TL;DR
- Secure Boot is mandatory for Valorant gameplay on Windows 11 systems
- Vanguard anti-cheat requires Secure Boot to prevent third-party cheating software
- BIOS configuration takes 5-10 minutes with proper step-by-step guidance
- TPM 2.0 activation is equally essential alongside Secure Boot
- Proper configuration prevents VAN 68 errors and ensures uninterrupted gaming
For competitive Valorant players operating on Windows platforms, understanding Secure Boot’s mandatory status is crucial for uninterrupted gameplay. Following Windows 11’s implementation, this security feature became non-negotiable, and bypassing it triggers immediate Vanguard anti-cheat interventions that can terminate your gaming session abruptly.
Microsoft engineered Secure Boot as a foundational security layer that prevents unauthorized code execution during system initialization. This protection mechanism verifies digital signatures of all boot-load components, effectively blocking malware and rootkits from compromising your system startup sequence. Maintaining this feature active provides continuous defense against sophisticated cyber threats.

Within Valorant’s ecosystem, Secure Boot functions as a critical trust verification component for Vanguard’s anti-cheat infrastructure. The system cross-references hardware security states to ensure players aren’t utilizing unauthorized third-party software that could create unfair advantages. Deactivating this feature typically generates specific error codes like VAN 68, which immediately blocks gameplay access.
Riot Games maintains an uncompromising position regarding Secure Boot activation for all Valorant participants. This policy stems from their fundamental commitment to competitive integrity, systematically eliminating potential cheating vectors that could undermine fair gameplay. The requirement represents a proactive security measure rather than an arbitrary restriction.
Configuring Secure Boot requires accessing your system’s UEFI/BIOS interface, which demands precise timing during system startup. The activation process typically completes within 5-10 minutes when following proper procedures.
- Initiate system restart and repeatedly press the designated BIOS access key during boot sequence. Common keys include F2, F10, Delete, or Escape, varying by manufacturer and displayed on initial boot screen.
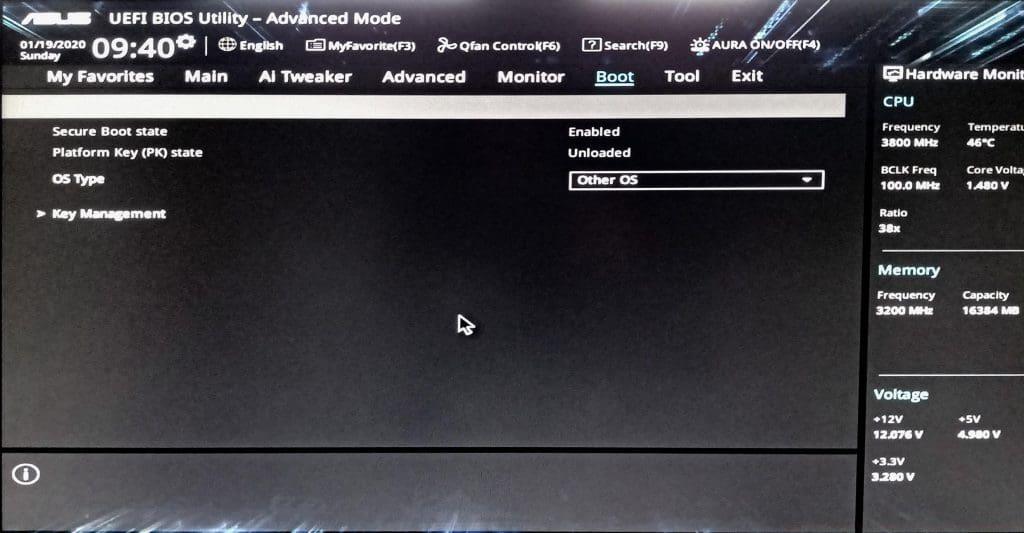
- Navigate to the Security or Boot section within BIOS/UEFI interface using keyboard directional keys.
- Locate the Secure Boot option and change its status from Disabled to Enabled. Some systems may require configuring Boot Mode to UEFI first.
- Save configuration changes using F10 key and confirm modification acceptance. System may require additional restart cycles to implement new security settings properly.
Many users encounter configuration obstacles from incorrect boot mode settings or legacy BIOS compatibility issues. Ensure your system operates in UEFI mode rather than Legacy/CSM, as Secure Boot functions exclusively within UEFI framework. Additionally, some motherboard manufacturers implement proprietary labeling for security features, requiring careful menu exploration.
For comprehensive system optimization, consult our BF6 Weapons Unlock Guide to understand how proper system configuration enhances overall gaming performance beyond basic security requirements.
Beyond Secure Boot activation, Trusted Platform Module (TPM) 2.0 represents another essential security requirement for Valorant operation. This cryptographic processor stores encryption keys and system integrity measurements, working synergistically with Secure Boot to create a comprehensive security framework.
Players frequently encounter VAN 68 errors despite Secure Boot activation, often stemming from incomplete configuration or conflicting software. Resolution typically involves verifying both Secure Boot and TPM 2.0 status through Windows Security dashboard, ensuring all hardware security features report proper functionality.
Advanced users should consider system compatibility verification before attempting Valorant gameplay. Modern hardware manufactured within the last five years generally supports these security features, while older systems may require firmware updates or hardware replacements. Checking motherboard manufacturer specifications provides definitive compatibility confirmation.
Understanding these security fundamentals extends beyond Valorant requirements. As explored in our Battlefield 6 Complete Guide, proper system configuration enhances performance across multiple gaming titles while maintaining security integrity.
Secure Boot’s implementation delivers dual benefits for Valorant enthusiasts: uninterrupted gameplay access and enhanced system security. Proper configuration not only prevents anti-cheat interventions but also fortifies your system against emerging security threats, creating a protected environment for competitive gaming. For specialized gameplay approaches, our BF6 Class Selection Guide demonstrates how system security enables advanced tactical flexibility.
Action Checklist
- Verify system compatibility for Secure Boot and TPM 2.0 support
- Access BIOS/UEFI using correct key during system restart
- Navigate to Security/Boot section and enable Secure Boot
- Confirm UEFI mode activation and save configuration changes
- Validate configuration through Windows Security center
No reproduction without permission:GameCDjnh » Can You Play Valorant Without Secure Boot? Complete guide to enabling Secure Boot for Valorant with troubleshooting tips and security benefits