Master Imola GP in F1 25 with optimal setup configurations and advanced racing techniques
Understanding Imola’s Technical Demands
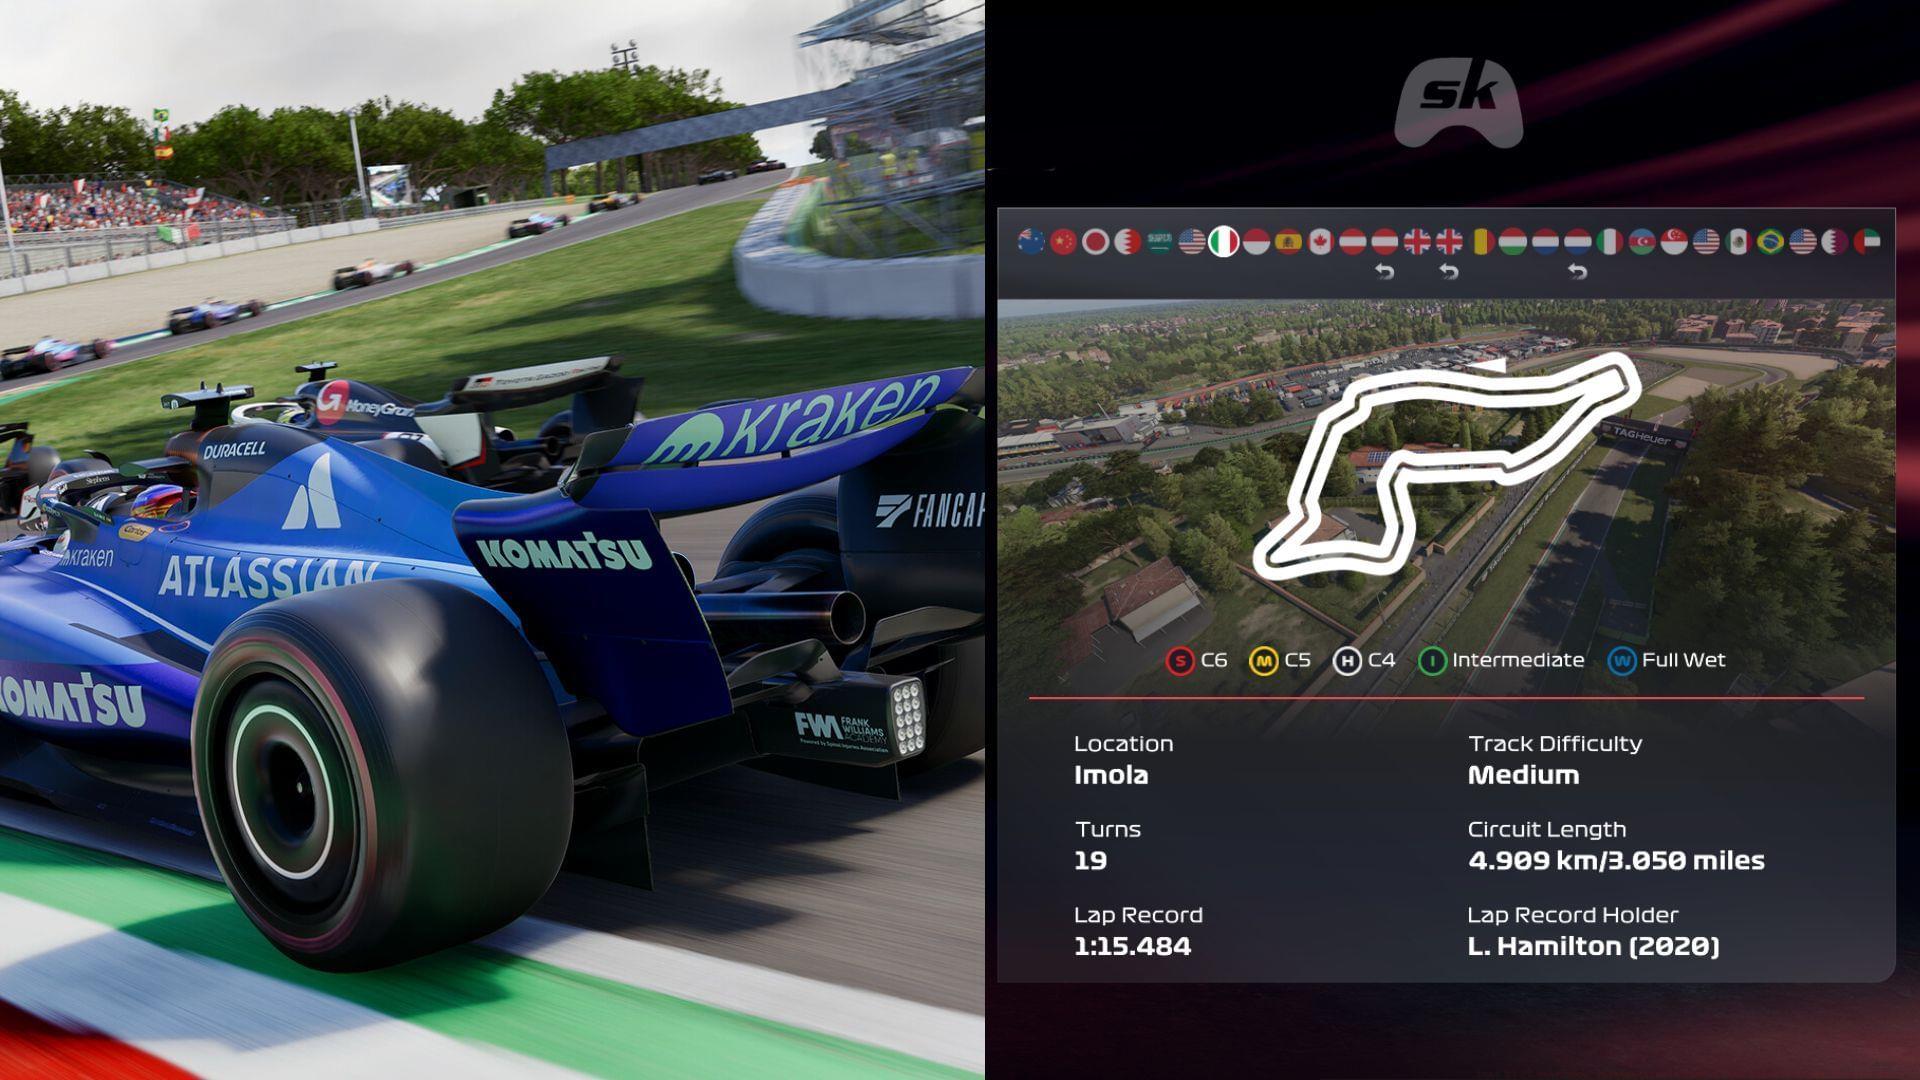
The Autodromo Internazionale Enzo e Dino Ferrari presents one of Formula 1’s most challenging circuits, demanding exceptional driver skill and precise car configuration. This historic Italian track combines narrow racing lines with minimal runoff areas, creating an environment where setup errors are immediately punished.
Imola’s flowing layout requires drivers to maintain consistent rhythm through sequences like the Acque Minerali complex, where maintaining momentum is crucial. The circuit’s technical nature means car balance takes precedence over outright speed, with stability under braking being particularly important for corner entry confidence.
Success at Imola hinges on achieving predictable front-end response while maintaining rear stability through the circuit’s elevation changes. The track surface evolution throughout a race weekend adds another layer of complexity, requiring adaptable driving styles and potentially setup adjustments between sessions.
Optimal Setup Configuration
Here’s the comprehensive Imola GP setup to maximize performance at the Autodromo Internazionale Enzo e Dino Ferrari in F1 25:
- Differential Adjustment On Throttle: 80%
- Differential Adjustment Off Throttle: 50%
- Front Anti-Roll Bar: 8
- Rear Anti-Roll Bar: 11
- Front Right Tyre Pressure: 22.5 psi
- Front Left Tyre Pressure: 22.5 psi
- Rear Right Tyre Pressure: 20.5 psi
- Rear Left Tyre Pressure: 20.5 psi
This configuration emphasizes front-end bite and braking stability, critical elements for navigating Imola’s demanding corner sequences. The aggressive differential setting provides exceptional traction out of slower corners like Tosa and Rivazza, while the balanced anti-roll bar combination ensures responsive direction changes without sacrificing stability.
The tyre pressure strategy focuses on maximizing mechanical grip while managing thermal degradation across longer stints. The front-to-rear pressure differential helps create understeer characteristics that most drivers prefer through Imola’s technical sections, particularly through the Variante Alta chicane where precise curb riding is essential.
Advanced players should consider adjusting front wing angles based on fuel loads – increasing downforce for heavier fuel conditions to maintain cornering stability, then reducing for qualifying and late-race scenarios when maximum straight-line speed becomes more valuable.
Advanced Driving Techniques
Mastering Imola requires specific driving techniques that leverage your car’s setup advantages. The circuit rewards drivers who can maintain rhythm and momentum through its flowing sections while maximizing exit speed from slower corners.
Approach Tamburello with confidence in your car’s front-end stability, using trail braking to rotate the car while maintaining minimum speed through the apex. The 80% on-throttle differential will provide immediate traction on exit, allowing earlier power application than more conservative setups.
Through Sector Two’s technical sequence, focus on smooth steering inputs and utilizing the full track width. The anti-roll bar balance provides the necessary compliance for aggressive curb riding at Variante Alta, but requires precise weight transfer management to avoid unsettling the car.
Braking zones demand particular attention – the setup’s front bias provides stability under heavy braking into Rivazza, but requires careful modulation to avoid locking fronts. Advanced drivers should practice brake bias adjustments throughout the race as tyre wear affects balance.
Overtaking opportunities are limited at Imola, making qualifying position crucial. The best passing zones remain at Tamburello (with DRS) and the approach to Tosa, where late braking and early traction can create opportunities.
Common Pitfalls and Solutions
Many drivers struggle with specific aspects of Imola that can be mitigated through setup understanding and technique adjustment. Recognizing these common issues early can save valuable lap time and prevent race-ending mistakes.
Overdriving the Front End: The setup’s front-biased nature can tempt drivers into over-slowing corners, costing exit speed. Focus on maintaining minimum corner speed rather than maximum entry speed to utilize the differential’s traction advantages.
Tyre Temperature Management: The lower pressure configuration helps, but aggressive curb riding can still overheat tyres. Be selective about which curbs to attack – prioritize exit curbs over entry curbs to maintain tyre life.
Brake Zone Confidence: If experiencing front locking under braking, consider reducing brake pressure by 1-2% rather than changing the fundamental setup. The stability advantages outweigh minor adjustment requirements.
Qualifying vs Race Balance: This setup works excellently for race conditions but may feel slightly understeery in qualifying trim. Consider a one-click rear wing reduction for qualifying if straight-line speed becomes limiting.
With proper technique and this optimized Imola GP configuration, you’ll achieve a car that feels connected and responsive through one of Formula 1’s most rewarding technical challenges.
Also Read: F1 25 review: A Formula One game that knows where it’s going
Explore additional F1 25 circuit guides below:
- Best F1 25 Shanghai International Circuit setup for the Chinese GP
- Best F1 25 Albert Park Circuit setup for the Australian GP
- Best F1 25 Lusail International Circuit Setup for the Qatar GP
- Best F1 25 Miami International Autodrome setup for the Miami GP
No reproduction without permission:GameCDjnh » Best F1 25 Autodromo Internazionale Enzo e Dino Ferrari setup for the Imola GP Master Imola GP in F1 25 with optimal setup configurations and advanced racing techniques