TL;DR
- Shinryu features four distinct combat phases requiring precise positioning and role execution
- Lightning-based attacks deal 40-50% more damage while Whirlpool requires constant distance management
- Healers must coordinate with tanks using Provoke and emergency Cure IV/V protocols
- Solo players should prioritize MP conservation and short-recast spells
- Team coordination and communication are essential for managing spawn mechanics
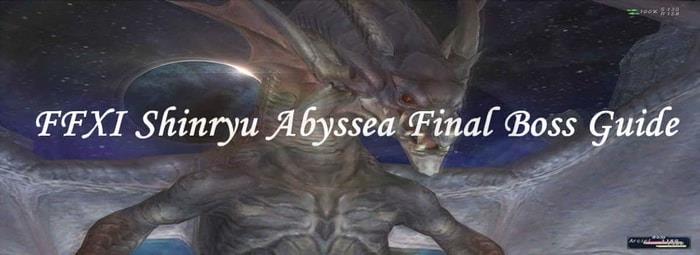
While Final Fantasy XI’s Abyssea content has been accessible for years, the formidable dragon king Shinryu continues to challenge even experienced adventurers. This comprehensive battle guide delivers the strategic insights needed to overcome one of Vana’diel’s most demanding encounters, transforming what seems impossible into an achievable victory.
Successful Shinryu attempts begin with meticulous party planning. Each member must understand their specific responsibilities—tanks focus on maintaining aggro, healers manage HP recovery and status removal, while damage dealers prioritize target elimination based on phase-specific priorities.
Critical preparation includes verifying all party members possess appropriate job-specific abilities. Tanks should have Provoke and Shield Bash ready, healers must prepare Cure IV/V and status removal spells, while damage dealers optimize their weapon skills and TP generation. Teams should establish clear communication protocols for phase transitions and emergency situations.
Phase 1: Initial Engagement
The opening phase establishes combat fundamentals. Position your tank directly facing Shinryu while damage dealers flank from the sides to avoid cleave attacks. Healers should maintain maximum casting range to minimize AoE exposure while keeping the main tank within healing distance.
Phase 2: Platform Management
Phase 2 introduces dynamic platform mechanics where only Shinryu and one additional platform remain active. Monitor both entities continuously to identify optimal switching opportunities. Execute platform transitions immediately when the add approaches Shinryu, then unleash maximum damage output during the brief vulnerability window.
Critical awareness: Shinryu’s Frost Breath delivers catastrophic single-target damage. Spread party members at least 10-15 yalms apart to minimize collateral damage from this ice-based attack that can instantly eliminate unprepared players.
Phase 3: Corner Strategy
The third phase eliminates platforms entirely, spawning additional enemies in all four corners. Position your party in the area with minimal enemy presence, typically the corner diagonally opposite Shinryu’s position.
Strategic positioning becomes paramount—immediately relocate to vacated spaces when nearby adds are eliminated, then systematically clear remaining threats before new spawns appear.
Phase 4: Final Assault
The concluding phase demands relentless offensive pressure while managing respawn mechanics. If defeated, return to combat within 10 seconds to reclaim your position before additional enemies materialize. Teams that maintain coordination through this intense final stretch typically achieve victory with minimal casualties.
Extended engagements against Shinryu inevitably strain healing resources. Implement these advanced support strategies to maintain party sustainability throughout the marathon encounter.
Tank threat management forms the foundation of survival. Utilize Provoke or Shield Bash to redirect enemy focus from overwhelmed healers to properly geared tanks. This fundamental aggro management separates successful attempts from failed ones.
Tactical Points (TP) represent crucial recovery resources. Deploy Second Wind strategically when TP reaches 1000+ to provide substantial area healing while conserving MP for critical moments.
Emergency protocols require pre-established role delegation. Designate secondary support players to temporarily assume healing duties, enabling primary healers to cast emergency Cure IV or V spells when multiple party members face imminent defeat.
Defensive buff management often determines survival margins. Consistently maintain Protect and Shellga effects, as their damage reduction proves indispensable against Shinryu’s relentless assault patterns.
Pro tip: Coordinate buff refreshes during phase transitions when attack frequency temporarily decreases, maximizing uptime during high-damage periods.
Solo adventurers face uniquely demanding circumstances requiring meticulous resource management and precise execution.
Mastering Shinryu’s ability rotation provides critical predictive advantage. Recognize visual cues like orange glow indicating imminent fire attacks, allowing proactive positioning adjustments.
Resource conservation demands strategic ability sequencing. Reserve ultimate abilities for the battle’s final third, ensuring sufficient mana crystals for activation while maintaining MP reserves through conservative attack patterns.
MP-free abilities offer sustainable damage options. Prioritize weapon skills and job abilities that generate TP rather than consume MP, creating sustainable damage cycles.
Status effect avoidance becomes survival-critical without backup healing. Position yourself to evade attacks causing paralysis, slow, or knockback effects, as recovering from these impairments solo proves exceptionally challenging.
Casting optimization favors spells with shorter recast timers. While exceptions exist for abilities like Paralyze where cast time becomes irrelevant once landed, generally prioritize rapid-cast spells for consistent damage application.
Gear selection dramatically influences solo viability. Equip stat-boosting equipment like INT gear for mages or STR gear for fighters, enhancing both damage output and survival capacity.
Despite his formidable reputation, Shinryu possesses exploitable weaknesses that skilled players can leverage for victory.
Elemental vulnerability represents your greatest advantage. Lightning-based spells and weapon skills inflict 40-50% increased damage, making them priority choices for damage-focused party members.
Add management requires immediate response protocols. Shinryu frequently summons reinforcements that must be eliminated within 15-20 seconds to prevent overwhelming spawn accumulation.
The Whirlpool technique demands constant positional awareness. This pulling maneuver drags players toward Shinryu while inflicting substantial damage. Maintain precise distance management—positioned just beyond his melee range but within effective casting distance for spells and abilities.
Health attrition becomes a war of endurance, particularly for solo attempts. Without party support, expect extended engagement durations of 8-12 minutes requiring consistent execution without error.
Reward acquisition follows successful completion. Visit NPCs in Abyssea settlements to acquire gear ranging from level 1 to 99, though repeated interactions may be necessary if initial attempts prove unsuccessful.
Action Checklist
- Establish clear role assignments with designated tanks, healers, and damage dealers
- Position party members 10-15 yalms apart during Phase 2 to mitigate Frost Breath damage
- Execute platform transitions immediately when adds approach Shinryu
- Prioritize lightning-based attacks and eliminate summoned adds within 20 seconds
- Maintain optimal positioning to avoid Whirlpool while staying within effective range
No reproduction without permission:GameCDjnh » FFXI Shinryu Abyssea Final Boss Guide Master the ultimate Abyssea challenge with expert strategies for Shinryu's complex battle phases