TL;DR
- Scholar masters both white and black magic with strategic weather manipulation and powerful DOT spells
- Ninja excels as shadow tank with high evasion but struggles against AOE magic damage
- Warrior offers versatile damage dealing and tanking with the game’s largest weapon selection
- Dancer provides frontline support through TP-based healing and debuff dances
- Red Mage’s versatility makes it ideal for solo play and multi-role party support
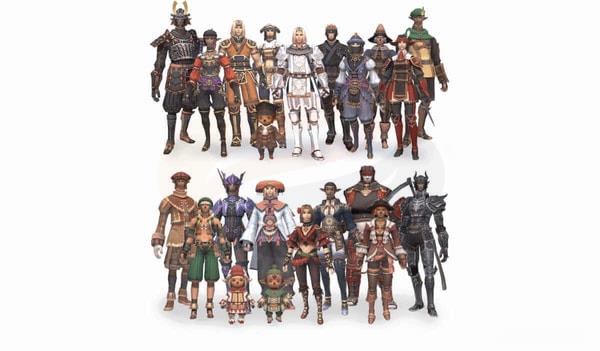
Your main job in Final Fantasy XI defines your character’s primary role and directly impacts how you gain or lose experience points. This comprehensive guide explores five of the most engaging jobs available, providing detailed analysis of their unique mechanics and strategic applications. Each job offers distinct playstyles that complement party dynamics in different scenarios.
New adventurers begin with access to only six starting jobs when they first arrive in Vana’diel. However, upon reaching level 30 with your initial job, you unlock access to the remaining 16 advanced jobs through specific questlines. Completing these job-specific missions grants you the ability to master additional combat roles and expand your strategic options significantly.

The Scholar represents magic mastery in its purest form, operating as a backline caster with exceptional proficiency in both white and black magic disciplines. While their magical potency surpasses that of Red Mages, this comes at the cost of reduced physical combat capabilities. Scholars utilize their Grimoire to access expanded spell libraries, making mastery of this tool essential for optimal performance.
What truly distinguishes Scholars is their unique weather manipulation abilities through storm spells, which can provide significant tactical advantages for themselves and their allies. Their exclusive Helix spells deliver powerful damage-over-time effects, with potency scaling based on current weather conditions and equipped elemental staves.
Tabula Rasa stands as the Scholar’s most remarkable SP ability, enabling the casting of Kaustra and Embrava spells. This ability effectively replicates the combined benefits of both Light Arts and Dark Arts simultaneously, though the individual arts remain necessary for activating specific Stratagems. Upon activation, all Stratagem charges are instantly replenished and can be used without consuming charges during its duration.
Advanced Scholar Strategies
Successful Scholars master the art of strategic stance dancing between Light Arts and Dark Arts based on encounter requirements. The Helix spells, when combined with Modus Veritas, deliver the game’s most potent DOT effects, while their elemental magic enables impressive solo skillchain execution without party assistance.
Job Abilities
- Level 1 – Tabula Rasa – Simultaneously optimizes both Black and White Magic while granting the combined advantages of Light Arts and Dark Arts simultaneously.
- Level 10 – Light Arts – Reduces White Magic MP costs and casting times by 10% while increasing Black Magic costs and times by 20%.
- Level 10 – Dark Arts – Decreases Black Magic MP consumption and cast duration by 10% while raising White Magic requirements by 20%.
- Level 35 – Sublimation – Gradually converts health points into magic points over time.
- Level 65 – Modus Veritas – Exclusively amplifies Helix Spells, boosting their damage output while cutting their duration in half.
- Level 75 Merit – Enlightenment – Permits the Scholar, regardless of current arts stance, to cast one spell from either Addendum: Black or Addendum: White as their subsequent magical action.
- Level 76 – Libra – Reveals comprehensive enemy statistics including elemental vulnerabilities and resistances.
Ninja’s unique tanking capabilities stem from their exceptional shadow generation mechanics rather than traditional defensive stats. In endgame content, NIN can effectively main tank through their ability to generate 6-7 shadows every 10 seconds, making it exceptionally difficult for enemies to penetrate their defenses before refresh opportunities arise.
The primary challenge for Ninjas emerges from area-of-effect spike damage scenarios. Both AOE spells and abilities that simultaneously remove shadows while dealing damage present significant threats. Since Ninja’s physical defense barely exceeds that of standard melee jobs, taking direct hits from such attacks proves particularly punishing.
Effective shadow management requires immediate recasting of your fastest available Utsusemi upon noticing health depletion. Advanced players develop muscle memory for their recast macros to ensure minimal downtime in shadow coverage.
Against spike damage situations, Ninjas must prioritize maximum durability through gear optimization. This involves stacking Magic Defense Bonus and Magic Evasion equipment while maintaining the 50% Damage Reduction Cap. The Malignance and Kendatsuba armor sets provide exceptional performance in these high-pressure scenarios.
Ninja Tanking Optimization
Ninja tanking effectiveness depends heavily on proper tool management and enmity control. Understanding the interplay between Yonin and Innin stances is crucial for managing threat levels and maintaining enemy focus while minimizing actual damage taken.
Job Abilities
- Level 1 – Mijin Gakure– Sacrifices your life force to inflict damage upon enemies. (Recast 1:00:00)
- Level 40 – Yonin – Reduces accuracy but significantly increases enmity generation and enhances ninja tool proficiency effects. (Recast 0:03:00, Duration 0:05:00)
- Level 40 – Innin – Decreases evasion capability while reducing enmity accumulation. (Recast 0:03:00, Duration 0:05:00)
- Level 75 – Sange – Boosts ranged attack accuracy by 25 points. (Recast 0:03:00, Duration 0:01:00)
- Level 77 – Futae – Consumes two ninja tools to empower your subsequent elemental ninjutsu with additional potency. (Recast 0:03:00, Duration 0:01:00)
- Level 95 – Issekigan – Enhances parrying probability and grants enmity bonuses for successful defensive maneuvers. (Recast 0:05:00, Duration 0:01:00)
- Level 96 Mikage – Provides variable bonuses to multiple main-hand weapon attacks depending on remaining Utsusemi shadow count. (Recast 1:00:00, Duration 0:00:45)
Warriors excel in two primary party roles: durable blood tank and high-output melee damage dealer. Their exceptional strength attributes combined with substantial health pools make them formidable in both capacities. The high frequency of double attacks combined with respectable base attack values enables Warriors to deliver consistently impressive damage numbers.
What makes Warrior particularly valuable is their remarkable adaptability, capable of seamlessly transitioning between damage-focused and tank-oriented roles as battle conditions demand. They boast access to the game’s most extensive weapon selection, though this versatility comes with certain limitations that require strategic management.
The Great Axe, while being Warrior’s signature weapon, suffers from comparatively lower weapon skill damage output. When measured against other dedicated damage-dealing jobs, Warriors typically demonstrate superior base weapon skill damage potential across most weapon categories.
Warrior’s most significant vulnerability lies in their limited magical defense capabilities. This weakness requires careful party composition consideration and strategic positioning during encounters with magic-using enemies.
Warrior Role Specialization
Advanced Warrior play involves mastering the timing of ability chains and understanding when to prioritize defensive versus offensive stances based on encounter mechanics.
Job Abilities
- Level 1 – Mighty strikes – Transforms all physical attacks into guaranteed critical strikes (Recast 1:00:00, Duration 0:00:45)
- Level 5 – Provoke – Forces enemy aggression toward you. (Recast 0:00:30)
- Level 15 – Berserk – Compromises defensive capabilities while substantially enhancing offensive power.(Recast 0:05:00, Duration 0:03:00)
- Level 25 – Defender – Diminishes attack potency while strengthening defensive resilience. (Recast0:03:00, Duration 0:03:00)
- Level 35 – Warcry – Amplifies attack power for all party members within range. (Recast 0:05:00, Duration 0:00:30)
- Level 45 – Aggressor – Improves accuracy ratings while negatively impacting evasion potential. (Recast 0:05:00, Duration 0:03:00)
- Level 60 – Retaliation – Enables counterattack functionality while reducing movement speed. (Recast 0:03:00, Duration 0:03:00)
- Level 75 – Warrior’s Charge – Doubles the damage of your next attack. (Recast 0:05:00, Duration 0:01:00)
- Level 77 – Restraint – Progressively increases weapon skill power with each successive normal attack landed. (Recast 0:10:00, Duration 0:05:00)
- Level 87 – Blood Rage – Enhances critical hit probability for all party members within the area of influence. (Recast 0:05:00, Duration 0:00:30)
- Level 96 – Brazen Rush – Increases the likelihood of executing consecutive double attacks. (Recast 1:00:00, Duration 0:00:30)
Dancer stands as one of FFXI’s most distinctive frontline DPS roles, offering exceptional utility through their unique dance-based ability system. While their feature set doesn’t quite match the extensive options available to Blue Mages, Dancers provide valuable capabilities that enhance any group composition they join.
The core mechanic distinguishing Dancers is their Waltz ability line, which provides healing and status removal through dance rather than traditional magic.
Dancers utilize TP instead of MP for their abilities, with Waltzes functioning similarly to conventional cure spells but tied to ability timers rather than spell recasts.
The finishing move system requires strategic planning, as Flourishes and other powerful dance steps become available only after accumulating sufficient finishing moves through successful Steps execution.
Dance Mechanics Mastery
Mastering Dancer involves understanding the intricate relationships between different dance types and their situational applications.
Job Abilities
- Level 1 – Trance – Eliminates TP costs for all Dances and Steps during its active period. (Recast 1:00:00, Duration 0:01:00)
- Level 5 – Sambas – These rhythmic dances provide unique enhancements to melee attack capabilities. (Recast 0:01:00, Duration – Varies)
- Level 15 – Waltzes – These healing dances restore health and remove detrimental conditions from targets. (Recast – Varies)
- Level 20 – Flourishes – Powerful dance maneuvers that become executable only after accumulating finishing moves. (Recast – Varies)
- Level 20 – Steps – These foundational dance movements generate finishing moves while applying debuffs to enemies. (Recast 0:00:05, Duration – Var.)
- Level 25 – Jigs – These self-enhancement dances improve your personal combat capabilities. (Recast, Duration – Varies)
- Level 40 – Flourishes II – Advanced dance techniques that require finishing move accumulation for activation. (Recast – Varies)
- Level 50 – Contradance – When active, significantly increases the amount of health restored by your next waltz. (Recast 0:05:00, Duration 0:01:00 )
- Level 75 – Fan Dance – Gradually reduces physical damage mitigation with each successful hit received. (Recast 0:03:00, Duration 0:05:00)
- Level 75 – Saber Dance – Enhances double attack frequency but disables waltz usage during effect duration. (Recast 0:03:00, Duration 0:05:00)
- Level 75 – No Foot Rise – Instantly grants additional finishing moves. (Recast 0:03:00)
- Level 77 – Presto – Provides an extra finishing move and strengthens the effect of your subsequent step. (Recast 0:00:15, Duration 0:00:30)
- Level 80 – Flourishes III – Elite dance maneuvers that require finishing move accumulation for execution. (Recast – Varies)
- Level 96 – Grand Pas– Allows Flourish execution without requiring finishing moves. (Recast 1:00:00, Duration 0:00:30)
Red Mage maintains its status as one of Final Fantasy’s most beloved hybrid classes, continuing this tradition within Vana’diel’s rich gameplay ecosystem. Wielding swords as their primary weapons, Red Mages combine martial prowess with both light and dark magical disciplines, enchanting their blades for enhanced combat effectiveness.
What makes Red Mage truly exceptional is their unparalleled versatility, capable of healing, dealing physical and magical damage, providing party support, and even tanking when circumstances demand.
When encounters demand repeated application of spells like Blind or Silence, Red Mages emerge as the preferred choice due to their specialization in enfeebling magic techniques.
Red Mage’s combat methodology represents one of the game’s most engaging playstyles. They can engage formidable enemies that would typically overwhelm other jobs, progressively diminishing monster combat capabilities while delivering powerful magical strikes.
The ability to transition between frontline combat and backline support makes Red Mages exceptionally resilient to player burnout. Their adaptability positions them as ideal choices for players planning extensive solo adventures throughout Vana’diel.
Red Mage Strategic Applications
Red Mages excel in situations requiring tactical flexibility and the capacity to adapt to rapidly changing combat conditions.
Job Abilities
- Level 1 – Chainspell – Enables dramatically accelerated spellcasting capabilities. (Recast 1:00:00, Duration 0:01:00)
- Level 40 – Convert – Exchanges current health points for magic points. (Recast 0:10:00)
- Level 50 – Composure – Extends spell recast durations while improving magical accuracy. (Recast 0:05:00, Duration 2:00:00)
- Level 83 – Saboteur – Enhances the potency and duration of your next enfeebling magic spell. (Recast 0:03:00, Duration 0:01:00)
- Level 95 – Spontaneity – Reduces the casting time required for the target’s subsequent magical spell. (Recast 0:10:00, Duration 0:01:00)
- Level 96 – Stymie – Substantially improves the hit probability of your upcoming enfeebling magic. (Recast 1:00:00, Duration 0:01:00)
Action Checklist
- Analyze party composition needs before selecting your main job role
- Master Scholar’s stance dancing between Light and Dark Arts for optimal spell efficiency
- Practice Ninja shadow management with immediate recast macros
- Optimize Warrior ability chains for maximum damage or tanking effectiveness
- Develop Dancer dance rotations based on encounter requirements and finishing move availability
- Create Red Mage role-switching strategies for different combat scenarios
No reproduction without permission:GameCDjnh » 5 Most Fun and Exciting Jobs in FFXI Master FFXI's most engaging jobs with expert strategies, ability breakdowns, and optimization tips