TL;DR
- Utilize Sire of Shards for screen-wide clear and Annihilating Light for boss encounters
- Stack maximum chain sources to multiply damage through Inevitability Jewel mechanics
- Master weapon swapping to overcome single-target limitations of circular projectile patterns
- Optimize gem levels and helmet enchantments for maximum chain count and damage scaling
- Balance clear speed with boss damage through proper skill and gear management
Welcome to this Path of Exile build spotlight featuring the explosive Rolling Magma Deadeye Build. Inspired by Mathil‘s innovative approach, this Deadeye character harnesses Sire of Shards to unleash Rolling Magma projectiles, accumulating extensive chain reactions complemented by satisfying Herald of Ash detonations to generate a mesmerizing display of carnage across your screen.
This build exemplifies how creative gear combinations can transform a seemingly straightforward spell into a devastating clearing machine. The core concept revolves around maximizing chain mechanics to achieve exponential damage growth while maintaining flexibility for challenging encounters.
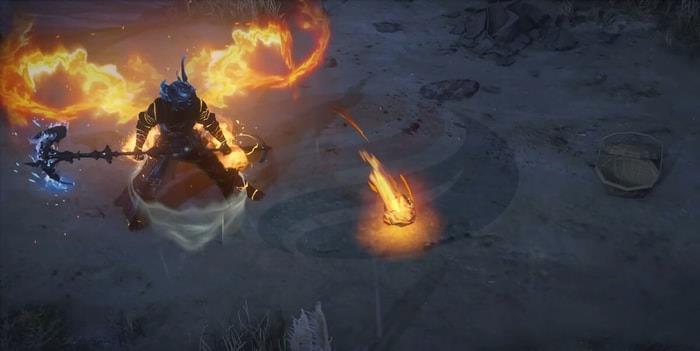
Rolling Magma functions as a fire spell that launches explosive orbs resembling fiery basketballs. Each impact triggers a detonation while continuing to bounce, with the number of bounces determined by your total chain count. We’ll explore the mechanics behind this interaction in greater detail shortly. The objective is to saturate your display with these projectiles until visual overload occurs. The optimal method for achieving this involves utilizing the Sire of Shards Unique Staff.
This legendary weapon provides additional projectiles and discharges them in a circular formation around your character. The crucial consideration is that this projectile distribution performs poorly against solitary targets, typically striking everything except your intended focus. Consequently, when facing resilient enemies, you’ll retrieve your reliable Annihilating Light from your inventory. This secondary staff triples elemental skill damage and enables employing a distinct gem setup for concentrated boss elimination. Through this dual-weapon approach, you can efficiently dispatch bosses while clearing entire screens with comparative simplicity, assuming you’re comfortable with occasional additional input commands.
Pro Tip: The weapon swap technique requires practice to master efficiently. Begin by practicing against map bosses before attempting major encounters like pinnacle bosses. Proper timing ensures you maintain damage uptime while avoiding unnecessary vulnerability windows during gear changes.
Let’s examine the underlying principles that establish Rolling Magma as a superior selection. The Inevitability Unique Jewel diminishes Rolling Magma damage by 50% but restores it by 40% per chain occurrence. Mathil emphasizes that to justify utilizing this Jewel, you must acquire every available chain source—one from the gem itself when elevated beyond level 20, another from the Deadeye Ascendancy passive tree, and an additional from the appropriate helmet enchantment. With these investments, you obtain substantial supplementary damage and area of effect enhancements from the Jewel.
Mechanics Deep Dive: The damage calculation follows a multiplicative pattern. Starting with 50% reduced damage, each chain applies a 40% more multiplier. With three chains (gem, ascendancy, enchantment), your damage becomes: 0.5 × 1.4 × 1.4 × 1.4 = 1.372, resulting in 37.2% more damage than the base value. Additional chains from other sources can further amplify this effect exponentially.
The chain mechanics also provide hidden defensive benefits by allowing you to attack from safer positions. Since projectiles chain between enemies, you can position yourself at the edge of combat while still effectively damaging entire packs.
Optimization Strategies: For advanced players seeking to maximize performance, consider these techniques: First, use Frostblink for positioning to ensure optimal projectile spread patterns. Second, integrate Arcane Surge through your movement skill to maintain consistent damage amplification. Third, utilize Hydrosphere to augment single-target damage by providing additional chain targets for your projectiles.
Common Mistakes to Avoid: Many players underestimate the importance of gem quality and level progression. Ensure your Rolling Magma gem reaches level 21 for the additional chain, and prioritize quality for increased projectile speed which indirectly improves clear speed.
Time Investment Estimates: Mastering the weapon swap technique typically requires 2-3 hours of practice. Optimizing your gear for maximum chains may take 5-10 hours of targeted farming or trading. The entire build comes online around level 68 when you can equip both key unique items.
|
DID YOU KNOW? acquire orbs to enhance your build capabilities |

Action Checklist
- Acquire Sire of Shards and Annihilating Light staffs for weapon swapping
- Level Rolling Magma gem to 20+ and obtain helmet chain enchantment
- Practice weapon swapping against map bosses until comfortable with timing
- Configure separate gem setups for clearing (Sire) and bossing (Annihilating Light)
- Optimize chain count through ascendancy, gem levels, and enchantments
No reproduction without permission:GameCDjnh » PoE Builds 3.19: Rolling Magma Deadeye Build Master the Rolling Magma Deadeye build with weapon swapping strategies and chain mechanics optimization