Master the three-phase Everdark Balancers boss fight with advanced strategies, gear recommendations, and phase-specific tactics
Understanding the Everdark Balancers Challenge
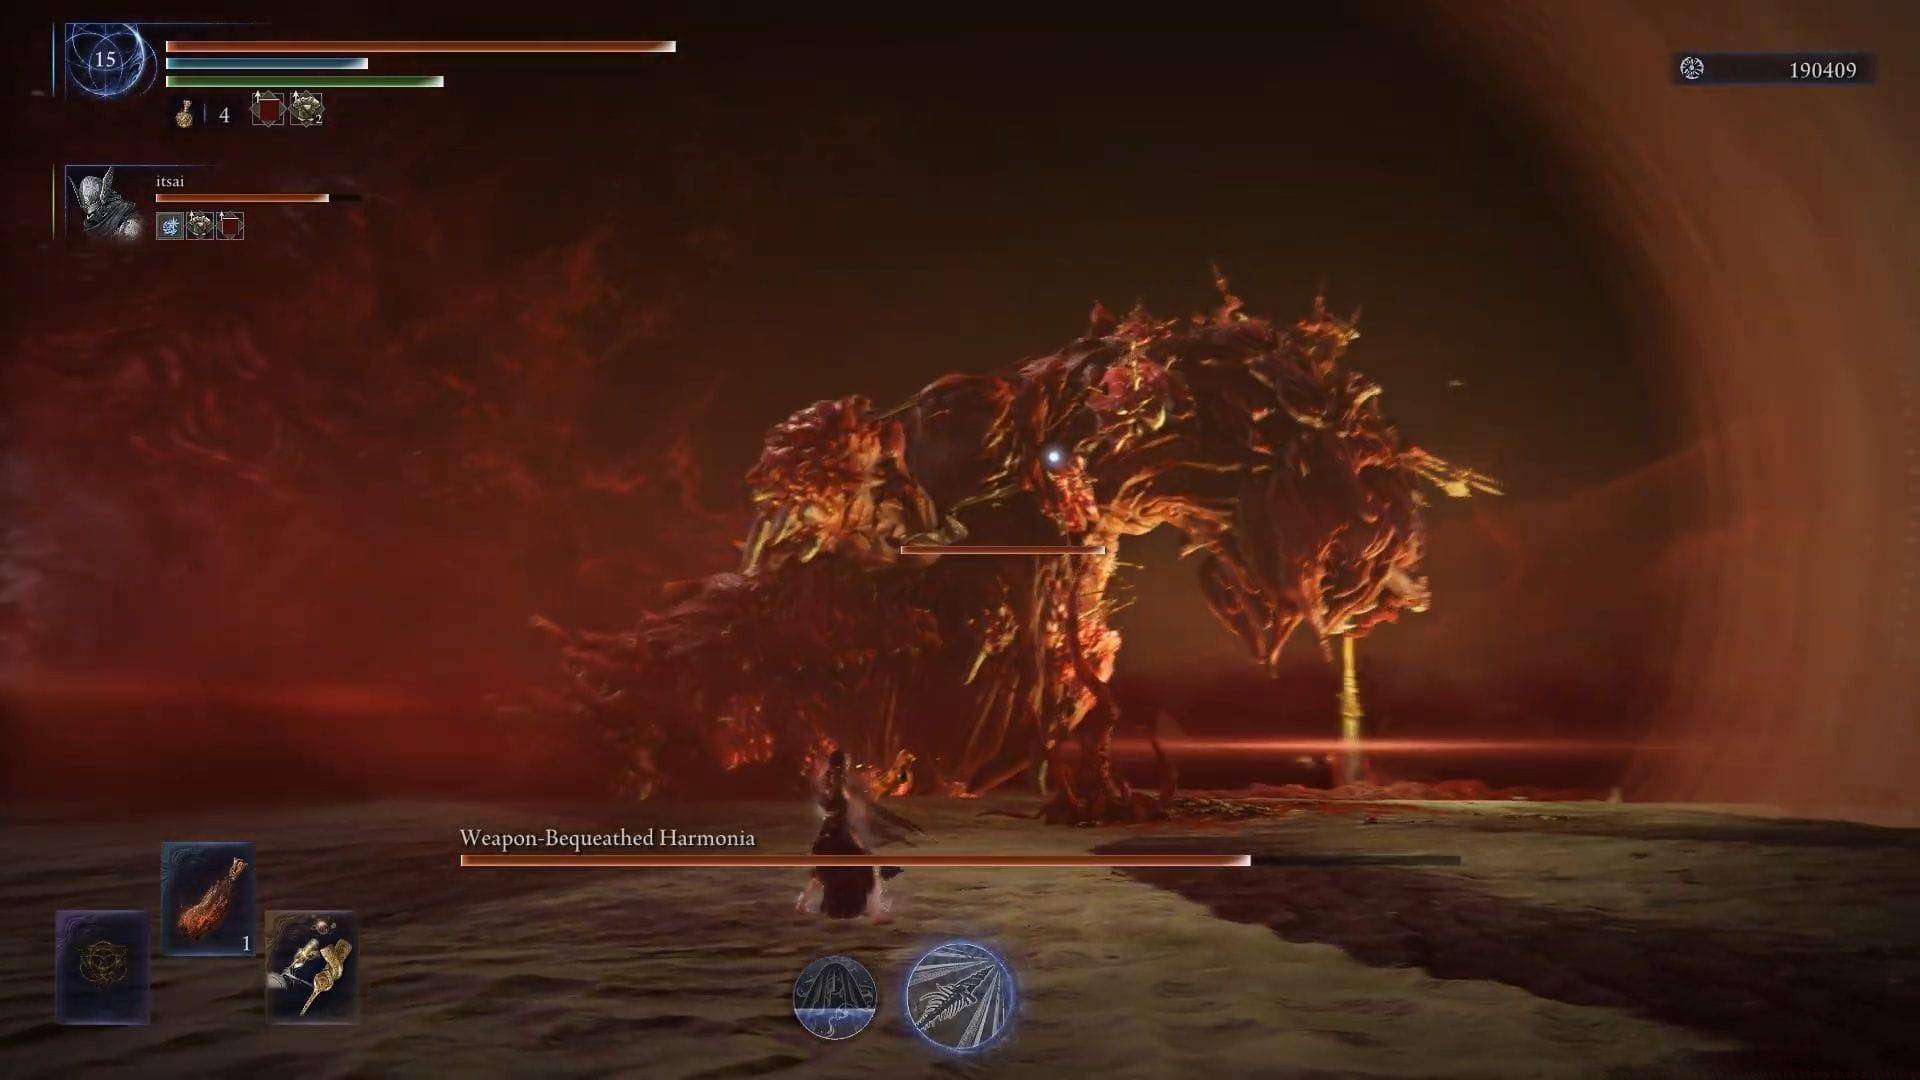
The Everdark Balancers represent one of Elden Ring Nightreign’s most demanding encounters, serving as the climactic battle in the Weapon Bequeathed Harmonia expedition introduced with version 1.03.1. This boss sequence demands exceptional situational awareness and adaptive combat strategies across three progressively difficult phases.
Proper preparation significantly impacts your success rate against these foes. Unlike standard boss encounters, the Everdark Balancers test your ability to manage multiple threat types simultaneously while conserving resources for the extended battle duration. Understanding the phase transition mechanics early prevents being caught off-guard by sudden difficulty spikes.
Many players underestimate the importance of positioning and environmental awareness in this fight. The arena itself becomes an active participant in the encounter, with ground-based attacks and area denial mechanics that punish static positioning. Learning to read these environmental cues separates successful strategies from repeated failures.
Phase 1: Initial Encounter Tactics
The opening phase mirrors standard Balancer encounters but with heightened aggression and coordination between enemies. Your primary objective involves systematically reducing the enemy count without being surrounded or cornered.
Separation Strategy: Bait individual Balancers using thrown items or careful positioning at the arena’s perimeter. Enemies have different aggression thresholds – striking one from distance often pulls it alone while others maintain positions. Create distance between yourself and the group before engaging isolated targets.
Attack Recognition: Ground rings signal the impending Circle of Purification attack. These magical formations appear briefly before spears erupt vertically. The telegraph provides approximately two seconds to reposition – use this time to move laterally rather than backward, as the attack covers substantial area.
Common Mistakes: Attempting to burst down multiple Balancers simultaneously typically results in being overwhelmed. Their coordinated attacks create overlapping damage zones that exceed most players’ evasion capabilities. Similarly, remaining in the arena center makes you vulnerable to encirclement with limited escape routes.
Phase 2: Enhanced Enemy Resurrection
Upon clearing the initial phase, defeated Balancers resurrect in corrupted forms with augmented speed and damage output. This resurrection mechanic catches many players unprepared, as the revived enemies possess completely different behavior patterns.
Audio Cue Utilization: High-frequency shrieks always precede charging thrust attacks. These auditory signals provide critical advance warning since the visual telegraph occurs too quickly to react to consistently. Develop the reflex to dodge immediately upon hearing these sounds, preferably diagonally toward the attacker’s flank.
Positioning Advantages: Dodge rolling through enemy combos positions you optimally for counterattacks. The Balancers’ multiple-slash combinations leave brief recovery windows where they cannot immediately turn to face new threats. Striking from behind during these moments maximizes damage while minimizing retaliation risk.
Aggression Management: Despite their enhanced capabilities, the resurrected Balancers still suffer from poor group coordination. Luring them apart remains essential, though their increased movement speed requires more precise positioning and quicker execution of separation tactics.
Phase 3: Leviathan Showdown
The battle’s climax introduces a massive leviathan that dominates the battlefield with area-denial attacks and devastating area-of-effect abilities. This phase tests your endurance and spatial management under constant pressure.
Distance Control: The leviathan’s ground dive creates expanding shockwaves that radiate outward. Maintaining medium distance provides optimal reaction time – too close limits evasion options, while excessive distance encourages more dangerous spear attacks. Time your dodges to coincide with the shockwave’s arrival at your position rather than the initial impact.
AOE Avoidance: Spear rain attacks initially target your current position, then sequentially strike adjacent areas. The safe zone paradoxically becomes the initial impact point once the pattern establishes itself. This counterintuitive positioning requires precise timing but effectively neutralizes the attack.
Status Effect Prevention: The leviathan’s flower bloom attack inflicts rapid Blood Loss buildup. Equipping talismans like the Mottled Necklace or consuming Blood Loss prevention items before this phase dramatically increases survival chances. During the bloom, prioritize absolute distance over tactical positioning.
Following the flower attack, Phase 2 Balancers resurrect temporarily. This repetition tests your resource management – conserve healing and offensive capabilities during the leviathan phase to handle this familiar threat efficiently.
Advanced Combat Optimization
Beyond basic tactics, several optimization strategies significantly improve your performance against the Everdark Balancers. These advanced considerations separate competent players from masters of this challenging encounter.
Gear Selection: Weapons with sweeping attacks excel against grouped enemies in Phase 1, while precision weapons with high critical damage perform better against resurrected Balancers. Consider carrying multiple weapon types to switch between phases. Armor with high poise prevents interruption during healing animations, while light armor improves evasion effectiveness.
Stat Allocation: Prioritize Vigor to survive combination attacks, with secondary investment in your primary damage stat. Endurance determines how many consecutive evasions you can perform – crucial during the leviathan’s rapid assault sequences. Mind investment benefits spellcasters but provides limited value for pure melee builds.
Consumable Usage: Damage-over-time items like poison knives effectively whittle down Balancer health while you focus on evasion. Defensive buffs like Dragoncrest Shield Talisman significantly reduce incoming damage during unavoidable attack sequences. Always enter Phase 3 with full healing resources and offensive consumables ready.
No reproduction without permission:GameCDjnh » How to defeat Everdark Balancers in Elden Ring Nightreign Master the three-phase Everdark Balancers boss fight with advanced strategies, gear recommendations, and phase-specific tactics