TL;DR
- Budget-friendly build scaling from 35 to 260 Exalted Orbs for different map tiers
- Exceptional clear speed (10/10) with strong single-target damage (9/10)
- Critical strike-focused Warstaff with 400-500+ Physical DPS requirement
- Spirit-based defense system utilizing Evasion and Energy Shield synergy
- Progressive leveling strategy with specific skill transitions per act
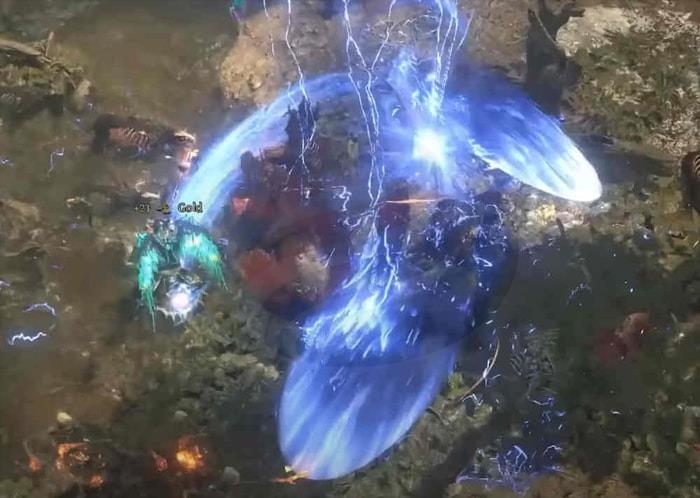
Greetings, fellow Exiles! Today we’re diving deep into one of Path of Exile 2’s most exhilarating builds – the Invoker Flicker Strike specialist. This comprehensive guide covers every aspect from equipment optimization to leveling progression, ensuring you master this high-mobility combat style. The build strategically combines Equipment, Skill Gems, Jewels, Passive Tree, Ascendancy choices, and Leveling strategies to create a devastatingly effective character.
Budget Breakdown
Entry Level (Low-Tier Maps): Approximately 35 Exalted Orbs provides solid foundation for early endgame content.
Mid-Range Progression: Around 80 Exalted Orbs significantly enhances performance and survivability.
High-End Optimization: 260 Exalted Orbs transforms the build into an elite mapping machine capable of handling the most challenging content.
Performance Assessment
Clear Speed: 10/10 – The Flicker Strike mechanic provides unparalleled map clearing efficiency.
Single Target Damage: 9/10 – Excellent boss-killing potential when properly executed.
Survivability: 9/10 – Strong defensive layers through Evasion, Energy Shield, and strategic positioning.
Essential Item Modifiers
Understanding which modifiers to prioritize is crucial for maximizing your build’s potential. Focus on Physical Damage for your weapon, while armor pieces should emphasize Evasion and Energy Shield combinations. Life and Elemental Resistances form your defensive backbone, with Critical Chance and Attack Speed driving your offensive output.
Weapon Selection Strategy
Budget Warstaff Option: Morbid Goad Expert Slicing Quarterstaff – Target at least 400 Physical DPS with supplemental Critical Strike Chance modifiers. This provides the foundation for consistent damage output while maintaining budget consciousness.
Premium Warstaff Upgrade: When resources permit, upgrade to a weapon boasting 500+ Physical DPS and 13% Base Critical Chance for significant power spike.
Armor Optimization
Body Armor Priority: Bramble Suit Expert Studded Vest – Seek minimum 1575 Evasion rating combined with 100+ Life and comprehensive Elemental Resistances. Note that 1575 Evasion specifically generates 105 Spirit through the “Lead me Through Grace” ascendancy passive.
Helmet Selection: Dusk Peak Expert Feathered Tiara (budget) provides 250 Energy Shield, 100 Life, and Resistances. The premium Vengeance Visage Advanced Feathered Tiara offers 350 Energy Shield, Critical Chance, and enhanced defensive stats.
Accessory Configuration
Gloves Specification: Target Rare Gloves with 100+ Life, balanced Evasion and Energy Shield, Attack Speed, and comprehensive Resistance coverage.
Footwear Requirements: Blood League Advanced Frayed Shoes should provide 100 Life, Evasion/Energy Shield hybrid, mandatory 30% Movement Speed, and Elemental Resistance stacking.
Ring Selection: Dragon Hold Prismatic Ring focuses on Life Leech with 80+ Life, while Rune Whorl Topaz Ring emphasizes Mana Leech functionality.
Amulet and Belt: Morbid Beads Lunar Amulet requires Intelligence, Dexterity, Life, and Resistances. Maelström Lock Double Belt prioritizes maximum Life (100+) and extensive Elemental Resistance stacking.
Flask Management System
Life Flask: Bubbling Ultimate Life Flask of the Mixologist with Instant Recovery and Reduced Charges Used properties.
Mana Flask: Opaque Ultimate Mana Flask of The Distiller featuring Increased Recovery and Reduced Charges Used modifiers.
Charm Selection
Analyst’s Thawing Charm of the Mixologist provides Increased Duration with Reduced Charges Used. Analyst’s Antidote Charm of the Apprentice offers similar duration and charge benefits for poison removal.
Primary Damage Skills
Ice Strike Configuration: Martial Tempo + Primal Armament + Rage + Inspiration + Super Critical creates your main clearing and single-target combination.
Flicker Strike Setup: Perpetual Charge + Close Combat + Heft + Rageforged enables the signature teleportation combat style this build is famous for.
Support Skill Integration
Charged Staff: Persistence + Lightning Exposure + Innervate + Rising Tempest provides crucial buff management and damage amplification.
Tempest Bell: Concentrated Effect + Heavy Swing + Cold Exposure + Ice Bite enhances area control and supplemental damage.
Utility Ability Selection
Charge Infusion: Precision + Cannibalism optimizes charge generation and consumption mechanics.
Wind Danger: Pin + Lockdown grants substantial Evasion bonuses while providing crowd control capabilities.
Combat Frenzy: Profusion enables consistent frenzy charge maintenance for sustained damage output.
Aura and Herald Management
Herald of Thunder: Blind + Maim + Electrocute delivers both offensive and defensive utility through multiple damage types and debuff applications.
Herald of Ice: Magnified Field + Shock Siphon + Cold Mastery provides clear speed enhancement through chain reaction explosions.
Optimal Modifier Selection
When selecting jewels for your Invoker Flicker Strike build, prioritize modifiers that complement your primary damage sources and defensive requirements. Physical Damage and Critical Chance remain top priorities, while Cold Damage and Elemental Damage provide supplemental scaling. Attack Speed jewels significantly improve your damage per second output, and Rage on Hit modifiers enhance your sustained combat capabilities.
Advanced Jewel Strategy: Consider jewel placement in sockets that can benefit from multiple notables or keystones, maximizing the value of each socket allocation.
For the complete passive tree visualization and detailed pathing, refer to the dedicated passive tree URL provided in our Class Guide for similar optimization principles. The tree emphasizes critical strike chance, physical damage conversion, and efficient pathing to key nodes that enhance both offense and defense.
Key Passive Nodes: Focus on obtaining the Resonance node early to enable the Frenzy to Power Charge conversion essential for Combat Frenzy functionality.
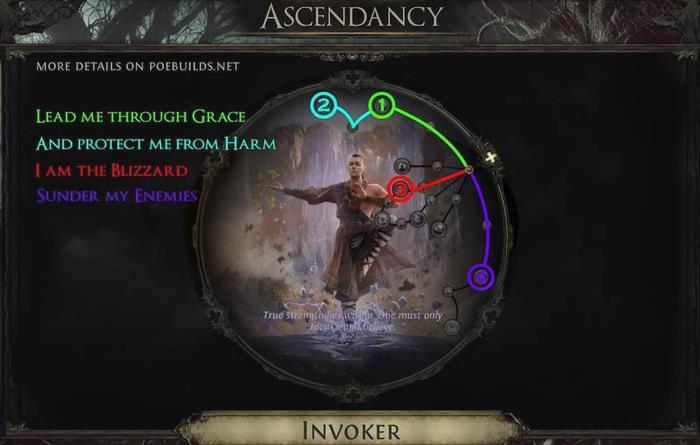
The Invoker ascendancy specialization provides the cornerstone of this build’s functionality through the “Lead me Through Grace” node, which converts Evasion rating into Spirit generation. This mechanic enables sustained ability usage throughout extended combat encounters.
Spirit Management: Understanding how your Evasion rating directly impacts your Spirit pool is crucial for optimal performance. The ascendancy tree focuses on maximizing this conversion while providing additional benefits to your core skills.
Act 1 Foundation Building
Begin your journey with Falling Thunder and Glacial Cascade as your primary skills. Once reaching level 5 and gaining access to higher tier skill gems, immediately transition to Ice Strike and Tempest Bell – this marks your first major power spike. Against rare or unique enemies, strategic Bell placement dramatically increases your damage output. Remember that Tempest Bell requires 4 Combo counts for activation, achieved by landing four consecutive Ice Strike hits before deployment.
Act 1 Skill Rotation: Falling Thunder – Lightning Infusion | Glacial Cascade – Cold Infusion – Ice Bite | Ice Strike – Martial Tempo – Rage | Tempest Bell – Concentrated Effect
Acts 2-3 Progression
Transition away from Falling Thunder and Glacial Cascade, activating Herald of Ice for enhanced clear speed. Before completing Act 2, secure Charged Staff and Combat Frenzy abilities. Combat Frenzy generates Power charges, while Charged Staff consumes these charges to provide substantial damage amplification.
Critical Mid-Game Acquisition: Combat Frenzy is located on the Ranger Tab of Spirit Skills. Immediately upon obtaining Combat Frenzy, allocate the Resonance passive node to enable Frenzy Charge conversion to Power Charges.
Acts 2-3 Skill Setup: Ice Strike – Martial Tempo – Crescendo – Primal Armament | Tempest Bell – Concentrated Effect – Ice Bite – Rage | Charged Staff – Persistence – Innervate – Rising Tempest | Combat Frenzy – Profusion
Cruel Difficulty Transition
Upon reaching Cruel difficulty, you’ll gain access to all skills and begin finding level 3 support gems, allowing you to fully customize your build as detailed in the Skill Gem section. Your Spirit requirements for maintaining all buffs will be fully satisfied through the “Lead me Through Grace” ascendancy node.
Leveling Gear Recommendations
Goldrim Felt Cap
This exceptional leveling helmet provides up to 35% all elemental resistances, dramatically easing early game survival challenges.
Wanderlust Wrapped Sandals
These unique boots significantly accelerate leveling progression through their 20% increased movement speed modifier at low level requirements.
Weapon Progression Path:
Corpse Spell Long Quarterstaff offers approximately 50 DPS around level 10.
Loaf Bane Crescent Quarterstaff becomes available in Act 2 with around 150 DPS capability.
Eagle Beam Steelpoint Quarterstaff at level 30 provides 200+ DPS with Critical Strike Chance for smooth progression into endgame content.
This concludes our comprehensive guide to Daniel’s powerful Invoker Flicker Strike build for Path of Exile 2. For additional gaming strategies and build optimizations, explore our extensive library of guides including our comprehensive Complete Guide to other gaming systems and our detailed Weapons Unlock guides for comprehensive gaming knowledge.
Advanced Optimization: Once you’ve mastered the core build mechanics, consider experimenting with alternative support gem combinations and jewel modifications to further tailor the playstyle to your preferences.
Action Checklist
- Acquire budget Warstaff with 400+ Physical DPS and Critical Strike Chance
- Transition to Ice Strike and Tempest Bell at level 5
- Activate Herald of Ice and obtain Combat Frenzy before Act 2 completion
- Allocate Resonance passive node immediately after getting Combat Frenzy
- Upgrade to premium Warstaff with 500+ Physical DPS and 13% Critical Chance
- Optimize jewel sockets with Physical Damage, Critical Chance, and Attack Speed modifiers
No reproduction without permission:GameCDjnh » PoE 2 Builds: Invoker Flicker Striker Build Master Path of Exile 2's Invoker Flicker Strike with expert gear selection and leveling strategies