Master the Shrine Vault puzzle in Silent Hill F Chapter 1 with detailed strategies for symbol hunting and enemy management
Understanding the Shrine Vault Challenge
The Shrine Vault puzzle in Silent Hill F represents your first substantial obstacle during Chapter 1, testing both puzzle-solving aptitude and survival skills simultaneously. Success demands locating scattered symbol pieces, interpreting mysterious clues, and continuously defending against a persistent supernatural threat. Your reward for overcoming this multifaceted challenge is a crucial key item that advances the narrative.
This ceremonial doll serves as more than atmospheric decoration—it actively provides the initial puzzle clues through interaction. Immediately upon examination, an aggressive entity materializes to confront you. After neutralizing this threat, access your inventory journal to proceed with the puzzle mechanics. Crucially, this adversary possesses regeneration capabilities, repeatedly returning to harass you, making speed and efficiency vital components of your strategy.
Achieving flawless completion without sustaining any injury additionally unlocks a special trophy/achievement within Silent Hill F’s Chapter 1 progression system, providing extra incentive for careful execution.
Also read: How to solve the Shrine Path Altar puzzle in Silent Hill F (Chapter 1)
Symbol Hunting Strategy
Examining the ritual doll reveals an enigmatic poetic message containing three essential concepts: Lightning, Decayed Tree, and Kudzu—the fundamental elements required to progress. However, before implementing these clues, you must first address the immediate hostile presence that manifests.
The procedural generation system randomizes symbol placements across numerous potential locations, ensuring each playthrough presents unique spatial challenges. Fortunately, the game’s mapping functionality automatically records investigated areas, significantly reducing potential frustration from repetition.
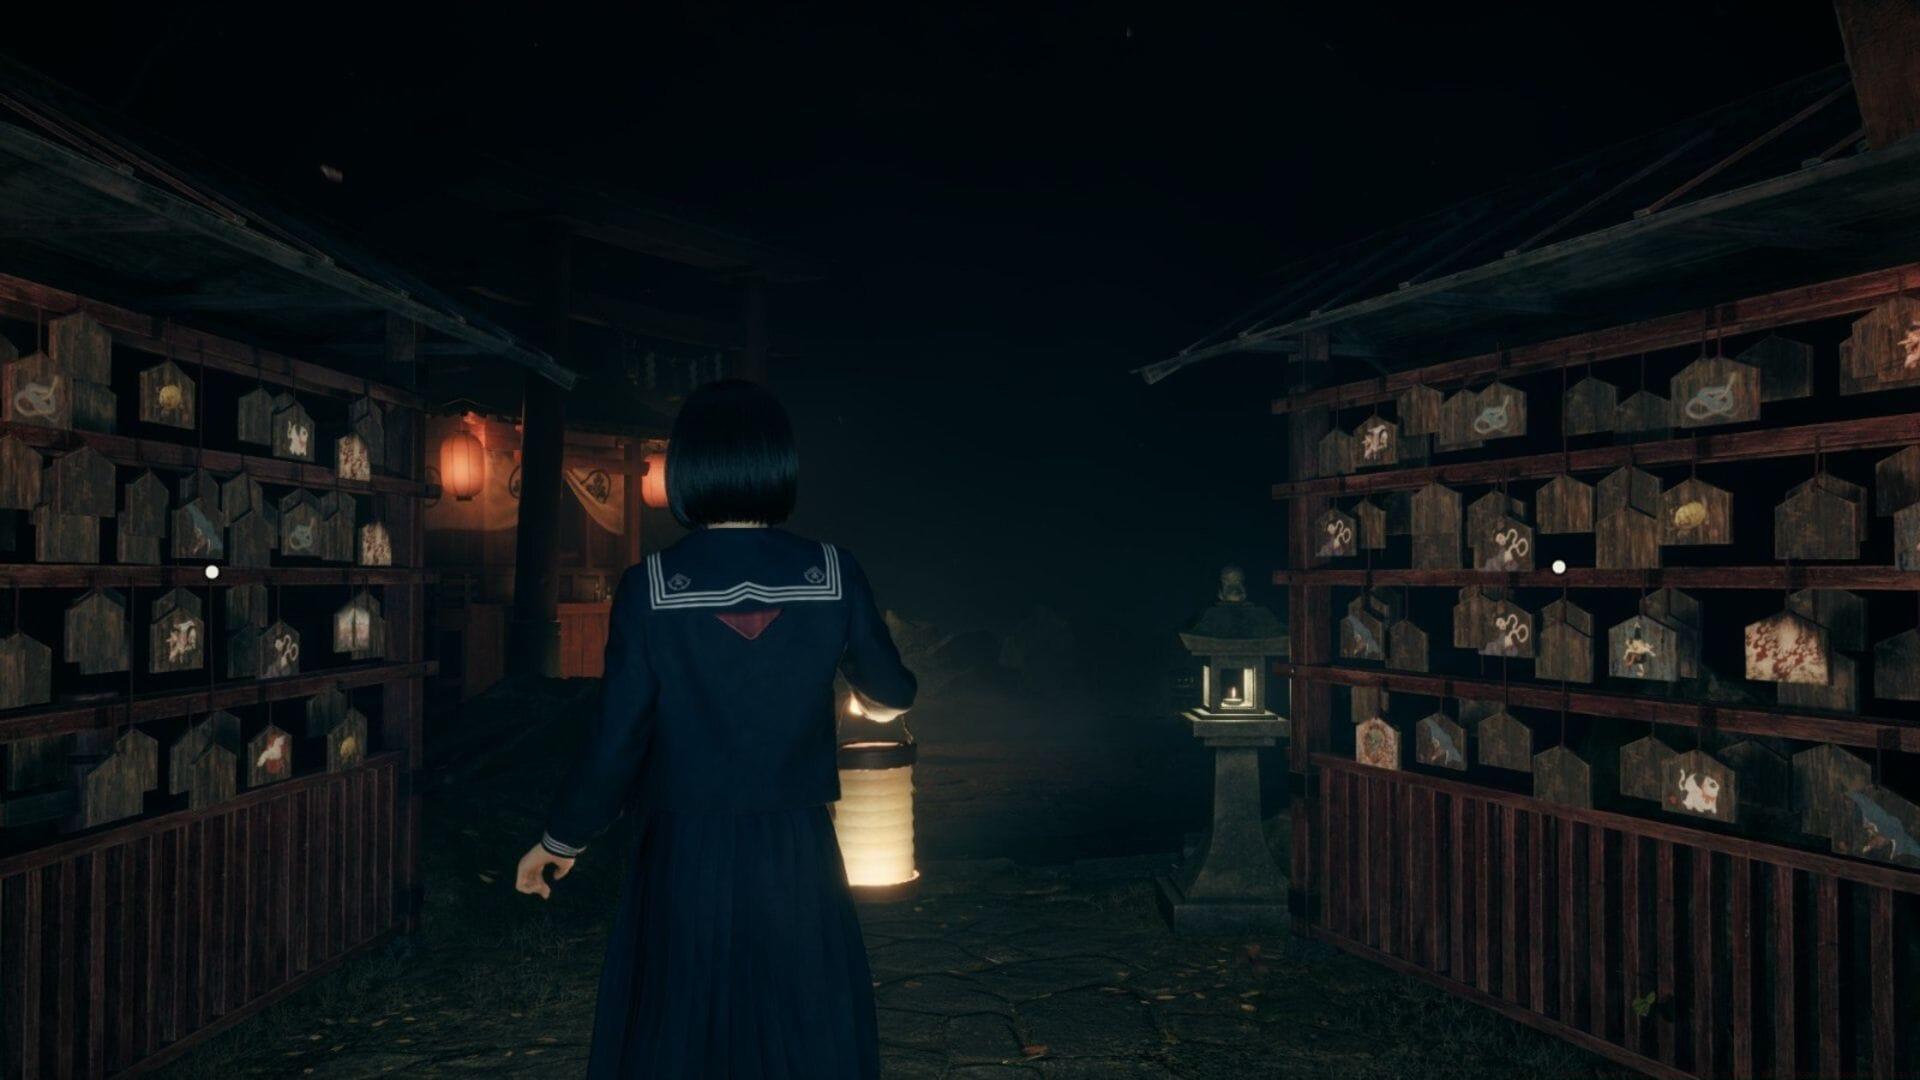
- The Decayed Tree Symbol: This emblem depicts a withered, deteriorating trunk with intricate bark details. Thoroughly inspect and rotate the object to ensure proper registration. Journal confirmation indicates successful logging.
- The Lightning Emblem: Manifesting as an engraved electrical burst pattern typically found on environmental surfaces. Your journal will automatically update upon successful identification.
- Kudzu Plant Marker: Distinguished by vibrant creeping vine motifs with distinctive leaf patterns. Interaction completes your symbolic collection when properly identified.
Rotating the Emas ritual plaques reveals the concealed symbols. Acquiring all three components activates the Combination Lock Dial mechanism, permitting return access to the primary vault chamber.
Combat and Survival Tactics
Critical Awareness: Hostile entities regenerate during symbol examination activities. The previously defeated creature frequently reappears, necessitating constant vigilance and repeated combat engagement when required.
Strategic enemy management proves crucial for efficient puzzle completion. Consider these advanced tactics: engage enemies near save points to minimize backtracking after respawns, utilize environmental obstacles to create distance during symbol examination, and prioritize symbol collection in areas with clear sightlines to anticipate approaching threats. The regenerating enemy typically follows predictable patrol routes—learning these patterns allows for strategic symbol collection during patrol gaps.
Weapon efficiency significantly impacts survival chances. Ensure your equipment is optimized for quick encounters rather than prolonged battles. Ranged weapons provide advantage by allowing symbol interaction from safer distances, while melee weapons should be reserved for when enemies breach your personal space unexpectedly.
Dial Combination Solutions
The required symbolic sequences vary according to your selected difficulty configuration, requiring careful attention to visual details:
Standard difficulty solution pattern:
- Circular design bisected by horizontal line
- Circle containing perpendicular vertical line
- Serpentine numeral “2” incorporating miniature “v” formation
Enhanced difficulty alternative sequence:
- Circle enclosing dual parallel minor lines
- Circular emblem with arced vertical element and intersecting external horizontal line
- Square framework housing inverted capital J character
Memorize these patterns before approaching the vault mechanism to minimize interaction time and reduce exposure to respawning threats. The journal provides visual references, but pre-memorization prevents dangerous delays during input sequences.
Advanced Completion Tactics
After securing all three symbolic components, return to the central vault chamber. Before departing the symbol collection area, strongly recommend creating a save backup—particularly if pursuing the no-damage achievement—in case of unexpected enemy encounters or symbol oversight.
At the vault interface, consult your journal and replicate the appropriate sequence on the combination mechanism. Correct symbol examination automatically configures the solution—entering it successfully unseals the vault, revealing the Stone Key resting ceremoniously upon the Altar surface.
Achievement hunters should note: the no-damage trophy requires avoiding all enemy contact throughout the entire puzzle sequence, including during symbol collection and return travel. Consider clearing enemies thoroughly before symbol examination, then utilizing speed and memorized routes to minimize exposure during return journeys.
Common failure points include: underestimating enemy respawn rates, misidentifying similar-looking symbols under pressure, and failing to create safety saves before vault approach. Address these through methodical exploration and defensive prioritization.
That concludes our guide on solving the Shrine Vault Puzzle in Silent Hill F (Chapter 1). For more game-related guides, make sure to follow Sportskeeda.
Check out: Does Silent Hill F have Denuvo?
No reproduction without permission:GameCDjnh » Shrine Vault puzzle guide in Silent Hill: How to complete easily Master the Shrine Vault puzzle in Silent Hill F Chapter 1 with detailed strategies for symbol hunting and enemy management