TL;DR
- The Gauntlet combines HCSSF with brutal global modifiers requiring specialized survival builds
- Minion, mine, and totem builds offer safest progression paths for beginners
- Defensive layering and resource management are more critical than damage optimization
- Campaign Acts 1, 4, and 9 contain the highest mortality rates requiring extra preparation
- Success depends on learning from each death and adapting strategies between attempts
Welcome, Exiles! This comprehensive guide provides battle-tested strategies for conquering Path of Exile’s most demanding community event. We focus exclusively on builds and tactics that deliver results in the punishing Hardcore Solo Self-Found environment of PoE 3.26’s Gauntlet. Every recommendation comes from extensive testing and community-proven success metrics.
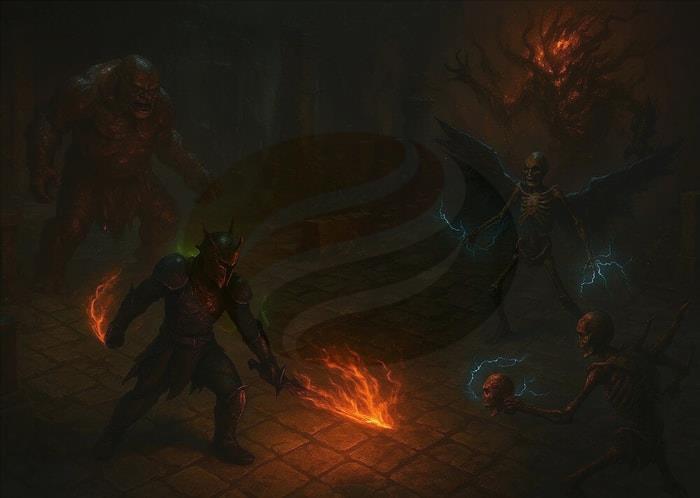
The Gauntlet represents Path of Exile’s ultimate test of player skill and game knowledge. Organized primarily by community figure Zizaran, this event transforms the standard game into an extreme survival challenge through multiple compounding difficulty layers.
Event Structure Fundamentals
● Hardcore Solo Self-Found (HCSSF): Complete isolation – no trading, party assistance, or external item transfers. Every piece of gear must be self-found or crafted.
● Global Modifiers: Substantial increases to monster damage output, health pools, elemental penetration values, and additional projectile counts. These modifiers stack multiplicatively, creating exponentially dangerous encounters.
● Limited Portals: Only three portals per boss kill contribute to scoring, forcing conservative portal usage and eliminating safety nets.
● Custom Ascendancies: The Fishia League introduces specialized ascendancy options including Ancestral Commander for totem specialization and Servant of Arakali for minion-focused approaches.
Scoring and Progression Mechanics
Your primary objectives involve surviving the campaign, leveling your character efficiently, and defeating key bosses while managing limited resources. Points accumulate based on boss kills, level milestones, and specific challenge completions within the constrained portal economy.
These builds were selected through rigorous analysis of their performance in previous Gauntlet events. Each excels in survivability, requires minimal gear investment, and provides clear progression pathways through both campaign and early endgame content.
1. Raise Zombie Puppeteer (Necromancer)
Strategic Advantages: Minion-based builds create natural damage absorption layers, keeping your character safely positioned away from direct combat. The strength stacking mechanic provides exceptional scaling with commonly available gear, while Animate Guardian offers utility buffs that significantly enhance both offense and defense.
Core Combat Mechanics: Raise Zombie serves as your primary damage engine, with strength attributes directly amplifying minion capabilities. The block chance derived from both gear selections and passive tree allocations creates additional defensive redundancy.
Advanced Defensive Layering: Beyond basic minion tanking, this build incorporates energy shield stacking, life pool development, and strategic positioning to maximize survival probability.
Leveling Progression Pathway: Begin with Summon Skeletons and Raise Zombie during early acts. Prioritize equipment with +minion gem level modifiers and strength attributes. Begin incorporating spectres and Animate Guardian functionality around Act 5 for optimal power progression.
Performance Analysis: The ranged playstyle provides exceptional safety margins, while the gear independence makes it ideal for SSF constraints. Boss damage remains consistently strong through mid-game, though minion AI behavior requires occasional manual repositioning for optimal performance.
2. Power Siphon Mines (Scavenger Saboteur)
Strategic Advantages: Remote mine deployment eliminates exposure to direct enemy attacks. Single-button mechanics reduce execution complexity during high-stress encounters. The build achieves rapid leveling progression while maintaining strong spell suppression values.
Core Combat Mechanics: Power Siphon links with mine supports for remote detonation capabilities. High-Impact Mine Support and Minefield Support dramatically increase area coverage and damage output. Early acquisition of Cloak of Flames provides substantial damage scaling before rare equipment becomes available.
Advanced Defensive Layering: Exceptional evasion ratings combine with spell suppression to mitigate both physical and elemental threats. Life stacking supplemented by stun immunity prevents unexpected crowd control deaths.
Leveling Progression Pathway: Initiate with Stormblast Mine or Explosive Trap for smooth early progression. Transition to Power Siphon functionality at level 28. Incorporate Smoke Mine and Flame Dash for superior battlefield mobility and positioning.
3. Ice Nova Archmage (Hierophant)
Strategic Advantages: Mind Over Matter (MoM) combined with mana stacking creates an effective health pool that surpasses conventional life-based defenses.
Core Combat Mechanics: Ice Nova casting on pre-placed Frostbolt projectiles generates double damage instances. Archmage Support scales spell damage directly with maximum mana values, while Hierophant ascendancy nodes provide additional mana scaling and endurance charge generation.
Advanced Defensive Layering: The MoM mechanic redirects 30% of damage taken to mana before life, effectively increasing your survivability threshold. Chilling and freezing capabilities provide additional crowd control layers.
Leveling Progression Pathway: Start campaign with Holy Flame Totem or Rolling Magma for reliable clearing. Transition to Ice Nova specialization after completing Act 3. Early investment in mana pool development through Clarity auras and specific passive nodes.
4. Explosive Arrow Ballista (Ancestral Commander)
Strategic Advantages: Totems perform combat actions while your character maintains safe positioning. Gear requirements remain minimal while scaling effectively into late campaign and early mapping content.
Core Combat Mechanics: Explosive Arrow linking with Ballista Totem Support creates overlapping damage fields. Totems sequentially stack explosive arrows on targets, culminating in massive detonation sequences.
Advanced Defensive Layering: Totems absorb enemy aggression and attention. High life values combined with resistance capping provides baseline durability. Fortify effects from either gear modifications or ascendancy selections add substantial damage reduction.
5. Lightning Strike Daughter of Oshabi
Strategic Advantages: Exceptional energy shield values combine with shrine buff mechanics for defensive superiority. Physical damage conversion to chaos bypasses many enemy resistance types.
Core Combat Mechanics: Lightning Strike utilized with pure energy shield equipment. Oath of the Magi ascendancy node doubles armor defensive values. Ghost Dance provides consistent energy shield sustain during combat engagements.
Advanced Defensive Layering: Energy shield pools exceeding 10,000 provide massive effective health. Spell suppression combined with resistance capping mitigates elemental threats. Stun immunity prevents interruption during critical combat moments.
Leveling Progression Pathway: Begin with Smite or Molten Strike during early leveling phases. Transition to Lightning Strike once adequate energy shield gear becomes available. Strategic shrine buff accumulation and movement speed optimization enhance both survivability and clear speed.
Campaign Navigation Excellence
Strategic overleveling before boss encounters provides crucial statistical advantages. Resistance capping should be prioritized immediately upon entering each new difficulty tier. Movement skill utilization for mechanic dodging becomes non-negotiable. Specific attention required for Acts 1, 4, and 9 – these segments demonstrate significantly higher player mortality rates requiring additional preparation and caution.
Common Beginner Mistakes to Avoid: Underestimating modifier stacking effects leads to unexpected one-shot scenarios. Gear progression should emphasize life and resistance values over damage optimization during early and mid campaign.
Gear Prioritization Framework
Life and resistance attributes consistently outperform damage investments for survival probability. Movement speed modifiers on footwear dramatically improve positioning capability and mechanic avoidance. Vendor recipe systems provide reliable gear upgrades during critical progression points.
Optimal Flask Configuration
● 1 Instant Life Flask for emergency recovery
● 1 Granite Flask for physical damage reduction
● 1 Jade Flask for evasion enhancement
● 1 Quicksilver Flask for mobility
● 1 Utility Flask selection (Sulphur or Basalt recommended)
Passive Tree Development Strategy
Life node acquisition takes precedence during early tree development. Spell suppression and block chance nodes provide substantial defensive returns. Avoid complex mechanic interactions – simplicity and reliability outperform theoretical maximums in Gauntlet conditions.
Advanced Defensive Concepts
Layered defense implementation separates successful Gauntlet runs from failed attempts. Each defensive mechanic should complement rather than duplicate existing layers. Strategic redundancy prevents single points of failure from ending your run.
Mapping Strategy Optimization
Fast-clearing skill selection minimizes exposure time to dangerous modifiers. Risk assessment for map modifiers becomes critical – certain combinations create unwinnable scenarios. Portal conservation requires disciplined play and encounter preparation.
Boss Encounter Mastery
Mechanical knowledge acquisition for each boss encounter is essential. Curse application through Sniper’s Mark or Assassin’s Mark significantly improves single-target damage output. Strategic positioning of minions, totems, or other aggro-drawing elements creates safer engagement conditions.
Resource Management Principles
Strategic portal reservation for boss attempts prevents wasted opportunities. Resource allocation should favor defensive improvements over marginal damage increases. Encounter preparation often proves more valuable than raw combat execution.
Advanced Risk Assessment
Learn to identify modifier combinations that exceed your build’s capabilities. Certain elemental penetration values combined with damage modifiers create mathematically impossible survival scenarios regardless of player skill.
The Gauntlet represents one of gaming’s most unforgiving challenges, yet with proper build selection and strategic execution, even novice players can achieve meaningful progression. Survival prioritization, coupled with systematic learning from each failed attempt, creates the foundation for eventual success.
Embrace the learning process – each death provides valuable data for improvement. Don’t hesitate to restart after learning critical lessons. Every attempt builds cumulative game knowledge and mechanical proficiency.
Remember that Gauntlet performance differs dramatically from standard gameplay. Strategies that succeed in trade leagues often fail catastrophically under Gauntlet conditions. Focus on consistency and reliability over theoretical maximum performance metrics.
Action Checklist
- Select one of the five recommended builds based on your playstyle preferences
- Practice campaign boss mechanics in standard league before attempting Gauntlet
- Establish resistance capping as immediate priority upon entering each new act
- Configure optimal flask setup with instant life recovery and defensive enhancements
- Develop strategic overleveling plan for high-mortality acts (1, 4, 9)
- Implement layered defense strategy combining multiple complementary mitigation types
No reproduction without permission:GameCDjnh » PoE 3.26 Gauntlet Guide – Top 5 Builds and Tips for Beginners Master PoE 3.26 Gauntlet with expert builds, survival strategies, and actionable checklists