TL;DR
- Ground Slam of Earthshaking provides massive screen-wide area coverage for efficient mapping
- Exceptional survivability with phenomenal recovery makes this build Hardcore SSF viable for all Ubers
- Two Large Cluster Jewels are essential for attack speed and closing the gap between Slayer and Berserker
- Static Strike and Vulnerability create powerful bleed stacking for boss melting
- Coronal Maul maces offer 82% additional area effect for even greater clear speed
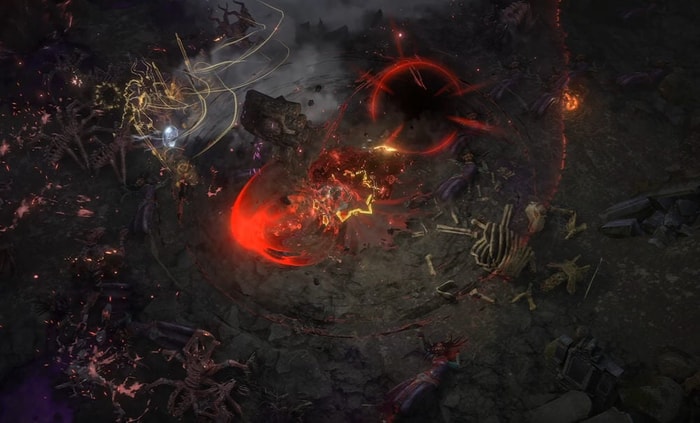
PhazePlays’ exceptional Bleed Slam Slayer build combines massive damage output with incredible defensive capabilities. The transfigured Ground Slam of Earthshaking gem enables screen-wide coverage that transforms your mapping experience while maintaining boss-killing potency.
This build utilizes a sophisticated combination of Static Strike to apply and aggravate bleeding effects, supplemented by Vulnerability for increased damage amplification. Rallying Cry provides crucial damage buffs at key moments. The core rotation involves setting up bleeds then spamming your slam attacks to maximize damage over time. If you haven’t acquired Ground Slam of Earthshaking yet, Sunder serves as an excellent alternative that effectively penetrates Hive Fortress defenses.
Common Beginner Mistake: Many players underestimate the importance of attack speed for bleed builds. Since bleed damage scales with hit damage rather than attack rate, slower weapons can feel clunky until you properly optimize your cluster jewel setup.
The Bleed Slam Slayer demonstrates remarkable strength across all content types. It ranks among the premier solo self-found bossing builds while maintaining exceptionally smooth mapping capabilities. In Hardcore SSF environments, this configuration has comfortably eliminated all 10 Uber bosses without ever creating significant death risk.
Deliberate defensive investment ensures exceptional safety margins, meaning damage potential can be significantly increased beyond demonstrated levels. The damage output feels consistently impressive while mitigation surpasses most contemporary builds. Recovery mechanics perform phenomenally well, and the guaranteed damage uptime proves invaluable during boss encounters by allowing complete focus on mechanic dodging.
Pro Tip: For Uber boss encounters, prioritize positioning that allows you to maintain bleed stacks while avoiding deadly mechanics. The build’s tankiness creates windows where you can stand still and attack when other builds would need to retreat.
Time Estimate: With proper gear and practice, most Uber bosses fall within 2-4 minutes depending on your investment level and familiarity with the fight mechanics.
For melee builds to achieve optimal performance, attack speed becomes critically important, particularly for bleed-focused configurations that typically employ slower weapon bases. Consequently, endgame progression strongly recommends incorporating two Large Cluster Jewels for substantial attack speed and damage enhancements.
Implementing dual clusters substantially narrows the velocity differential between Slayer and Berserker ascendancies. The additional attack speed not only improves clear speed but also enhances the fluidity of the play experience.
Optimization Strategy: Target cluster jewels with notable passives like Fuel the Fight for life gain on hit or Rapid Infusion for additional attack and cast speed.
Common Pitfall: Many players try to skip cluster jewels to save passive points, but this severely gimps the build’s potential. The investment consistently pays dividends in both damage output and quality of life.
Combined with the build’s extensive area coverage, the mapping experience feels exceptionally satisfying. Area of effect synergizes powerfully with Grand Slam mechanics. Key AoE sources include:
- Brinkmanship: Provides substantial area increases while standing close to enemies
- Executioner: Offers both area effect and damage against low-life targets
- Awakened Increased Area of Effect Support
- Pulverize Support with built-in area multipliers
- Weapon Selection: Coronal Maul maces present an attractive option delivering an additional 82% area of effect.
Advanced Technique: For maximum clear speed, position yourself so each slam hits multiple packs simultaneously.
Maces utilizing the Coronal Maul base type emerge as particularly compelling choices, providing inherent area bonuses that compound with other sources.
Estimated Setup Time: Full AoE optimization typically requires 15-20 hours of farming and crafting to assemble the complete package.
Action Checklist
- Acquire Ground Slam of Earthshaking gem or use Sunder as temporary replacement
- Set up Static Strike and Vulnerability for bleed application and amplification
- Incorporate two Large Cluster Jewels with attack speed notables
- Optimize area of effect through Brinkmanship, Awakened Increased AoE, and Coronal Maul
No reproduction without permission:GameCDjnh » PoE Build 3.27: Bleed Slams Slayer – Ground Slam of Earthshaking Build Master Path of Exile's powerful Bleed Slam Slayer build with screen-wide clear and boss dominance