TL;DR
- Master the resource cycle between Soul Stones and Possession Meter for optimal damage output
- Use Guillotine Swing as your primary opener to generate resources quickly
- Activate Deathlord Mode strategically during boss mechanics or burst phases
- Position yourself carefully to maximize area-of-effect damage while avoiding enemy attacks
- Combine Nightmare set bonuses with proper skill sequencing for maximum effectiveness
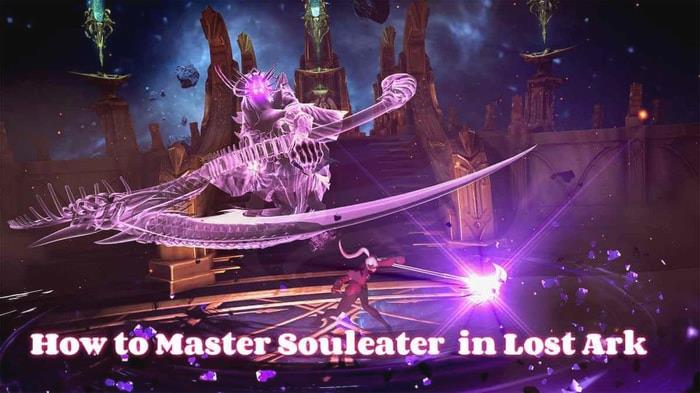
The Souleater represents one of Lost Ark’s most technically demanding advanced classes, requiring precise resource management and strategic decision-making. As an Assassin subclass, this character wields an imposing scythe while commanding spectral entities to dominate the battlefield. Success with this class hinges on understanding two critical resources: Soul Stones and the Possession Meter, which create an intricate combat cycle that separates novice players from masters.
This death-wielding specialist operates through three distinct skill categories: Scythe techniques, Specter summoning, and Deathlord transformations. Each category interacts differently with your resources, creating a dynamic gameplay loop that demands constant attention and adaptation to combat situations.
New players often struggle with the Souleater’s complexity, particularly the timing between building resources and unleashing powerful transformations. Understanding this fundamental cycle is the first step toward mastering this high-skill-cap class.
Scythe abilities form the backbone of your offensive capabilities, delivering substantial physical damage while generating the Soul Stones necessary for more advanced techniques. These foundational attacks allow you to maintain consistent pressure while building toward your more powerful capabilities.
Your Soul Stone capacity maxes out at 10 units, creating natural decision points about when to transition between skill types. Efficient Souleater play requires recognizing these thresholds and adjusting your combat rhythm accordingly.
Guillotine Swing stands out as your premier opening move, dealing significant damage while immediately generating 3 Soul Stones. This makes it ideal for initiating engagements, especially when combined with the Nightmare set’s shard generation mechanic. Proper sequencing of Scythe skills ensures you maintain optimal resource flow throughout extended encounters.
Many intermediate players fail to maximize their Scythe skill usage, instead rushing toward Specter abilities prematurely. This results in suboptimal damage output and extended downtime between powerful combinations.
Specter techniques consume your accumulated Soul Stones to unleash magical assaults while progressively filling your Possession Meter. This resource-building phase is crucial for accessing your most devastating capabilities.
Death Eater serves as your primary sustainability tool, summoning a biting specter that damages foes while restoring 10% of your health. This dual-purpose ability makes it invaluable for maintaining combat longevity without sacrificing offensive pressure.
Death Chain provides essential crowd control by binding enemies with spectral chains, pulling them into optimal positioning for area-of-effect follow-ups. Strategic use of this skill can dramatically increase your damage efficiency against grouped opponents.
Advanced players learn to weave Specter skills between Scythe attacks, creating a fluid rotation that maintains constant pressure while building toward transformation windows.
Resource mismanagement represents the most common failure point for Souleater players. Burning through Soul Stones too quickly leaves you unable to respond to dynamic combat situations, while hoarding them excessively delays your power spikes.
When your Possession Meter reaches maximum capacity, you gain access to Deathlord Mode—a transformative state that significantly enhances your combat capabilities. During this empowered phase, your standard skills receive substantial upgrades while unlocking exclusive abilities.
• Death Slash: The Souleater slashes with her scythe, dealing damage and reducing the enemy’s defense.
• Death Reap: The Souleater dashes forward and slashes with her scythe, dealing damage and stunning the enemy.
• Death Harvest: The Souleater spins her scythe around her, dealing damage and knocking back the enemy.
• Death Eater: The Souleater summons a specter that bites the enemy, dealing damage and restoring her health.
• Death Chain: The Souleater summons a specter that binds the enemy with chains, dealing damage and pulling them closer.
• Death Bomb: The Souleater summons a specter that explodes on the enemy, dealing damage and applying a debuff that reduces their movement speed and attack speed.
• Deathlord’s Judgment: The Souleater unleashes a powerful slash that deals damage and executes the enemy if their health is below a certain threshold.
Strategic activation represents the difference between mediocre and exceptional Souleater performance. Elite players conserve their transformation for critical moments: boss mechanic windows, add-phase bursts, or emergency survival situations.
Mastering the Souleater demands sophisticated combat awareness and precise execution timing. Your positioning relative to enemies significantly impacts both your survivability and damage potential, requiring constant spatial assessment during engagements.
The Nightmare equipment set revolutionizes your gameplay by providing shards every 10 seconds, enabling you to utilize Deathlord abilities without consuming your Possession Meter. This creates additional strategic depth regarding when to use shard-based versus meter-based transformations.
Optimal opening sequence: Begin with Guillotine Swing (generating 3 Soul Stones), immediately follow with Deathbringer using a shard (applying 30% defense reduction), then transition into your standard rotation. This initial burst establishes immediate pressure while setting up subsequent combinations.
Against boss encounters, preserve your Deathlord Mode for specific mechanics where maximum damage output provides the greatest benefit. The 30% defense reduction from Deathbringer creates valuable damage amplification windows for your entire team.
Intermediate players typically achieve 60-70% of the class’s potential damage output, while masters consistently reach 85-95% through refined timing and resource allocation.
The Nightmare set stands as the definitive gear choice for Souleater specialists, providing unparalleled flexibility through its shard generation mechanic. This allows strategic conservation of your Possession Meter for ideal transformation moments.
For players seeking alternative approaches, the Dominion set offers increased skill uptime through cooldown reduction, while the Salvation set provides raw statistical bonuses for players preferring straightforward power increases.
Proper stat allocation focuses on Specialization to enhance your Identity gauge generation, followed by Crit to maximize your damage during transformation windows. This stat priority ensures you maintain consistent access to your most powerful abilities.
Engraving selection should prioritize Souleater-specific enhancements alongside general damage amplifiers. Grudge, Cursed Doll, and Ambush Master complement your class engravings effectively.
Much like selecting the right Class Guide in other games, your gear choices dramatically impact your playstyle and effectiveness.
Resource exhaustion represents the most frequent error among Souleater players. Novices often expend all Soul Stones immediately, leaving them resource-starved during critical combat phases. Practice disciplined resource conservation by maintaining 2-3 Soul Stones as an emergency reserve.
Premature transformation activation wastes your most powerful state on non-critical moments. Develop the patience to delay Deathlord Mode until you can maximize its impact.
Positioning negligence significantly reduces your effectiveness while increasing incoming damage. The Souleater’s area-of-effect capabilities demand careful enemy grouping and personal positioning.
Skill sequence rigidity prevents adaptation to dynamic combat situations. While having a standard rotation is valuable, elite players adjust their skill usage based on real-time combat developments.
These foundational principles, combined with the advanced strategies from content creators like ZealsAmbitions, provide a comprehensive framework for Souleater mastery. As with any complex class in games like those covered in our Complete Guide resources, consistent practice remains essential for achieving proficiency.
For additional combat optimization strategies, consult our Weapons Unlock guide for complementary techniques.
Action Checklist
- Practice the Guillotine Swing into Deathbringer opener until it becomes muscle memory
- Master Soul Stone management by maintaining 2-3 reserve stones
- Learn to identify optimal Deathlord Mode activation windows
- Optimize positioning to maximize area-of-effect damage while minimizing enemy contact
- Experiment with Nightmare set shard usage versus Possession Meter conservation
No reproduction without permission:GameCDjnh » How to Master Souleater in Lost Ark Master the Souleater's deadly scythe combat, resource management, and advanced Deathlord Mode tactics