TL;DR
- Poison Nova and Corpse Explosion form the core damage rotation with perfect synergy
- Death’s Web and Trang-Oul’s Claws provide essential -% enemy poison resistance stacking
- Sunder Charms enable breaking immunities but require careful resistance management
- Teleport positioning and curse timing separate average from expert players
- The build excels at clearing dense monster packs and farming high-value areas efficiently
The Poison Necromancer represents one of Diablo 2 Resurrected’s most formidable endgame specializations, capable of decimating entire screens of enemies through sophisticated damage combinations. This build leverages poison, fire, and physical damage types to overcome virtually any resistance configuration, making it exceptionally versatile for farming diverse content. With strategic application of Sunder Charms, Lower Resist curses, Amplify Damage, and Infinity mercenary support, you can systematically dismantle even the most resistant enemy compositions.
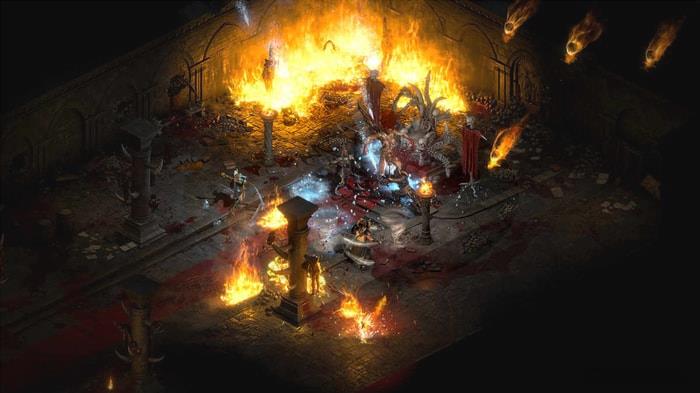
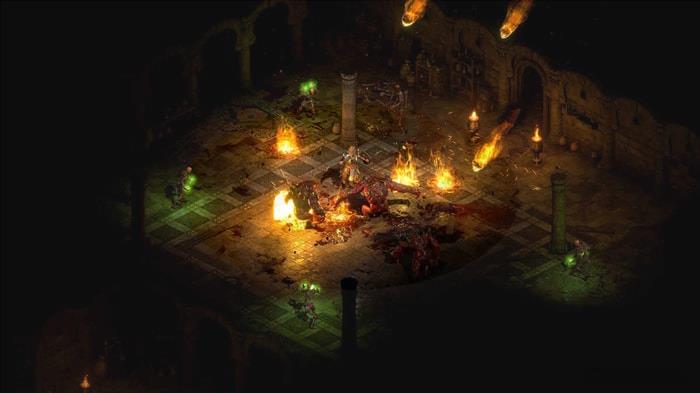
At the heart of this build’s offensive capability lies the powerful synergy between Poison Nova and Corpse Explosion. Poison Nova unleashes an expanding ring of toxic gas that inflicts substantial damage over time across a wide radius. Corpse Explosion then capitalizes on fallen enemies by detonating their remains, dealing massive area fire and physical damage. These abilities complement each other perfectly—Poison Nova creates the initial casualties while Corpse Explosion cleans up survivors, including those with poison immunity or resistance.
The optimal skill point allocation for maximum effectiveness follows this pattern:
• 20 points in Poison Nova (primary clearing skill)
• 20 points in Poison Explosion (synergy damage boost)
• 20 points in Poison Dagger (additional synergy enhancement)
• 1 point in Corpse Explosion (secondary damage source)
• 1 point in Amplify Damage (physical resistance reduction)
• 1 point in Lower Resist (elemental resistance breaking)
• 1 point in Decrepify (boss control mechanism)
• 1 point in Clay Golem (distraction and slow utility)
• 1 point in Summon Resist (minion durability)
• 1 point in Bone Armor (personal damage mitigation)
• Remaining points in Bone Wall (defensive barrier and synergy)
Poison Nova, Poison Explosion, and Poison Dagger collectively amplify your primary poison damage output through their synergy bonuses. Corpse Explosion serves as your secondary damage engine, converting fallen enemies into area-denial weapons. Amplify Damage and Lower Resist function as your immunity-breaking tools, systematically dismantling enemy defenses. Decrepify provides crucial crowd control against dangerous elite packs and bosses. Clay Golem offers reliable tanking capabilities while applying movement and attack speed reduction. Summon Resist enhances your minion’s survivability against elemental threats. Bone Armor and Bone Wall create layered physical defense systems that can block enemy advancement and absorb significant damage.
Strategic attribute distribution is crucial for balancing offensive power with survivability in the Poison Necromancer build. Unlike some classes that spread points across multiple stats, this specialization focuses heavily on maximizing life while meeting essential equipment thresholds.
The optimized stat allocation follows this priority system:
• Strength: Allocate precisely enough to equip your gear, typically between 80-100 points depending on your specific item configuration.
• Dexterity: Invest sufficient points to achieve maximum block (75%) when using Homunculus shield.
• Energy: Zero investment—mana regeneration and pool size are sufficiently managed through equipment.
• Vitality: All remaining points go here to maximize health pool and survivability.
Strength and Dexterity serve primarily as gateway stats for equipment requirements and blocking capability. Energy receives no allocation since mana management is effectively handled through gear bonuses, potions, and regeneration. Vitality represents your primary investment, dramatically increasing both raw life total and effective health through damage reduction synergies.
Advanced players should note that achieving the 75% block chance with Homunculus typically requires approximately 150-200 Dexterity depending on character level and other equipment modifiers. This investment pays significant dividends in survivability against physical attackers and ranged threats. The health scaling from Vitality becomes increasingly valuable in Hell difficulty where enemy damage output spikes dramatically.
Equipment selection for the Poison Necromancer focuses on several key attributes: poison damage enhancement, enemy poison resistance reduction, casting speed, overall resistances, and magic find potential. Each piece should contribute meaningfully to your overall damage output or survivability.
The premier endgame configuration utilizes these items:
• Weapon: Death’s Web
• Shield: Homunculus
• Helmet: Harlequin Crest
• Armor: Enigma
• Gloves: Trang-Oul’s Claws
• Belt: Arachnid Mesh
• Boots: War Traveler
• Amulet: Mara’s Kaleidoscope
• Rings: Stone of Jordan and Bul-Kathos’ Wedding Band
• Charms: Annihilus, Hellfire Torch, and Poison and Life Small Charms
Death’s Web stands as the definitive weapon choice, providing substantial poison damage amplification and critical -% enemy poison resistance. Homunculus offers exceptional defensive utility with +2 to all skills, enhanced blocking chance, and resistance bonuses. Harlequin Crest delivers comprehensive benefits including skill points, blocking enhancement, and life/mana increases. Enigma provides game-changing mobility through Teleport alongside valuable skill and Magic Find bonuses. Trang-Oul’s Claws are indispensable for their curse enhancement, poison damage boost, and enemy resistance reduction. Arachnid Mesh contributes +1 to all skills, faster cast rate, and maximum poison resistance enhancement. War Traveler offers vital statistics boosts and Magic Find. Mara’s Kaleidoscope provides well-rounded skill and resistance improvements. Stone of Jordan and Bul-Kathos’ Wedding Band provide skill points alongside life and mana augmentation. Annihilus, Hellfire Torch, and Poison and Life Small Charms round out your setup with comprehensive attribute, resistance, and damage enhancements.
For players utilizing Sunder Charms, this optimized configuration maximizes effectiveness:
• Weapon: Death’s Web
• Shield: Homunculus
• Helmet: Trang-Oul’s Wing
• Armor: Enigma
• Gloves: Trang-Oul’s Claws
• Belt: Trang-Oul’s Girth
• Boots: War Traveler
• Amulet: Mara’s Kaleidoscope
• Rings: Stone of Jordan and Bul-Kathos’ Wedding Band
• Charms: Annihilus, Hellfire Torch, Rotting Fissure, Flame Rift, Bone Break, and Poison and Life Small Charms
The Sunder Charm configuration builds upon the standard setup with strategic modifications to leverage Sunder Charm benefits. Rotting Fissure systematically dismantles enemy poison resistance while imposing a personal resistance penalty. Flame Rift targets fire-resistant enemies with similar trade-offs. Bone Break addresses physical immunities with corresponding personal resistance reduction. These Sunder Charms collectively enable the Poison Necromancer to engage virtually any enemy composition, particularly those with traditional immunity profiles. To counterbalance the inherent resistance penalties from Sunder Charms, the three-piece Trang-Oul’s set (comprising Trang-Oul’s Wing, Trang-Oul’s Claws, and Trang-Oul’s Girth) delivers comprehensive resistance compensation, poison damage amplification, and enemy resistance reduction.
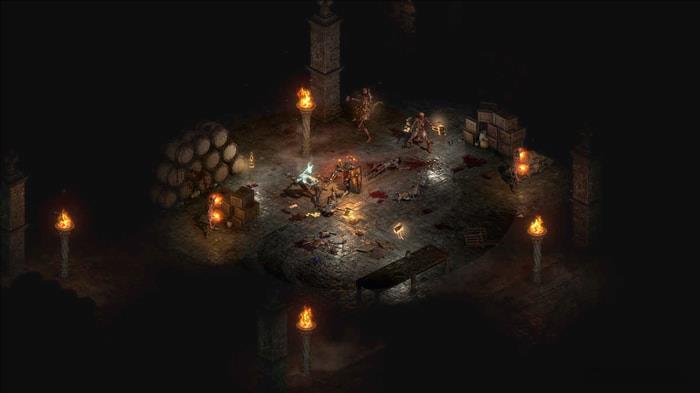
Mastering the Poison Necromancer’s combat flow requires understanding nuanced positioning, timing, and ability sequencing. The core gameplay loop revolves around systematic area clearing through coordinated poison application and corpse utilization.
The comprehensive engagement strategy unfolds through these methodical steps:
• Teleport strategically to position yourself at optimal casting range from enemy groups, then deploy Amplify Damage or Lower Resist based on their specific resistance profiles.
• Unleash Poison Nova to inflict massive damage over time, progressively eliminating targets and generating corpses.
• Trigger Corpse Explosion on freshly created corpses to deal secondary fire and physical damage to survivors.
• Repeat this sequence methodically until the entire area is cleared of threats.
• Apply Decrepify against challenging elite packs or bosses to dramatically reduce their threat level.
• Utilize Clay Golem and Bone Armor as defensive layers against physical damage sources.
• Deploy Bone Wall tactically to create chokepoints or block pursuing enemies.
• Leverage Sunder Charms to overcome immunities while carefully managing your own resistance deficits.
This build excels at high-tempo gameplay that rewards precise execution and strategic foresight. While requiring practice to master, the Poison Necromancer delivers exceptionally rewarding gameplay through its capacity to systematically dismantle entire screens of enemies. For magic finding enthusiasts, this specialization offers outstanding efficiency in high-density areas like The Chaos Sanctuary, The Pit, and Ancient Tunnels. The combination of area damage, immunity breaking, and rapid clearing makes it one of Diablo 2 Resurrected’s premier farming builds.
Common mistakes to avoid include misjudging teleport positioning, incorrect curse selection against mixed resistance groups, and inadequate resistance management when using Sunder Charms. Advanced players can optimize clear speeds by pre-casting curses during teleport animation and timing Corpse Explosion chains for maximum area coverage. Typical clearing sessions in optimized farming routes take approximately 2-3 minutes per full clear, making it exceptionally time-efficient for targeted item hunting.
Action Checklist
- Allocate skill points following the 20/20/20 core poison skills with 1-point wonders in support abilities
- Distribute stats prioritizing Vitality after meeting Strength/Dexterity equipment thresholds
- Acquire core equipment pieces starting with Death’s Web and Trang-Oul’s Claws for -% enemy poison resistance
- Practice the core combat rotation: Teleport → Curse → Poison Nova → Corpse Explosion
- Master Sunder Charm integration and resistance management techniques
- Optimize farming routes for maximum efficiency in high-density areas
No reproduction without permission:GameCDjnh » How to Build a Poison Necromancer in Diablo 2 Resurrected Master the Poison Necromancer build with advanced strategies, gear optimization, and immunity-breaking techniques for Diablo 2 Resurrected