TL;DR
- Achieve 6,000+ effective health and max elemental resistances before attempting the fight
- Understand the phase-switching mechanic between The Maven and her Nucleus
- Master dodging Cascade of Pain projectiles and Circle Slam attacks
- Learn the Memory Game sequence to avoid instant death mechanics
- Utilize damage windows during Tri-beam Claws and Final Phase for maximum DPS
Path of Exile represents the pinnacle of action RPG gaming, developed by Grinding Gear Games with a distinctive dark fantasy aesthetic. Players find themselves exiled from the island civilization of Oriath to the treacherous continent of Wraeclast, a land steeped in ancient magic and corruption.
Your journey through Wraeclast involves selecting from seven distinct character classes, each battling through dangerous territories and confronting powerful entities to reclaim your place in Oriath.
Among the most formidable endgame challenges awaits The Maven, an entity you can challenge after acquiring “The Maven Writ” item. This key component becomes accessible through successful boss encounters within The Maven’s Crucible arena, where you must prove your combat prowess against multiple bosses consecutively.
This comprehensive guide provides the strategic foundation needed to overcome one of Path of Exile’s most complex boss encounters.
Proper preparation separates successful Maven challengers from those who face repeated defeat. Building your character with specific defensive and offensive benchmarks dramatically increases your chances of victory.
Critical defensive requirements include maintaining at least 6,000 effective health points through life, energy shield, or mana reservation combinations. Elemental resistances must reach the 75% cap for fire, cold, and lightning damage types, with chaos resistance ideally at positive values.
● Effective health pool exceeding 6,000 through layered defenses
● Maximum elemental resistances at 75% cap with potential overcap for penetration
● Essential movement skills like Dash, Flame Dash, or Shield Charge for positioning
● Layered defensive mechanisms including block, spell suppression, or physical damage reduction
● High damage output capabilities exceeding 4 million DPS for phase transitions
Advanced players should consider incorporating ailment immunity, particularly for freeze and shock effects that can prove fatal during critical mechanics. Having instant life recovery flasks and movement speed enhancements provides crucial survivability during complex attack sequences.
If your build lacks these essential components, consider visiting MmoGah to safely acquire Path of Exile currency for necessary upgrades.
The Maven confrontation operates on a sophisticated phase-switching mechanic that demands strategic adaptation. Combat alternates between direct engagement with The Maven herself and destructive phases targeting her Nucleus core.
When you successfully reduce The Maven’s health pool to zero, the battle immediately transitions to her Nucleus. This entity unleashes a catastrophic explosion capable of instantly defeating any character build regardless of defenses.
Crucially, while The Maven’s health fully regenerates after each phase transition, the Nucleus sustains cumulative damage throughout the encounter.
This design creates a race against time – you must destroy the Nucleus before The Maven’s repeated assaults overwhelm your defenses and resources.
Mastering The Maven’s diverse attack repertoire represents the core challenge of this encounter. Her abilities range from straightforward projectiles to complex arena-wide mechanics requiring precise execution.
Default Attack
This fundamental ability involves The Maven projecting a singular pink energy beam along a predictable trajectory. Employ evasion skills with proper timing to completely avoid this straightforward attack pattern.
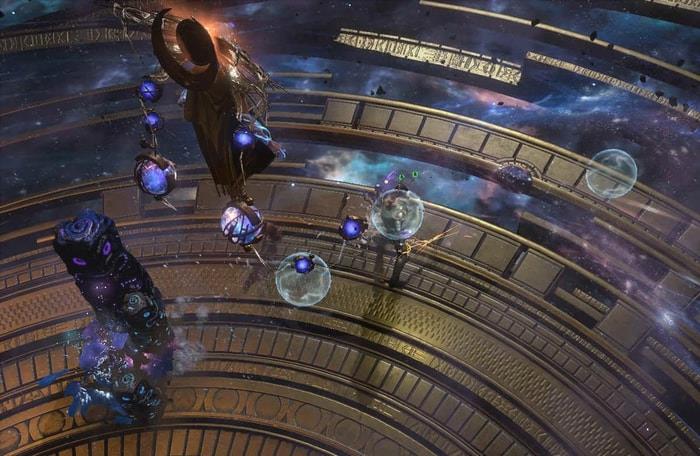
Mine!
During this sequence, the Nucleus gradually releases small energy spheres that drift throughout the combat arena. Once sufficient quantities accumulate, The Maven vocalizes ‘Mine,’ triggering all spheres to adopt pink coloration and pursue your character, detonating upon contact. While individually weak, their collective impact can significantly drain your resources if poorly managed.
Gravity Wells
The Maven’s Nucleus launches three tracking orbs that aggressively pursue your position. Upon collision, these orbs explode creating persistent ground effects that reduce action speed and inflict damage-over-time (DoT). Strategic placement in the arena’s central region minimizes their combat impact.
Circle Slam
Before executing this devastating attack, The Maven clearly marks a circular zone within the arena, then delivers tremendous damage after a brief telegraphing period. Circle Slam inflicts between 8,741 to 13,111 damage, representing one of her most lethal abilities despite its easily avoidable nature.
Tri-beam Claws
The Maven announces “Stand Still” before deploying three parallel energy beams that sweep across the battlefield. This creates a prime damage opportunity as The Maven remains stationary and vulnerable during the attack sequence.
Cascade of Pain Projectiles
When The Maven declares “A Cascade of Pain,” she initiates a continuous barrage of projectiles. This represents one of her most dangerous abilities, dealing 3,722-5,583 cold damage per projectile with challenging evasion requirements.
Maven Nucleus Cannon
This easily recognizable attack involves The Maven’s Nucleus charging a high-powered cannon. The slow projectile speed and distinctive purple visual indicator provide ample reaction time for avoidance.
Maven Super Fire Projectile
Preceding this assault, The Maven warns “take this” before launching a massive projectile along a linear path. Dealing 6,203-9,305 damage, this attack demands immediate evasion despite its straightforward trajectory.
Rotating Beams
Throughout the Nucleus phase, two rotating energy beams slowly circulate the arena perimeter. Contact with these beams completely disables health regeneration and life leech effects for 10 seconds. Upon the Nucleus’s destruction, five beams emerge creating narrow safe passages that require constant positional adjustment.
The Memory Game
At strategic intervals, The Maven proclaims “Death will not be an escape” to initiate this critical mechanic. The arena divides into three distinct sections that illuminate sequentially, requiring precise pattern replication. Failure results in catastrophic explosions dealing 42,571-63,857 damage.
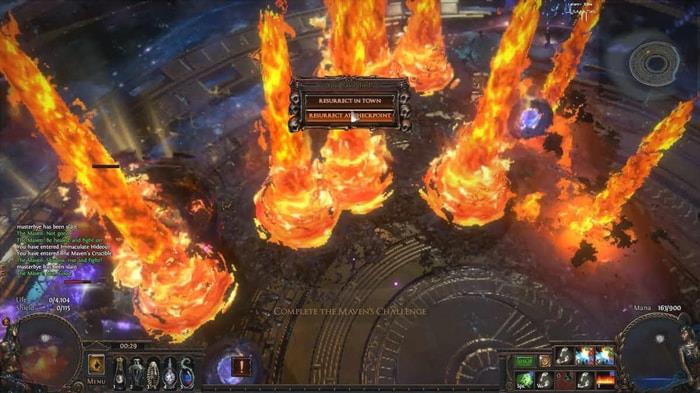
The Final Phase
During this concluding stage, the destroyed Nucleus occupies the arena center while projecting five beams that disrupt regeneration and leech mechanics. Maintaining proximity to The Maven while maximizing damage output becomes the winning strategy.
Beyond basic mechanics understanding, implementing advanced combat strategies dramatically improves your success rate. These techniques separate experienced players from those struggling with repeated attempts.
Positioning represents the most critical element throughout the encounter. Maintain awareness of arena boundaries while positioning yourself to minimize exposure to multiple attack types simultaneously.
Common mistakes include standing too close to The Maven during Cascade of Pain, failing to track Memory Game sequences accurately, and mismanaging flask usage during critical moments.
Optimize your damage windows by capitalizing on Tri-beam Claws and Final Phase opportunities. During these periods, The Maven’s reduced mobility allows for concentrated damage application.
Advanced players should practice the Memory Game mechanic extensively, as this represents the most frequent cause of failure among experienced players.
Survival techniques include pre-positioning before attack telegraphs, maintaining constant movement to avoid projectile tracking, and strategically using the arena’s perimeter to create distance during dangerous sequences.
For comprehensive strategies on character development, consult our Class Guide to ensure your build aligns with The Maven’s specific challenges.
Action Checklist
- Verify 6,000+ effective health and max elemental resistances
- Practice Memory Game pattern recognition in safer environments
- Position Gravity Wells in arena center during Nucleus phase
- Master dodging Cascade of Pain by maintaining maximum distance
- Capitalize on damage windows during Tri-beam Claws attacks
- Execute Final Phase strategy by staying close to The Maven
No reproduction without permission:GameCDjnh » Path of Exile: The Boss Maven Guide – How to Kill The Maven Master The Maven boss fight with essential preparation, phase strategies, and attack patterns for Path of Exile success