Master advanced strategies to conquer Moorwing’s brutal attacks and optimize your combat approach in Hollow Knight Silksong
Understanding Moorwing’s Threat Level
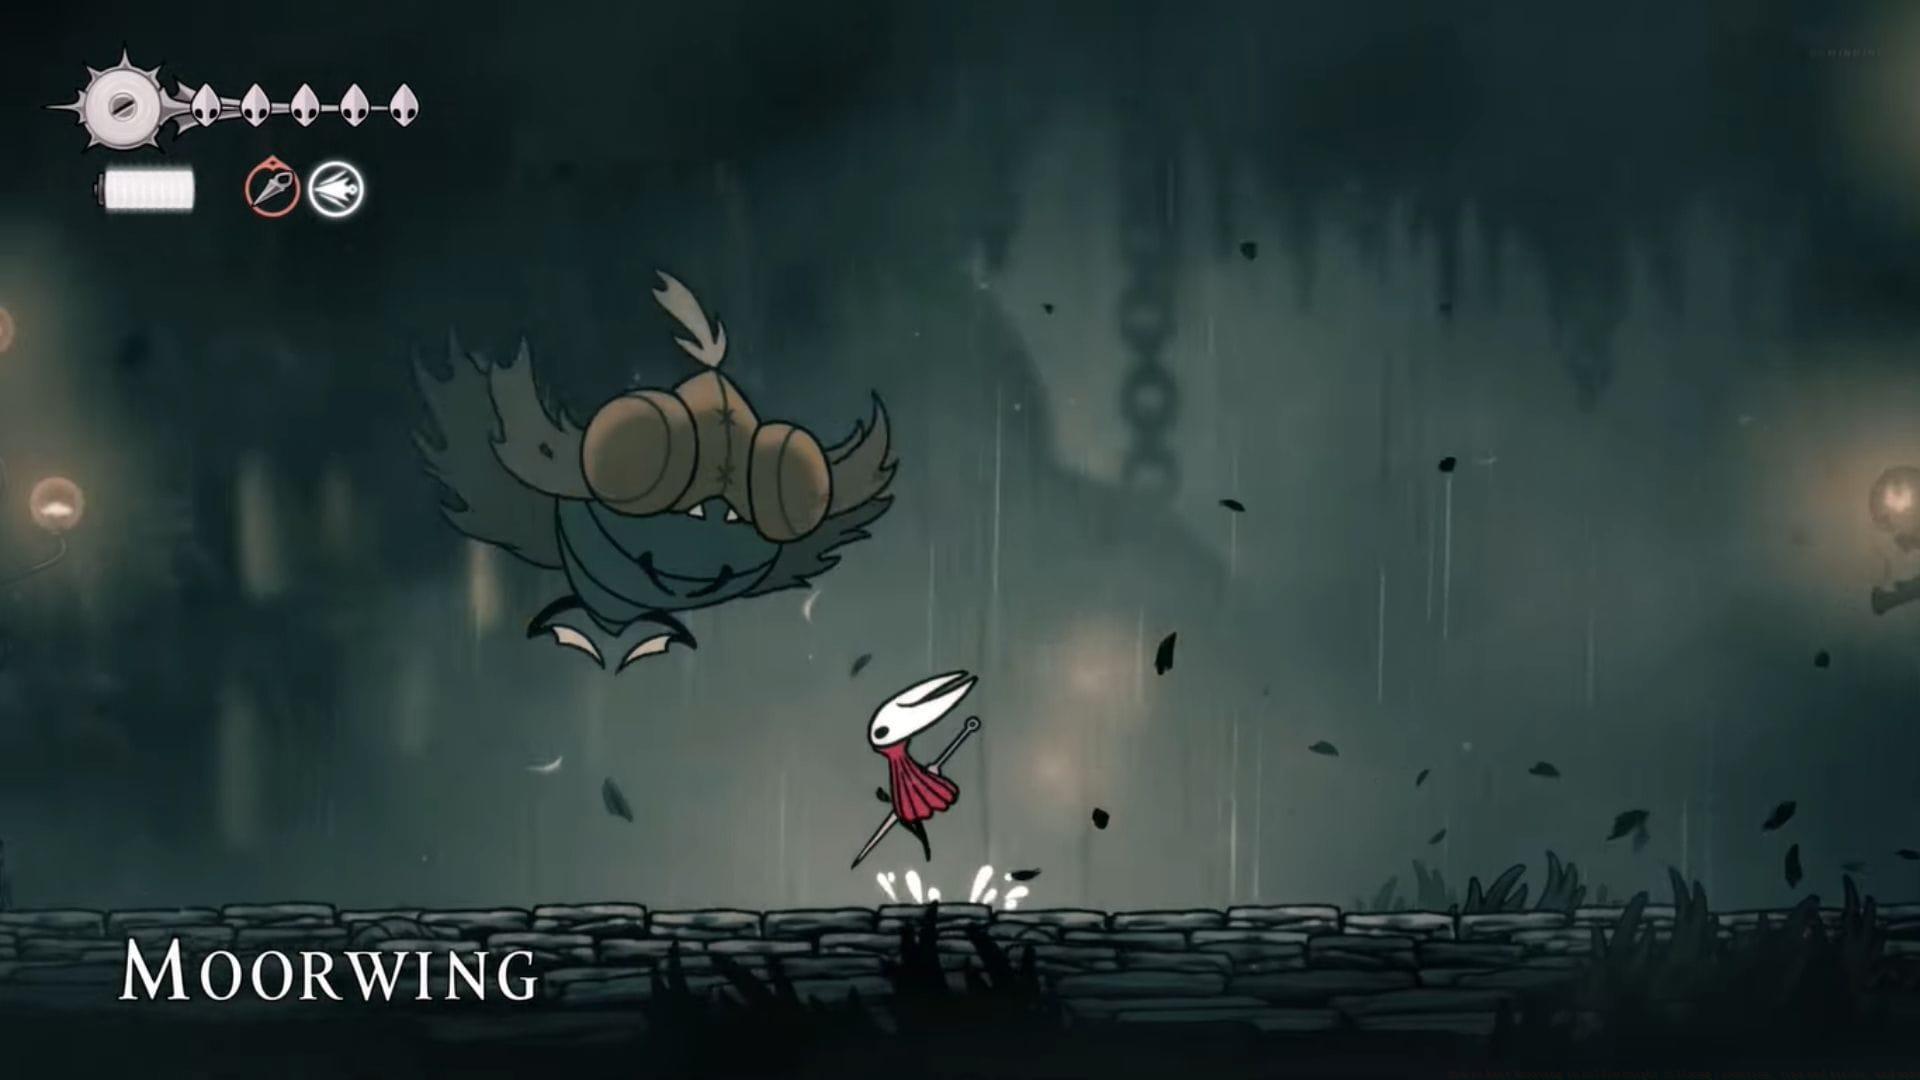
Moorwing presents one of the most punishing boss encounters in Hollow Knight Silksong due to its devastating damage output. Each of its limited move set attacks inflicts exactly two Masks of damage, making even brief lapses in concentration potentially fatal. Unlike bosses where you can absorb occasional hits, Moorwing demands near-perfect execution. The key to victory lies in meticulous pattern recognition and exploiting brief vulnerability windows between its assault cycles.
Successful Moorwing encounters require understanding its four primary attack types and their distinct tells. Each attack follows predictable patterns once recognized, but their execution speed and area coverage make them challenging to evade. Advanced players should note that attack timing may vary slightly based on distance and phase transitions, requiring adaptive response strategies rather than rote memorization.
Attack Pattern Breakdown and Counter Strategies
The dive attack serves as Moorwing’s opening maneuver and positional reset tool. This horizontal charge occurs close to ground level after the boss briefly retreats. While visually straightforward, its deceptive speed often catches newcomers off-guard. Optimal evasion involves jumping with precise timing to clear the attack hitbox while positioning yourself for counter-attack opportunities. Advanced technique: Use Silkbind moves during your jump to extend air time and position yourself advantageously.
Also read: All items in Hollow Knight Silksong and how to get them
Close-quarters combat triggers Moorwing’s claw strike, a rapid slicing motion using its razor-sharp lower claws. This attack creates a dangerous zone directly beneath the boss that must be avoided. The optimal counter-strategy involves maintaining medium distance to bait the attack, then darting in to strike the head during recovery frames. Critical insight: The claw strike has the longest recovery animation of Moorwing’s moveset, providing your most reliable damage window.
Garmond’s intervention during claw strikes creates golden opportunities for sustained damage. When he blocks the attack, you gain several seconds of safe engagement time. However, over-commitment remains dangerous as Moorwing can transition directly into other attacks. Professional tip: Land 3-4 hits maximum during these windows, then reset to neutral positioning.
Spinning blade attacks require heightened spatial awareness and prediction skills. Moorwing signals this move by rapidly closing its wings forward before launching a ground-rolling blade. The projectile maintains consistent ground-level trajectory but gains unpredictable bounce patterns in later phases. Evasion requires well-timed jumps combined with lateral movement to avoid follow-up attacks. Advanced tactic: Use the environment’s vertical space—certain elevated platforms provide safe zones from ground-based blades.
Also read: How to beat Fourth Chorus in Hollow Knight Silksong
The double blade variation represents Moorwing’s most complex attack pattern. Two sequentially launched blades create overlapping danger zones with independent bounce physics. This attack becomes particularly treacherous when Garmond deflects blades, altering their trajectories unexpectedly. Survival requires constant movement and avoiding corner trapping. Expert strategy: Position yourself near wall edges to limit blade bounce angles and create predictable evasion corridors.
Combat Optimization and Ally Utilization
Strategic distance management forms the foundation of consistent Moorwing victories. Maintain approximately 1.5 character lengths distance during neutral phases—close enough to engage during openings but far enough to react to sudden attacks. After landing claw strike counter-hits, immediately create distance to avoid blade follow-ups. When blades are active, carefully monitor Garmond’s position to anticipate deflection angles. Common mistake: Staying too close after successful attacks often leads to unavoidable damage from rapid transition moves.
Health preservation requires absolute priority over damage dealing. Since two hits typically mean defeat, you must heal immediately after taking damage. Safe healing windows occur after dodging double blade attacks and during Moorwing’s extended dive recovery animations. Advanced technique: Unlock and utilize quick-heal abilities to minimize vulnerability during healing actions. Remember that surviving at 1 Mask with healing resources beats aggressive play that risks immediate death.
Understanding the 70+ hit requirement puts the marathon nature of this fight in perspective. This translates to approximately 3-5 minutes of near-perfect execution depending on your damage output. Psychological preparation for this endurance test helps maintain focus during extended combat. Pro tip: Practice consistent rhythm rather than rushed aggression—landing 2 hits consistently per opening beats risky attempts at 3-4 hits that get you damaged.
Advanced Combat Techniques
Optimizing your damage output requires understanding Hornet’s move properties against Moorwing’s hitboxes. Upward slashes consistently connect with the head during dive recoveries, while forward strikes work best during claw attack vulnerabilities. Avoid using dive attacks yourself unless absolutely necessary, as the recovery animation often leaves you exposed to Moorwing’s rapid responses.
Common beginner mistakes include over-commitment during vulnerability windows, misjudging blade bounce patterns, and poor positioning relative to Garmond. Advanced players should focus on these optimization areas: baiting specific attacks through positioning, using environmental features for safety, and managing Silk resources for emergency evasion.
Phase transition awareness becomes crucial as Moorwing’s attack speed slightly increases after taking approximately 30 and 50 hits. During these transitions, expect quicker attack recoveries and more aggressive combo patterns. Preparation for these difficulty spikes prevents unexpected failures during otherwise successful runs.
Ultimate pro strategy: Master the art of “damage banking”—consistently landing 1-2 hits during every opening rather than gambling for larger combos. This conservative approach ultimately yields faster kill times by eliminating death scenarios and maintaining offensive pressure throughout the entire encounter.
No reproduction without permission:GameCDjnh » How to beat Moorwing in Hollow Knight Silksong: Location, tips and tricks, and more Master advanced strategies to conquer Moorwing's brutal attacks and optimize your combat approach in Hollow Knight Silksong