Complete guide to solving Wavey Bay’s Monetoo puzzle and obtaining all chest rewards in Genshin Impact
Introduction to Wavey Bay Puzzle
Wavey Bay represents one of the most engaging puzzle areas within Natlan’s Easybreeze Holiday Resort in Genshin Impact. This scenic coastal region houses an intricate Luxurious Chest challenge that requires locating three elusive Monetoos and completing their associated trials. Successfully restoring all graffiti art not only grants access to the primary Luxurious Chest but also rewards you with two additional Exquisite Chests, making this puzzle particularly valuable for resource collection.
Understanding the puzzle mechanics beforehand significantly enhances your efficiency. Each Monetoo presents unique environmental challenges that test your mastery of the Asha painting system and navigation skills. The rewards justify the effort, providing valuable Primogems, Adventure EXP, and character enhancement materials essential for progression.
First Monetoo Location and Challenge
Your initial Monetoo awaits discovery in a modest campsite situated directly east of the main Luxurious Chest marker. Begin by approaching the dormant Asha figure and establishing connection through the indwell mechanic. Once synchronized, the Monetoo will initiate movement toward a cluster of four distinct Asha dwellings, each requiring specific interaction.
Critical color application sequence: The second house demands proximity activation with its resident Asha. Progress to the third structure where you must apply vibrant yellow pigment to the alpaca toy decoration. Continue to the fourth dwelling and coat the nearby balloon ornament with striking red paint. This precise color coordination triggers the progression mechanism.
Should the Monetoo halt unexpectedly at the second house despite proper Asha engagement, implement this troubleshooting solution: apply blue coloration directly to the house structure itself. This often resolves pathfinding issues and restores the Monetoo’s navigation toward the final graffiti destination.
Second Monetoo Location and Challenge
Venture northward from the Luxurious Chest to locate the second Monetoo perched atop a wooden platform adorned with rainbow motifs. Access this elevated position utilizing the grappling sigil transportation system. Upon reaching the ledge, you’ll encounter a Chroma Kite device that requires color activation to become functional.
Engage the Chroma Kite by applying appropriate pigments, then deploy it to approach the star-patterned graffiti displayed on the adjacent wall surface. The stellar design demands specific color placement: designate the central star with yellow hue while coloring the two flanking stars with blue tones. This chromatic arrangement successfully completes the artistic restoration.
After fulfilling the star coloration requirements, return to the primary puzzle zone and accompany the Monetoo as it journeys toward its designated graffiti canvas. This segment tests your understanding of the grappling mechanics and color puzzle solving simultaneously.
Third Monetoo Location and Challenge
The third Monetoo requires exploration of the western ledge accessible via grappling sigil traversal. This area conceals an entrance to a subterranean chamber that houses the final puzzle component. Before descending, ensure your active party composition includes capable combat units, as this area contains hostile entities.
Upon entering the concealed room, eliminate all adversarial forces to secure the area. The Monetoo remains confined within a restrictive cage that demands liberation. Simultaneously, inspect the chamber for a Remarkable Chest that provides additional rewards beyond the primary puzzle objectives.
After successfully rescuing the captured Monetoo from its imprisonment, guide the entity back to its corresponding graffiti location. This segment combines combat proficiency with puzzle-solving finesse, offering substantial rewards for prepared adventurers.
Final Puzzle Completion
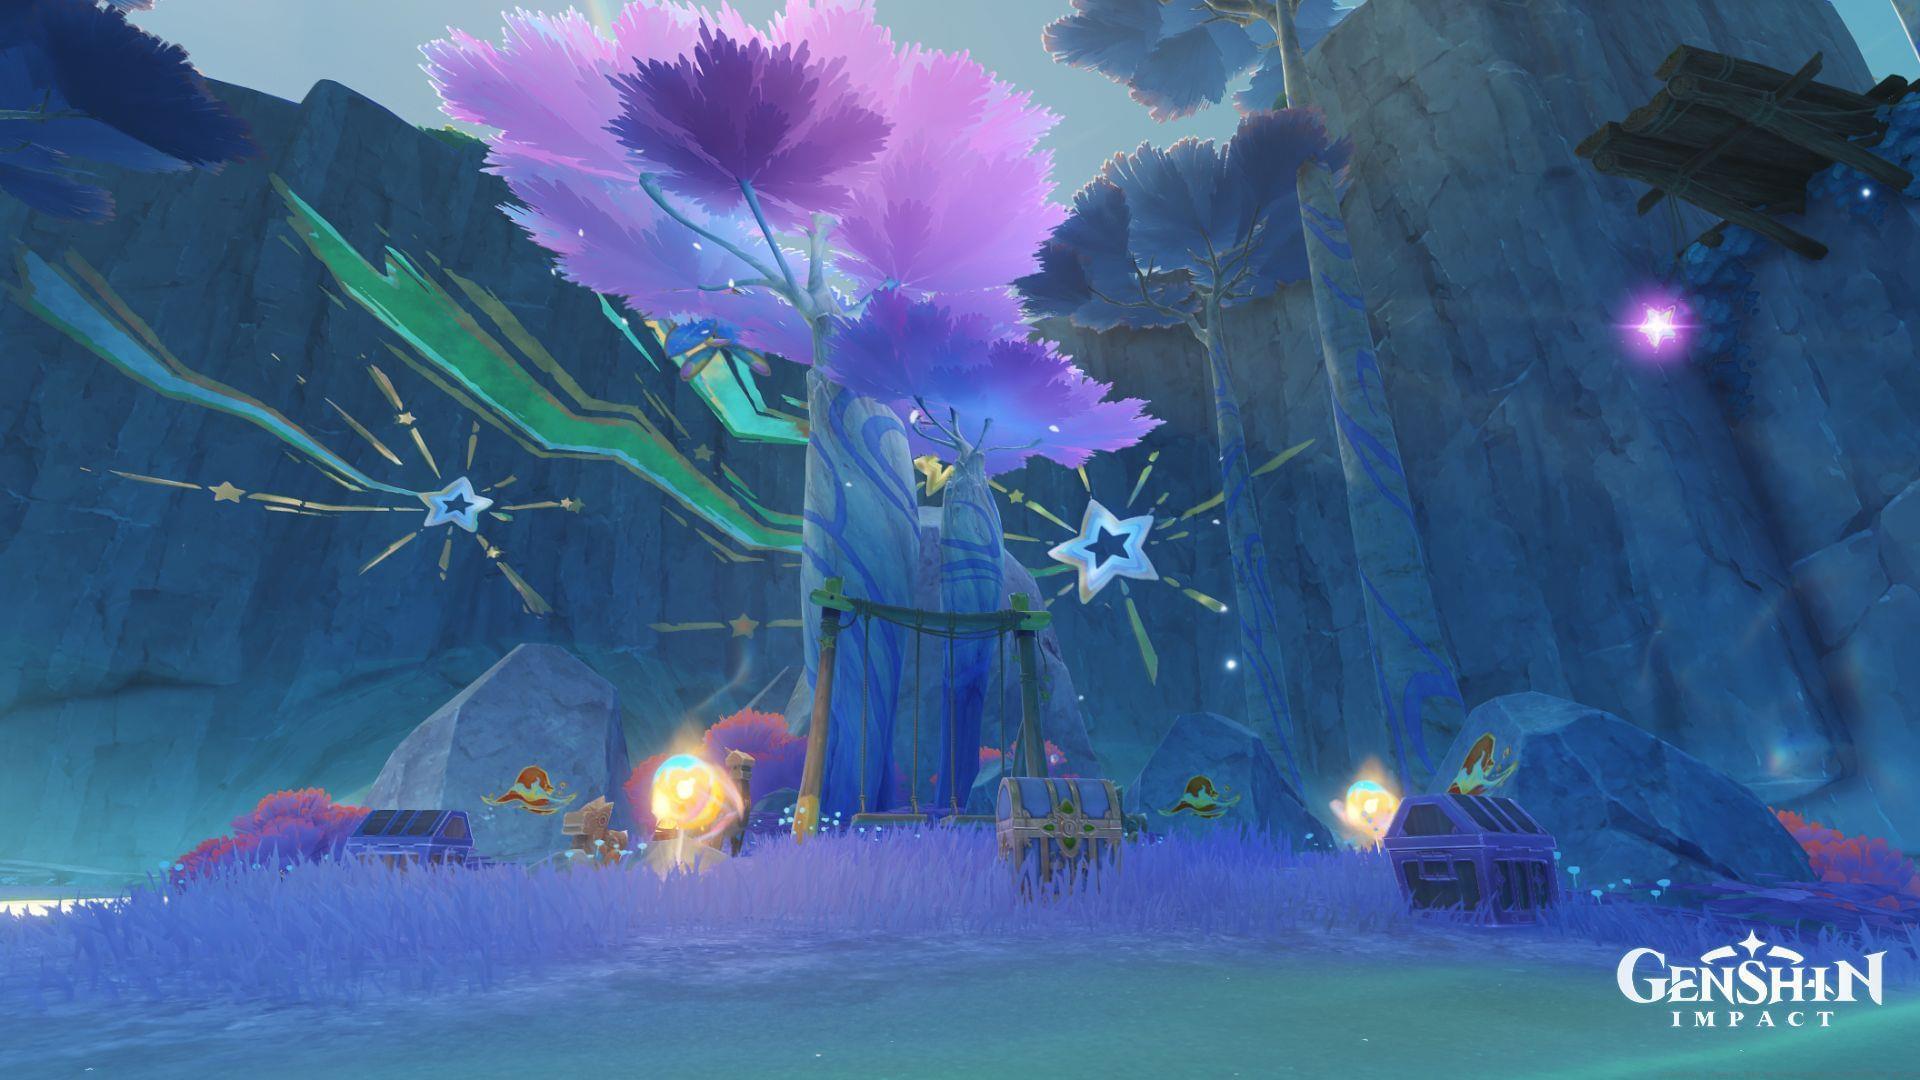
With all three Monetoo graffiti artworks fully restored, the puzzle enters its concluding phase. Locate and interact with the swing apparatus positioned within the puzzle area to initiate the final challenge sequence. This interaction serves as the activation mechanism for the reward distribution system.
Upon successful swing activation, the game awards your efforts with two Exquisite Chests alongside the premier Luxurious Chest. These containers yield substantial resources including Primogems, character experience materials, and potential artifact discoveries.
For optimized completion, consider these advanced strategies: complete the puzzle during daylight hours for improved visibility, ensure your party contains at least one archer for distant pigment application, and prepare combat capabilities before accessing the secret chamber. These preparations minimize completion time and maximize reward acquisition efficiency.
No reproduction without permission:GameCDjnh » Genshin Impact Wavey Bay Luxurious Chest guide Complete guide to solving Wavey Bay's Monetoo puzzle and obtaining all chest rewards in Genshin Impact