A comprehensive guide to mastering Baldur’s Gate 3’s Photo Mode with expert tips for creating stunning in-game photography
Introduction to Photo Mode
Baldur’s Gate 3’s Photo Mode represents one of Larian Studios’ most impressive content additions, introduced in the extensive Patch 8 update spanning 48 pages of detailed notes. This sophisticated photography system enables players to capture any moment from their adventure with professional-grade controls, transforming ordinary gameplay into gallery-worthy artwork or intricate narrative compositions.
Alternatively, you can activate Photo Mode by selecting the camera icon positioned beneath your mini-map interface. This dual-access system ensures both controller and mouse/keyboard users can quickly enter creative mode.
Important limitation: While Photo Mode operates fully during regular gameplay, using it during cinematic cutscenes or dialogue sequences restricts your control to post-processing effects, decorative stickers, and framing options only. Plan your photography sessions accordingly.
Multiplayer photography note: Photo Mode functions in both multiplayer sessions and split-screen cooperative play, but only the session host can activate it. When engaged, the feature automatically pauses gameplay for all participants, so coordinate with your party before extensive photography sessions.
Camera Controls and Movement
Once you’ve activated Photo Mode in Baldur’s Gate 3, your primary objective becomes positioning the virtual camera exactly where you envision your composition. Understanding the comprehensive control system is essential for achieving professional results. You can manipulate the camera either through the dedicated control HUD interface or utilize direct keybindings for more immediate responsiveness:
Pro Controller Tip: Console players should note that HUD navigation utilizes identical button mappings as camera control. Use Triangle (PS5) or Y (Xbox) to seamlessly switch between manipulating your camera and adjusting settings within the interface.
Photo Mode incorporates a valuable camera position memory feature, allowing you to save specific coordinates for later retrieval. This functionality encourages creative experimentation with different angles and compositions—if a particular approach doesn’t produce desired results, you can instantly return to your saved viewpoint with a single button press.
Advanced Camera Settings
Baldur’s Gate 3’s Photo Mode includes comprehensive camera configuration options accessible through dedicated settings tabs. These parameters provide granular control over photographic elements, determining which characters maintain central focus, whether the camera follows moving subjects, tilt intensity, and numerous other professional variables.
The Lens Settings tab delivers precise control over fundamental photographic characteristics that define image quality and artistic impact:
Professional Photography Advice: For dramatic character portraits, combine narrow Field of View with strong Depth of Field effects focused specifically on your subject. This technique isolates characters from their environment, creating cinematic emphasis. When capturing expansive landscapes, widen your Field of View while minimizing Depth of Field strength to maintain clarity throughout the scene.
Character Customization
One of Photo Mode’s most impressive capabilities involves dynamically adjusting your party members’ actions and emotional expressions to suit your photographic vision. Navigate to the “Character Settings” tab to access these powerful narrative tools. Initially, you can determine which companions appear within your scene, selecting from available party members and NPCs present in your current location.
After selecting visible characters, choose any party member or playable character on-screen to apply the following expressive and positional adjustments:
The final customization tier enables visibility toggling alongside quality-of-life cosmetic adjustments:
Related content exploration: Baldur’s Gate 3: All newly added subclasses explained
Character Photography Strategy: Create narrative sequences by saving multiple camera positions with different character expressions and poses. This workflow allows you to build visual stories showing character development or party interactions across several linked images. For authentic-looking scenes, avoid having all characters stare directly at the camera—mix gaze directions to simulate natural group dynamics.
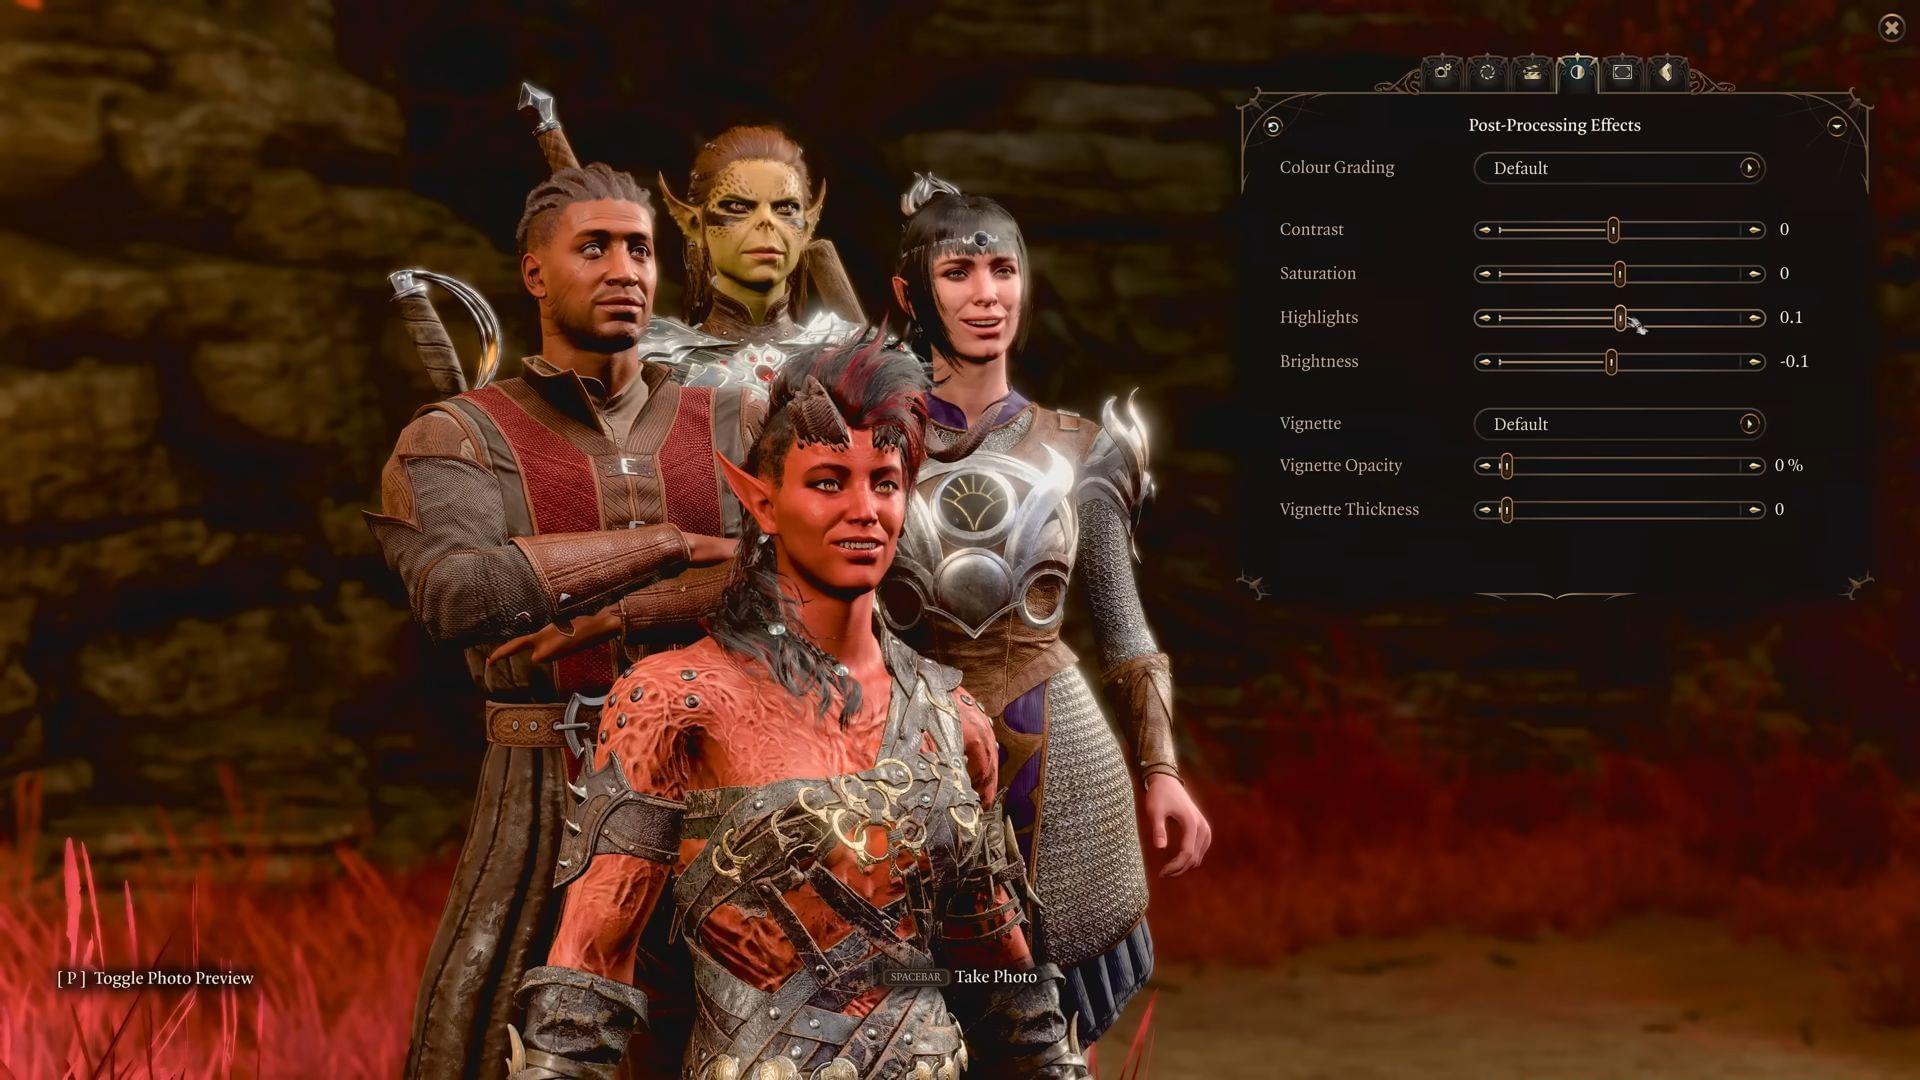
Post-Processing and Effects
Post Processing Effects
Baldur’s Gate 3’s Photo Mode includes comprehensive post-processing effects that transform raw captures into polished artistic creations:
Beyond post-processing, Photo Mode enables frame additions and cinematic aspect ratio bars for professional presentation:
Select from curated in-game preset frames to complement your image’s theme and mood. Each frame includes adjustable opacity controls for seamless integration with your composition.
Apply vertical or horizontal black bars to create cinematic widescreen or portrait aspect ratios. These bars include adjustable width/height parameters alongside opacity controls for customized implementation.
The sticker system allows insertion of up to 30 decorative elements (currently limited to in-game presets) with comprehensive control options including scaling, rotation, and layering capabilities.
Visual Effects Strategy: Apply color grading first to establish overall mood, then adjust contrast and saturation to enhance that mood’s intensity. Add vignettes last to subtly direct viewer attention. For cohesive image sets, maintain consistent color grading across related screenshots to create visual narrative continuity.
Saving and Sharing Your Creations
Steam version screenshots automatically save to this directory path:
Console players access their photographic creations through platform-specific interfaces:
You now possess comprehensive knowledge of Baldur’s Gate 3’s Photo Mode fundamentals. This powerful creative toolkit transforms your gameplay experiences into personalized artistic expressions. Remember that mastery develops through experimentation—don’t hesitate to capture numerous variations of the same scene while adjusting different parameters to discover your unique photographic style.
Sharing Optimization: Before sharing screenshots externally, consider cropping to standard social media aspect ratios (16:9 for Twitter/Facebook, 4:5 for Instagram portraits). Use minimal compression when exporting to preserve Larian’s detailed texture work. Create thematic screenshot collections that tell visual stories about your particular playthrough journey.
No reproduction without permission:GameCDjnh » Everything you need to know about the new Photo Mode in Baldur’s Gate 3 A comprehensive guide to mastering Baldur's Gate 3's Photo Mode with expert tips for creating stunning in-game photography