Master the strategy to defeat Pazuzu in Dragon Quest 1 & 2 HD-2D Remake with expert tactics and party optimization
Understanding Pazuzu’s Role and Battle Locations
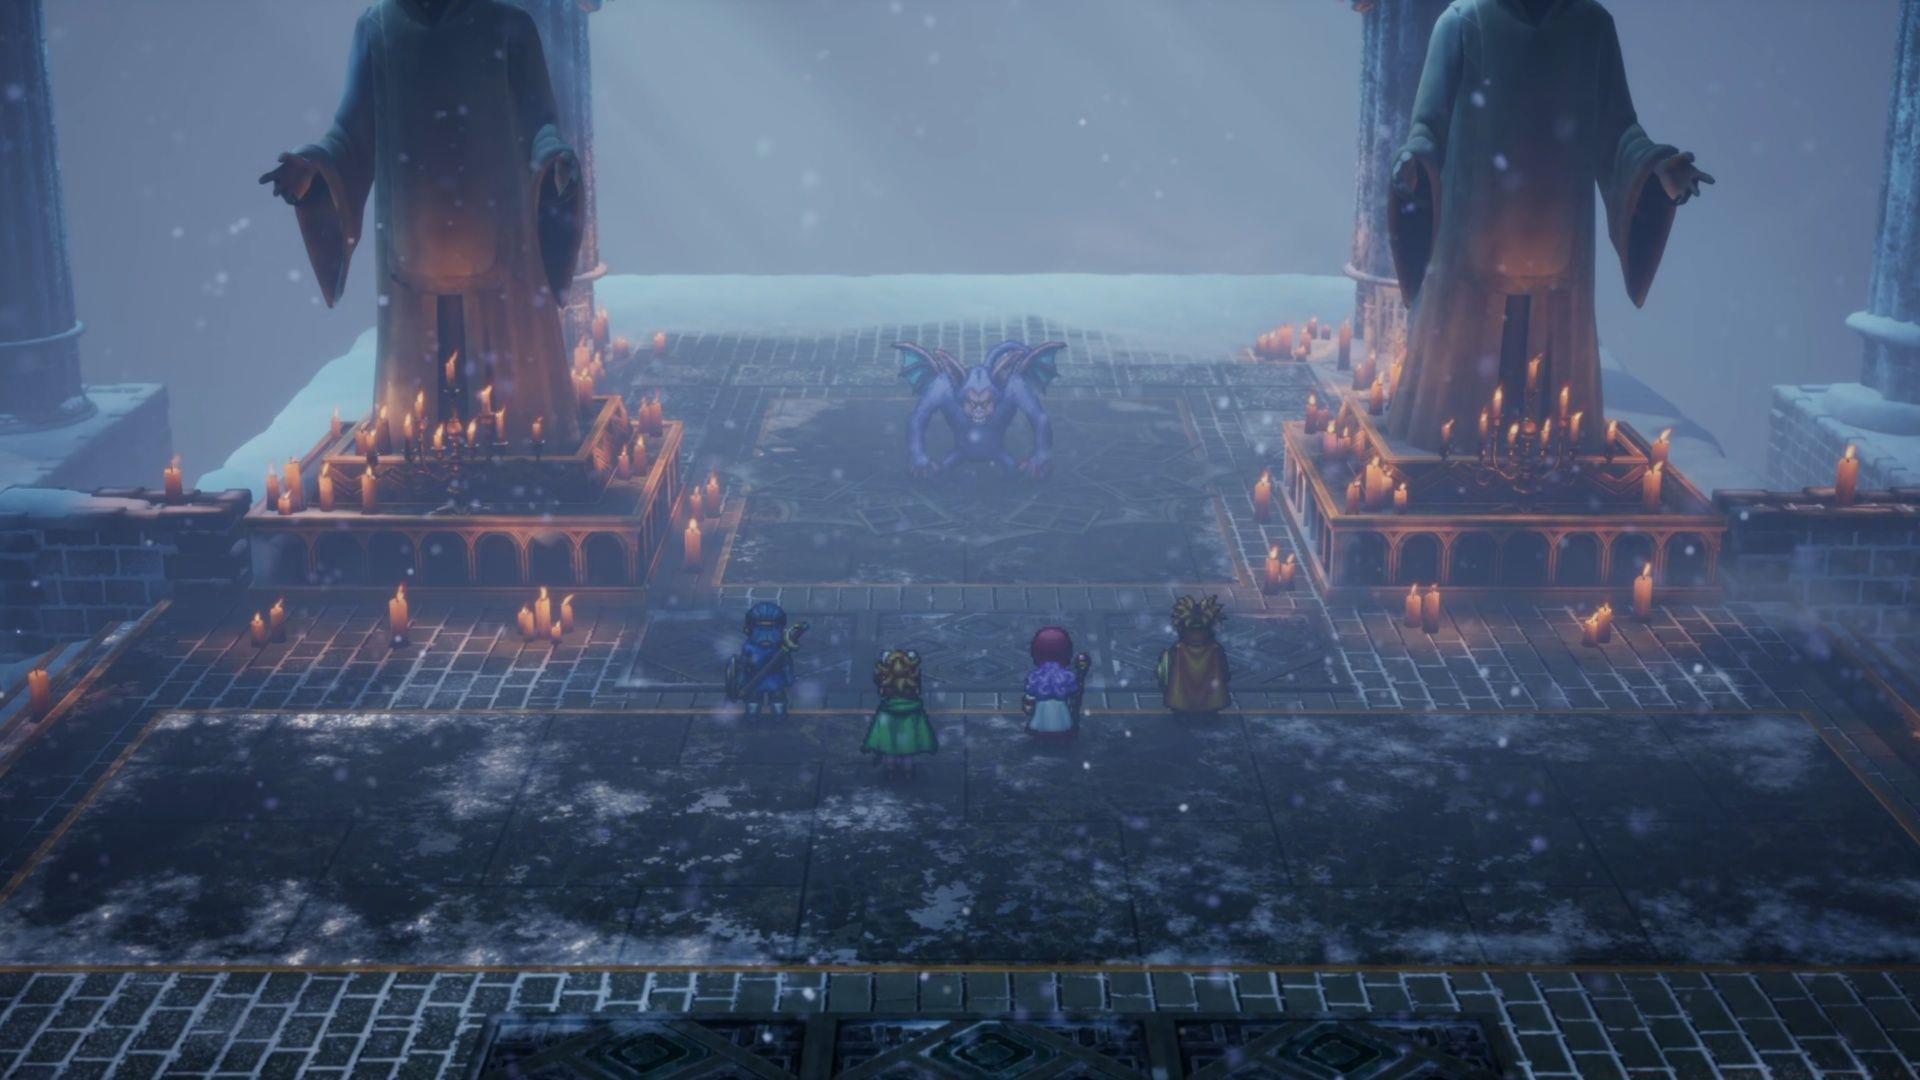
As a primary lieutenant serving under High Priest Hargon, Pazuzu represents one of the final major story bosses you’ll encounter in the Dragon Quest 2 portion of the HD-2D Remake. Your initial confrontation occurs within Pazuzu’s Lair, where he tests your party’s capabilities before the ultimate showdown. The rematch happens later at Rendarak, Hargon’s fortress, where Pazuzu returns with enhanced durability but identical combat patterns. Understanding that his strategy remains consistent between encounters allows you to master the fight mechanics during the first engagement.
Many players underestimate the importance of learning Pazuzu’s patterns during the initial fight, only to struggle when facing his powered-up version. The key difference lies in his health pool scaling—the Rendarak encounter features approximately 30-40% more HP, requiring greater endurance from your party but no fundamental strategy changes.
Pazuzu’s Arsenal: Spells and Attack Patterns
Pazuzu’s most feared ability is his frequent casting of Thwack, an instant-death spell that can eliminate multiple party members simultaneously. This makes him particularly dangerous for unprepared teams. However, players utilizing the Dracky Quest difficulty mode gain immunity to these instant-kill effects through invulnerability settings.
His complete moveset includes several devastating options that require careful preparation:
The Wild Side ability represents one of his most dangerous patterns, as it effectively doubles his action economy. When you see him activate this buff, prepare for potentially devastating combination attacks that can overwhelm your healing capabilities.
Optimal Party Strategy and Role Assignment
Pazuzu demonstrates significant vulnerability to specific physical attacks, particularly Demon Demeanor and Cattle Prod techniques. Magical assaults prove largely ineffective against him, making a Midenhall-focused physical strategy your optimal approach. The core sequence involves applying Oomph to amplify your Hero’s damage output, followed by Muster Strength for additional power stacking, then unleashing either Demon Demeanor, Cattle Prod, or Multifists abilities.
Maintaining defensive buffs proves crucial for survival. Ensure Magic Barrier and Insulatle remain active throughout the engagement to mitigate his spell damage. Fortunately, Pazuzu possesses critical weaknesses to status ailments that can trivialize the encounter. Both Rib Tickler (available to Matilda) and Puff Puff (usable by Hero or Peronel) connect with remarkably high success rates, often disabling him for multiple turns.
This status vulnerability enables you to control the battle’s pace by keeping Pazuzu incapacitated while your Hero dismantles his health bar. Here’s the optimized role distribution for each party member:
Positioning Peronel with the Duplic Hat accessory significantly enhances healing effectiveness during critical moments when multiple characters require simultaneous recovery.
Advanced Tactics and Common Pitfalls
Despite his intimidating spell list, Pazuzu doesn’t represent an exceptionally difficult adversary when properly prepared. The most common mistake involves underestimating his action economy when Wild Side activates—this frequently catches players off-guard and can lead to party wipes. Always maintain your buffs, as letting Magic Barrier or Insulatle expire dramatically increases incoming damage.
Advanced players can optimize further by equipping the Meteorite Bracer on the Hero to guarantee first strikes, allowing you to apply crucial buffs before Pazuzu acts. The Silver Shield provides excellent magical resistance for your frontline characters, while the Magic Armor significantly reduces spell damage taken.
Another frequent error involves wasting turns on ineffective magical attacks. Remember that Pazuzu possesses high magic resistance, making physical abilities your only reliable damage source. Don’t attempt to out-damage him with spells—focus exclusively on buffing your Hero’s physical output while controlling Pazuzu with status effects.
For players struggling with the encounter, consider grinding a few additional levels near Rendarak to increase your health pools and damage output. The difference between level 28 and level 31 characters can transform this from a challenging fight to a manageable encounter.
Explore our additional Dragon Quest 1 & 2 HD-2D Remake strategy content
No reproduction without permission:GameCDjnh » Dragon Quest 1 & 2 HD-2D Remake: How to beat Pazuzu (DQ2) Master the strategy to defeat Pazuzu in Dragon Quest 1 & 2 HD-2D Remake with expert tactics and party optimization