Complete guide to mastering The Burning Mountains quest with stealth strategies and combat tips
Quest Overview and Preparation
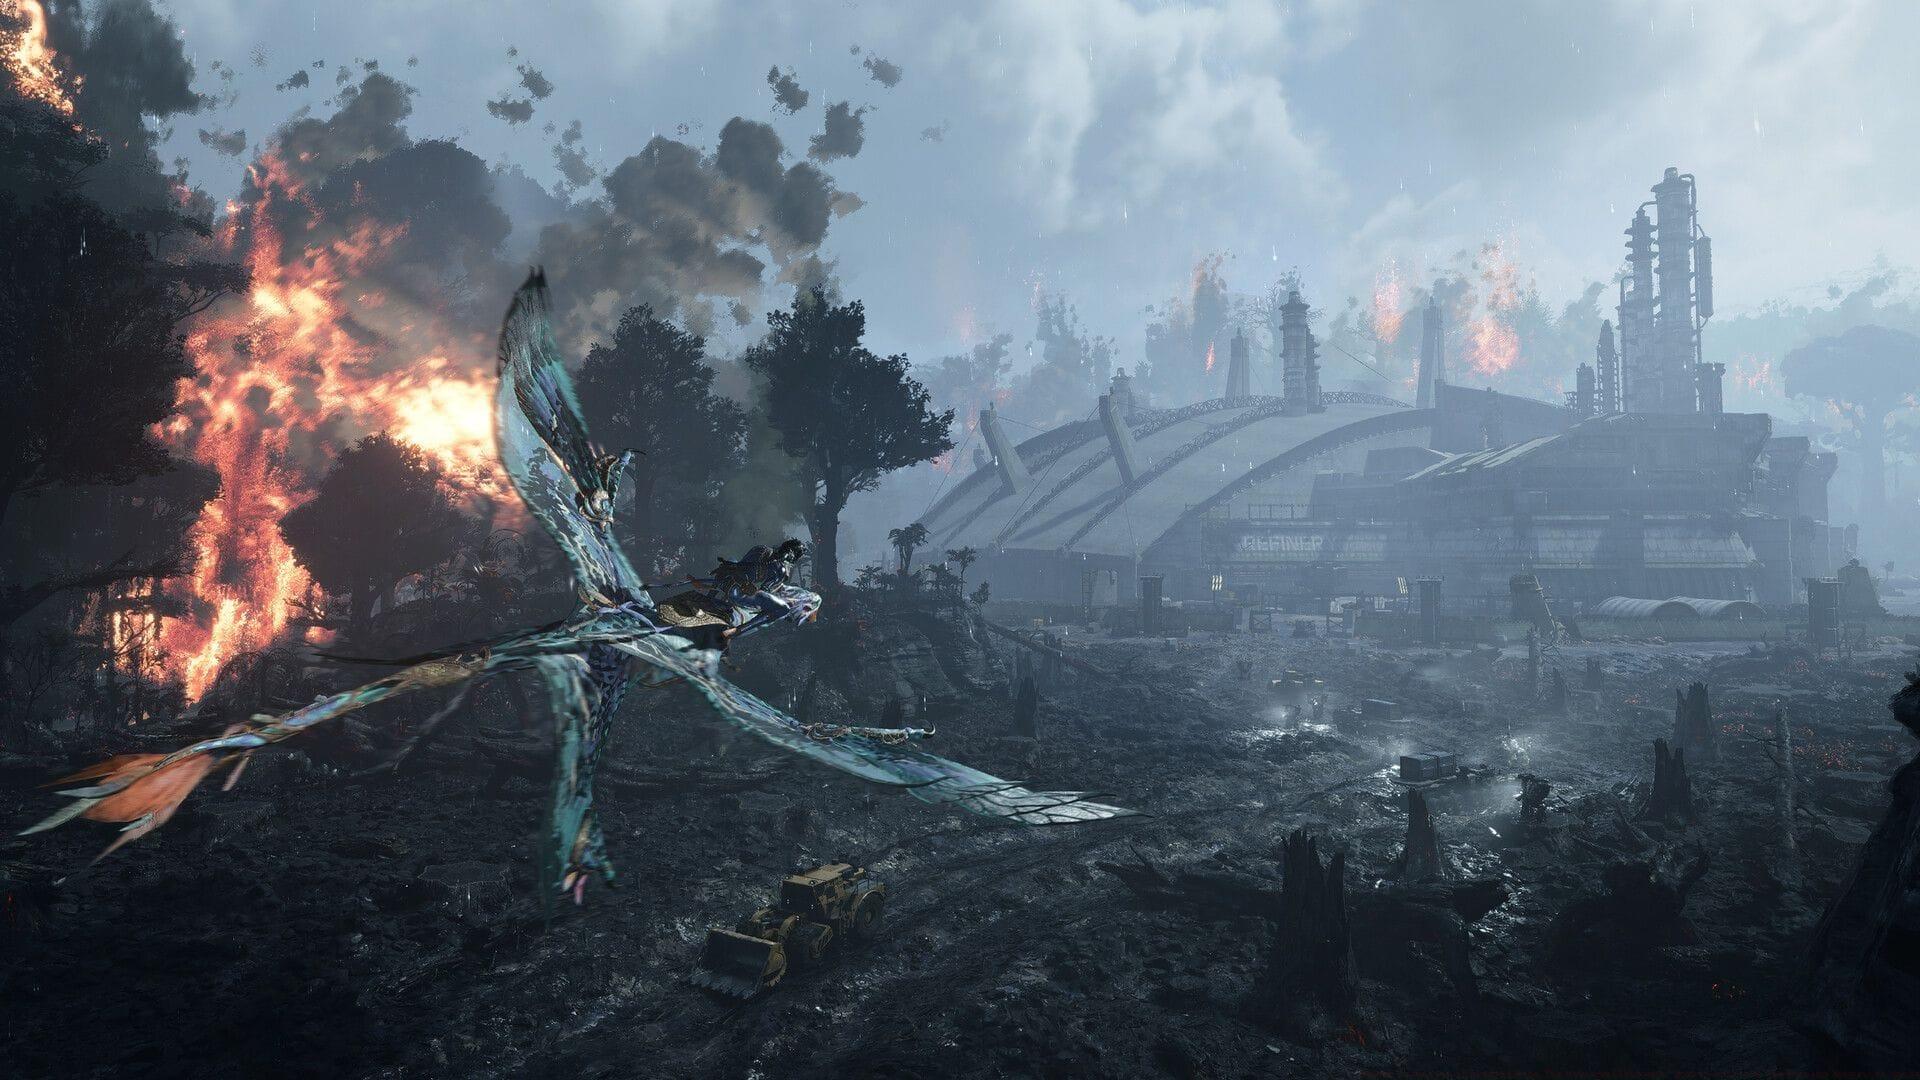
The Burning Mountains quest represents a critical story mission within Avatar Frontiers of Pandora’s From The Ashes expansion, categorized under the Save Your People narrative arc. This challenging operation becomes accessible in Kinglor Forest after you’ve completed the Alone introductory mission, marking your progression into mid-game content. The primary objective involves locating Teylan at the heavily guarded Ikran Rookery, requiring careful planning and execution.
When preparing for this mission, ensure your character has adequate stealth capabilities and ranged combat proficiency. The RDA presence includes specialized sniper units that can detect you from significant distances, making approach strategy crucial. Unlike earlier missions, The Burning Mountains introduces vertical combat scenarios that test your mobility and positioning skills.
Rookery Infiltration and Navigation
Approaching the designated area triggers a critical warning from Teylan about RDA sniper positions overlooking the main pathways. Dismount from your Ikran well before reaching the visible perimeter and continue infiltration on foot to maintain stealth advantages. The optimal entry point is the concealed cave system positioned to the left of the main Rookery entrance, which provides cover from aerial patrols and sniper sightlines.
Once inside the cavern network, immediately take the right branching path to initiate your vertical ascent. You’ll encounter Forest Gate Lily obstacles that require precise arrow shots to clear progression routes. These biological barriers serve as both navigation challenges and early warning systems—destroying them alerts nearby RDA patrols if done carelessly. Follow the massive organic branch structures to locate climbable vines that provide access to elevated pathways.
Advanced navigation tip: Use Na’vi senses frequently to identify interactive environmental elements before they become visible. The Rookery’s interior features multiple branching paths, but the rightward route consistently offers the most direct access to upper levels while minimizing enemy encounters during initial infiltration phases.
Combat Encounters and Stealth Approaches
Reaching the upper cavern areas brings you into contact with RDA patrol groups including heavily armored AMP mechanized suits. These walking fortresses present significant threats in direct confrontations. The most effective countermeasures involve ascending to elevated positions to target the operator compartment or executing rear-assault maneuvers to disable power systems. Your Na’vi senses reveal critical weak points on both standard troops and mechanized units—target these areas for maximum efficiency.
Further progression reveals a captured Na’vi warrior surrounded by RDA guards in a strategically complex area. This rescue scenario offers multiple engagement options:
- Stealth Archery Approach: Eliminate guards protecting the Na’vi using silent takedowns and bow attacks from concealed positions
- AMP Neutralization: Approach mechanized suits from behind using terrain cover for stealth takedowns unavailable in frontal assaults
- Priority Target Elimination: Quickly eliminate the two RDA troopers positioned at the perimeter to prevent reinforcement calls
Completing this engagement sequence rewards you with a Short Bow upgrade from Itu, providing enhanced damage output for subsequent encounters. This weapon proves particularly effective against the light armor worn by RDA sniper units encountered later in the mission.
Common mistake: Attempting to rescue the captured Na’vi through direct assault typically triggers overwhelming reinforcements. Instead, use the terrain’s vertical elements and foliage coverage to isolate and eliminate enemies systematically before approaching the prisoner.
Mountain Ascent and Final Approach
The concluding phase involves a dangerous vertical ascent while RDA forces actively target your position with sustained firearms and rocket attacks. This segment introduces dynamic combat mobility challenges as platforms become unstable under fire. Multiple enemy placements including roaming AMP units require careful engagement decisions:
- Environmental Utilization: Use rock formations and vegetation for concealment while marking targets through Na’vi senses
- Mechanized Threat Management: Detection by AMP patrols creates difficult combat scenarios—avoid or isolate them when possible
- Vertical Navigation: Floating platforms enable bypassing lower-level enemies entirely through strategic positioning
- Aerial Threat Response: Hostile helicopters require precise wing shots rather than center-mass targeting
- Engagement Selectivity: Comprehensive enemy elimination is unnecessary—stealth progression remains viable throughout
The route to Teylan follows a relatively straightforward path despite the combat complexity. Emphasize stealth movement during platforming sections since open firefights severely limit mobility options. Reaching the summit triggers a narrative cutscene that concludes The Burning Mountains quest, advancing the From The Ashes storyline significantly.
Pro tip: The ascent sequence contains multiple optional paths that offer tactical advantages. The eastern route provides superior cover from sniper fire, while the western path offers more environmental interaction opportunities for creative combat solutions.
No reproduction without permission:GameCDjnh » Avatar Frontiers of Pandora From The Ashes walkthrough: How to complete The Burning Mountains quest Complete guide to mastering The Burning Mountains quest with stealth strategies and combat tips