Complete guide to liberating the rare Scourgewing dragon in Wuthering Waves 2.4 Guardian Tower quest
Quest Overview and Preparation
The expansive Wuthering Waves 2.4 expansion introduces Septimont, Rinascita’s largest metropolitan area teeming with ancient gladiator lore and elusive dragon species. Within this new territory lies the Guardian Tower questline, offering players the extraordinary opportunity to emancipate a captive Scourgewing—a rare draconic entity with unique characteristics.
Preparation Tips: Before embarking on this expedition, ensure your character possesses adequate combat capabilities for confronting multiple Tacet Discord encounters. Recommended Resonance Power level should exceed 45 for optimal performance. Stock up on healing items and consider bringing characters with aerial combat proficiency to handle the tower’s vertical challenges.
Initial Investigation and Tower Entry
Begin your journey at the Mournfell Canyon Resonance Beacon, where you’ll encounter Tulia stationed at the tower’s northern entrance. This NPC serves as your primary quest guide and provides essential context about the distressed creature’s origins.
Navigation Strategy: The tower entrance features a distinctive architectural design with visible energy seals. Execute Hero’s Slash precisely on the glowing barrier—timing matters here as delayed strikes may require multiple attempts. Pro tip: Position yourself at optimal distance (approximately 3-4 character lengths) for maximum slash effectiveness.
Upon breaching the initial barrier, immediately investigate the dragon-themed mural adjacent to the doorway. These paintings contain crucial narrative elements and occasionally trigger environmental interactions.
Tower Exploration Mechanics
Progressing deeper reveals chambers populated by Tacet Discord adversaries. Combat efficiency is paramount—focus on eliminating spellcasters first as they can summon reinforcements. After clearing enemies, examine the luminous armor fragments for historical insights about Septimont’s gladiatorial legacy.
Advanced Movement: The tower’s upper levels require sophisticated Hero’s Slash applications. Execute diagonal slashes for angled barriers and remember to dismantle wooden obstructions by interacting with clearly marked pull-points. Many players overlook the strategic viewpoint from the large window—scanning the external environment often reveals hidden pathways.
Staircase exploration leads to additional dragon-themed artworks depicting gladiator combat sequences. These narrative elements provide context for the Scourgewing’s imprisonment and the tower’s original purpose.
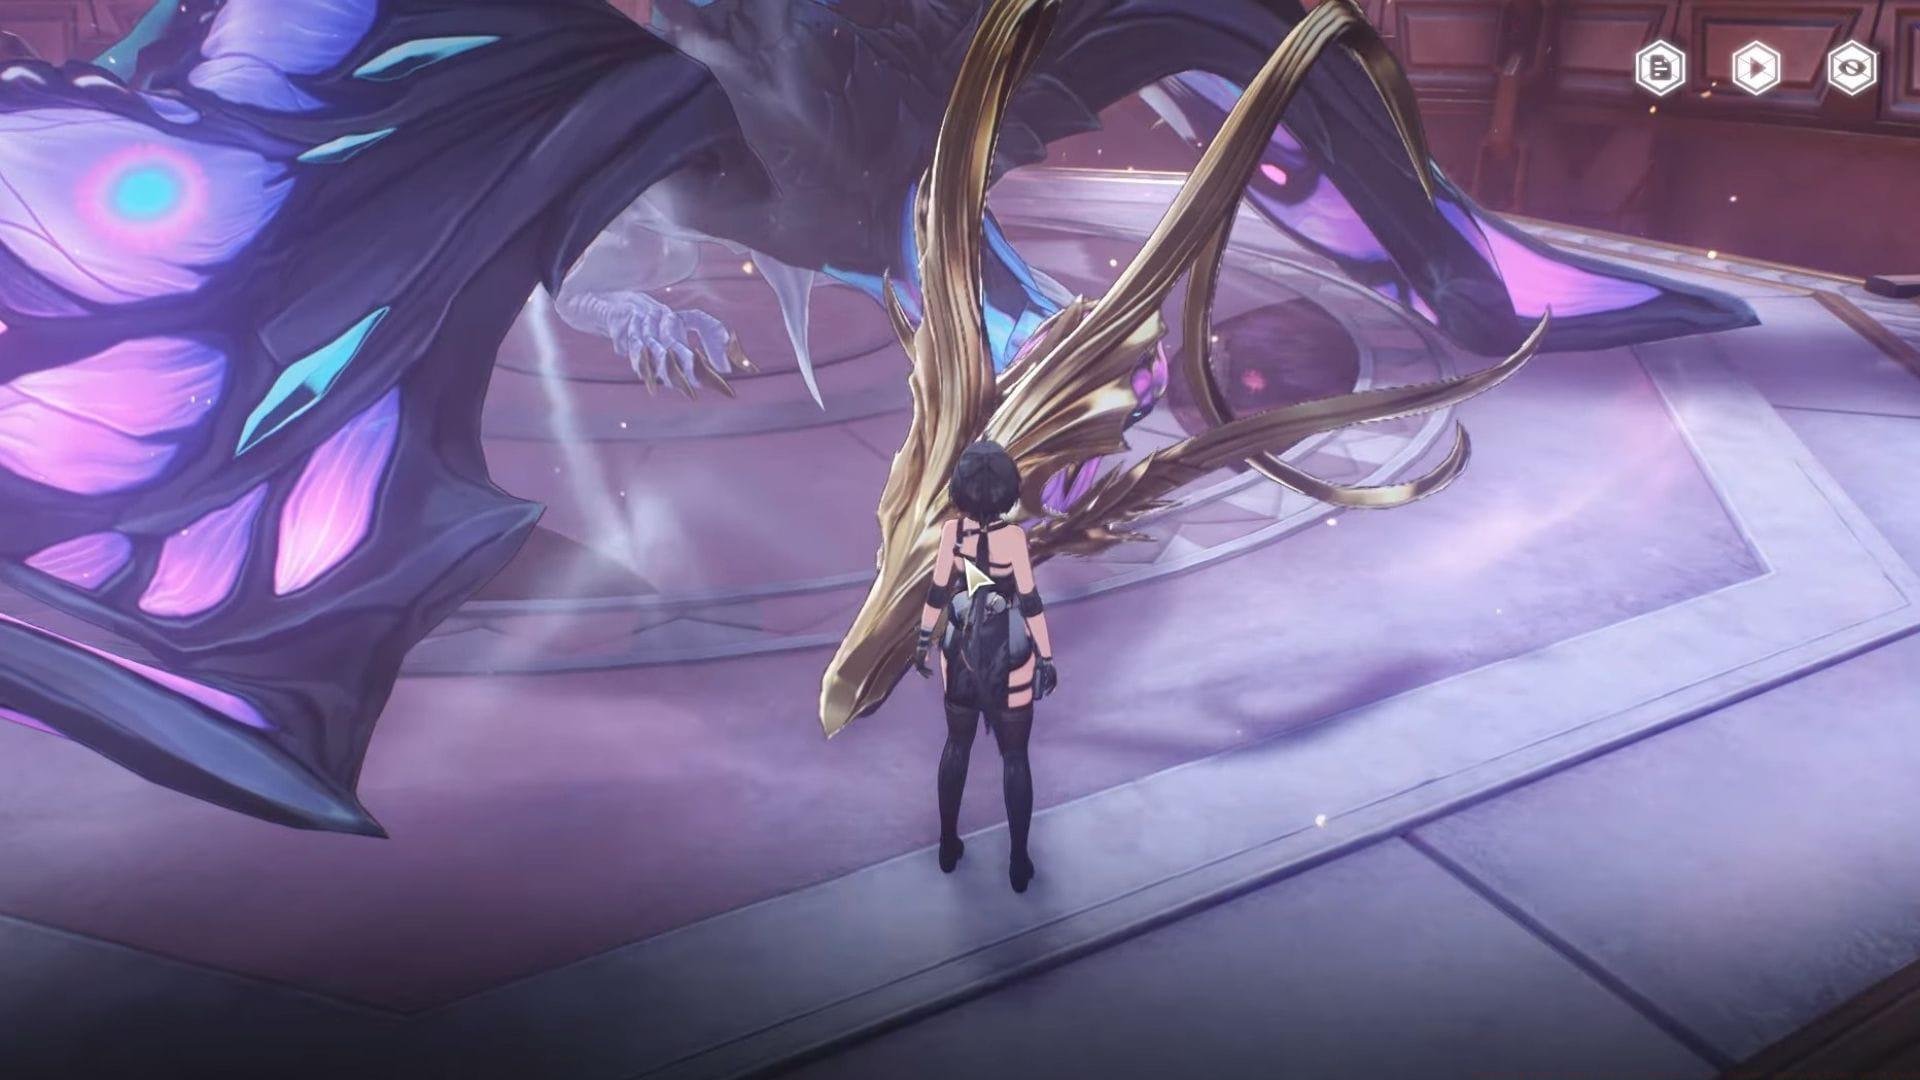
Dragon Liberation Process
The climactic chamber houses the tethered Scourgewing, bound by luminous threads requiring precise swordplay. Deploy Sword of the Giant Summon for horizontal cutting motions across multiple threads simultaneously. This specialized technique dramatically reduces liberation time compared to individual thread targeting.
Charge Collection: After freeing the dragon, navigate downward using the emergent floating staircases or controlled descent. The subsequent chamber contains three essential Hero’s Rend charges: first from the glowing sword interaction, second from the retrieved helmet, and finally from the statue’s spear absorption.
Common Pitfall: Many players mistakenly use Hero’s Rend charges prematurely. Conserve all three charges exclusively for the final platform sequence where they’re required for obstacle clearance.
Advanced Strategies and Rewards
The culminating sequence demands precise Wingray deployment to reach Scourgewing Isth’s platform. Master the momentum-based gliding mechanics—initiate glide from elevated positions and utilize air currents for extended mobility.
2D Perspective Puzzle: The observer tower segment transitions to lateral movement mechanics. Navigate carefully as missteps can reset progression. The final Hero’s Slash against the tower structure requires charged attack execution—hold the attack button until visual cues indicate maximum power.
Reward Analysis: Successful completion yields substantial benefits:
- Union Experience x500 – Significant faction reputation progress
- Advanced Resonance Potion x3 – Valuable character enhancement resources
- Advanced Sealed Tube x3 – Rare crafting components for end-game gear
These rewards substantially accelerate character progression and equipment development.
No reproduction without permission:GameCDjnh » Wuthering Waves Where Sky is Clear and Glory Shines: Guardian Tower quest guide Complete guide to liberating the rare Scourgewing dragon in Wuthering Waves 2.4 Guardian Tower quest