TL;DR
- Complete 8-boss Tazavesh Megadungeon walkthrough with detailed mechanics explanations
- Strategic positioning tips and common mistake avoidance for each encounter phase
- Optimized group coordination strategies for complex mechanics and environmental hazards
- Essential preparation requirements and unlock process for accessing the Veiled Market
- Advanced optimization techniques for experienced players seeking faster clear times
The highly anticipated World of Warcraft Shadowlands Chains of Domination expansion introduces the challenging Tazavesh Megadungeon within the mysterious Veiled Market. As players worldwide prepare to explore this new content, understanding the access requirements becomes crucial for successful progression.
Gaining entry to this Broker-controlled zone requires completing a specific quest chain that begins in Oribos. Visit the Innkeeper to acquire “The Al’ley Cat of Oribos” mission, which involves interacting with multiple Broker NPCs across different zones. The journey culminates in boarding a star-faring vessel that transports your group directly to the elusive Veiled Market location.
Navigation through the teleportation network requires careful attention to Broker dialogue and environmental cues. Successfully completing this initiation process grants permanent access to Tazavesh for future dungeon runs.
Zophex presents the initial major challenge with his aggressive pursuit mechanics and environmental hazards. The Interrogation ability targets a random player, initiating a chase sequence where the boss unleashes devastating frontal damage with spinning blades. Maintaining distance during this phase prevents unnecessary group damage and preserves healing resources.
When Containment Cell activates, immediate burst damage focus becomes essential to prevent the boss from executing the trapped party member.
Armed Security creates persistent ground hazards that require constant spatial awareness. These spinning blades remain active throughout the encounter, creating safe zone management challenges.
Impound Contraband introduces weapon management mechanics, temporarily disabling affected players until they retrieve their equipment. Strategic positioning near weapon drop locations minimizes downtime during this disruptive phase.
Rotary Body Armor demands continuous positional adjustment from damage dealers. The rotating shield mechanic requires the group to maintain constant movement around the boss perimeter.
The Menagerie encounter features three distinct combat phases against different Broker-engineered creatures. Beginning with the Devourer, this beast utilizes Grip of Hunger to pull the entire group inward, followed by a ground slam that devastates anyone within 20 yards. Immediate dispersal after the pull prevents catastrophic group damage.
Grand Consumption healing mechanics require precise AoE avoidance, while Gluttony debuff management becomes critical for phase transitions.
Transitioning to Akilight introduces Anima Orb management. These floating hazards inflict both immediate damage and stacking damage reduction debuffs, creating escalating combat difficulty if improperly managed.
Venting Protocol creates environmental complexity where players with Gluttony can transform dangerous orbs into beneficial damage buffs.
Venza Goldfuse concludes the encounter with Chains of Domination immobilization and Whirling Annihilation vortex mechanics. Coordinated chain breaking and controlled distancing ensure survival during this intense finale.
Mailroom Mayhem introduces complex damage distribution mechanics and timed environmental interactions. Money Order requires precise group stacking to share incoming damage effectively, preventing individual player fatalities.
Fan Mail demands proactive healing preparation as the boss unleashes sustained party-wide damage over five seconds. Healer cooldown management becomes essential during this sustained damage phase.
Purple swirl mechanics present strategic choices between accepting stacking damage-over-time debuffs or creating persistent ground hazards.
Unstable Goods bomb management requires coordinated team effort. Identifying active mail shoots and executing precise throws prevents catastrophic explosions while managing debuff stacks through timely dispels.
Successful bomb disposal requires spatial awareness and communication between players handling the explosives and those managing environmental hazards.
Gaining entry to Myza’s exclusive Oasis area requires completing a three-step trading sequence. The initial purchase from the Broker outside the establishment drops a trade-specific item that must be delivered to the appropriate vendor specialization.
Strategic item routing involves matching weapon items to arms dealers, textiles to cloth merchants, and precious gems to jewel traders.
Continuous mob spawning during the trading process demands efficient add control. Designating one player for trade completion while the remaining four focus on enemy elimination ensures smooth progression.
Password acquisition requires successful completion of all three trade cycles while maintaining control over the escalating enemy reinforcements.
Within Myza’s Oasis, the fourth boss occupies the central stage surrounded by five interactive instruments. Each musical device – drum kit, guitar, saxophone, trumpet, and microphone – functions similarly in collecting floor notes that provide stacking buffs.
The wave-based encounter begins with numerous adds that pose minimal threat except for the Oasis Security units.
Menacing Shout presents dual threats of direct damage and spellcasting interruption, requiring immediate counter-measures when cast by either adds or the main boss.
Crowd Control frontal deflection requires precise positioning behind the boss during activation. The five-second immunity period demands quick reaction times from all damage dealers to maintain optimal positioning.
Suppression Spark concludes the boss’s ability rotation with coordinated group spreading and controlled movement away from the central figure to avoid splash damage.
Soazmi introduces complex portal mechanics with circle, triangle, and square gateways that enable rapid positional changes. Understanding the teleportation network becomes essential for surviving the expanding energy waves that eventually cover the entire combat area.
The primary survival mechanic involves identifying portal pairs and utilizing them to bypass the deadly energy surges that inflict heavy damage-over-time effects.
Progressive room segmentation creates increasingly complex navigation challenges. The evolving battlefield partitions demand strategic portal chaining through multiple teleportation points to reach safe zones.
Double Technique interruption demands tight group coordination within confined quadrants. Maintaining proximity ensures successful double-cast stopping during critical phases.
Hylbrande demands precise tank positioning due to Shearing Swings frontal cleave and Titanic Crash stun mechanics. Proper boss facing away from the group prevents unnecessary damage to non-tank players.
Laser marking mechanics require careful kiting to room edges, preventing hazardous puddle placement in central combat areas.
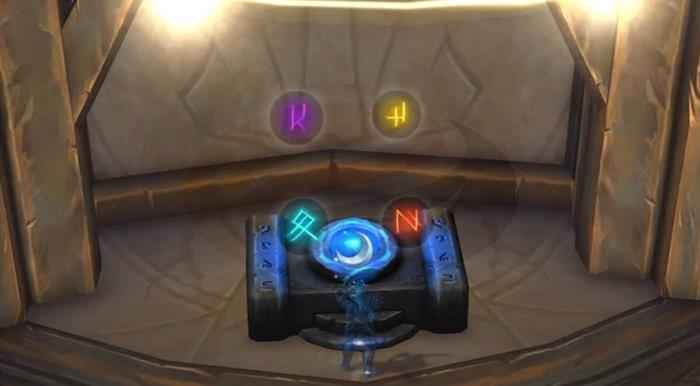
Sanitizing Cycle introduces the central console puzzle mechanic. The color-coded pattern displayed dictates orb placement in specific room quadrants – top left, top right, bottom right, and bottom left positions.
Vault Purifier adds present dual threats of boss damage reduction and console interaction blocking. Prioritizing add elimination before puzzle solving ensures uninterrupted phase progression.
The naval-themed encounter emphasizes environmental awareness with water hazards proving instantly fatal. Anchor shot chains require immediate counter-movement to prevent being dragged into lethal liquid areas.
Environmental swirl avoidance and fire patch management create constant movement requirements. The substantial health pools of ship-spawned adds necessitate strategic kiting and crowd control application.
Infinite Breath presents both threat and opportunity – while dangerous to the tank, it instantly eliminates any adds caught within its area of effect.
Hook Swipe tail mechanics introduce positional hazards, while Double Time acceleration demands enhanced kiting strategies and coordinated crowd control deployment.
So’leah’s initial phase features Hyperlight Spark chain lightning mechanics and Collapsing Star timed soaking requirements. The 25-second detonation timer creates urgent phase progression demands.
Phase transition at 40% health introduces relic mechanics that reduce boss damage intake by 99%. Breaking this damage reduction requires precise Hyperlight Jolt routing through all floating artifacts.
Hyperlight Nova creates expanding circles around each relic, while Energy Fragmentation unleashes projectile barrages from all active cosmic artifacts.
Relic management becomes the central focus of phase two, with proper Jolt routing essential for making the boss vulnerable again.

Strategic positioning according to arrow indicators ensures successful Jolt propagation through the required relic network.
Action Checklist
- Complete Oribos quest chain to unlock permanent Veiled Market access
- Assign specific roles for each boss mechanic before engaging encounters
- Practice portal navigation and energy wave dodging for Soazmi encounter
- Coordinate trading sequence for Myza’s Oasis password acquisition
- Master console color puzzle mechanics for Hylbrande phase interruption
No reproduction without permission:GameCDjnh » WoW Shadowlands 9.1 Tazavesh Megadungeon -All Bosses Guide Complete Tazavesh Megadungeon boss guide with strategies, mechanics, and optimization tips for WoW Shadowlands