TL;DR
- The Countess guarantees rune drops with specific difficulty-based tier limitations
- The Pit’s level 85 designation enables any item in the game to potentially drop
- Fire immunity on higher difficulties requires strategic damage type planning
- Optimal farming routes can reduce completion time by 30-40%
- Proper character builds and equipment dramatically impact farming efficiency
Diablo 2 Resurrected presents players with an expansive world filled with exploration opportunities and loot acquisition challenges. While numerous items and crafting materials exist throughout Sanctuary, the most valuable resources demand targeted farming in specific high-yield locations. Strategic farming involves systematically eliminating monsters and opening containers to acquire specific gear components and enhancement materials. This practice enables significant character progression through equipment upgrades, skill optimization, build refinement, and player economy participation. Our comprehensive analysis focuses on two premier farming destinations that deliver exceptional returns for time investment.
The Countess represents a corrupted noble entity inhabiting the fifth tier of the Forgotten Tower within Black Marsh territory. This former aristocrat succumbed to demonic influence, mastering forbidden arcane arts that now serve darker purposes. Her primary distinction lies in consistent rune drops—socketable artifacts that empower equipment and abilities. These runic components can be systematically arranged to form D2R Runewords, creating extraordinary item combinations with unique attribute bonuses.
This unique monster stands as the game’s most reliable rune source, providing at minimum one guaranteed rune per successful encounter. Her drop tables span from El to Ist tier in Normal mode, extend to Lo runes in Nightmare, and reach Zod level potential in Hell difficulty. Escalating challenge levels correlate directly with improved high-tier rune acquisition probabilities. However, strategic awareness is crucial as she develops complete fire immunity in advanced difficulty settings, necessitating alternative damage approaches.
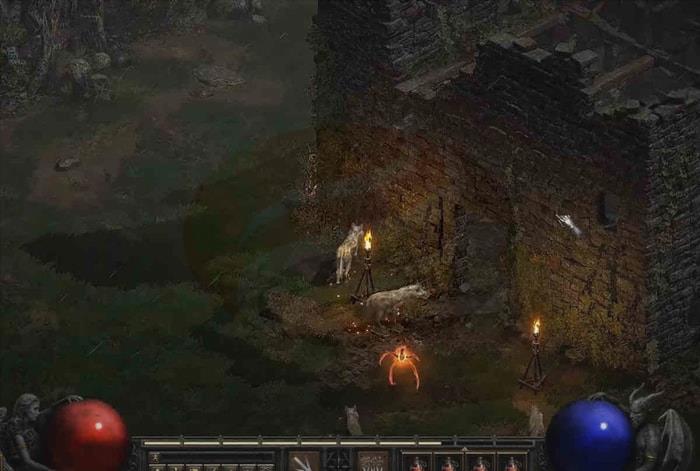
Accessing the Countess efficiently involves utilizing the Black Marsh waypoint followed by entry into the Forgotten Tower complex. This multi-level structure features five procedurally generated floors with varying enemy compositions and layout configurations. The target consistently resides on the final level within a chamber containing both a super chest and distinctive fireplace feature. Super chests represent specialized containers with significantly elevated rare and unique item drop rates. The fireplace conceals a hidden passage leading to a secondary chamber housing another super chest alongside a golden chest—this special container provides enhanced set and unique item acquisition chances.
This location excels for rune acquisition and supplementary item farming. Players can systematically defeat the Countess, plunder available chests, exit the game session, and restart to repeat the cycle. Strategic caution remains essential due to environmental hazards and hostile entities throughout the tower that threaten character survival.
The Pit dungeon system occupies territory within Tamoe Highland, accessible via the Outer Cloister waypoint network. Originally serving as rogue training grounds, this facility now suffers demonic infestation and monstrous occupation. Its exceptional characteristic lies in maintaining area level 85 status, meaning every game item possesses potential drop eligibility regardless of selected difficulty setting. Additionally, this location features exceptionally dense enemy populations, substantially increasing loot acquisition opportunities through sheer encounter volume.
Reaching The Pit efficiently requires Outer Cloister waypoint utilization followed by traversal to Tamoe Highland. This two-level dungeon exhibits randomized layouts and enemy distributions throughout both tiers. Hostile inhabitants include diverse monster types: fallen warriors, carver shamans, devilkin brutes, dark archers, stalker assassins, rogue spellcasters, and ranger marksmen. The environment also contains multiple super chest variants alongside standard treasure containers, all providing item and currency drop potential.
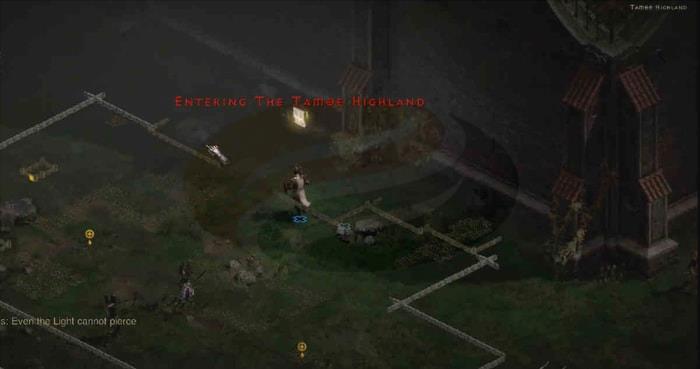
This area delivers exceptional returns for equipment farming, experience accumulation, and D2R gold acquisition. Players can systematically clear both levels, loot all available containers, then exit and restart games to repeat the process. Strategic preparation should account for variable enemy immunities and resistance profiles that fluctuate based on difficulty settings and creature types. Advanced preparation remains essential given the substantial challenge level and aggressive enemy behaviors encountered throughout The Pit.
Understanding the distinct advantages of each farming location enables optimized resource allocation. The Countess specializes in rune acquisition with guaranteed drops, while The Pit offers comprehensive endgame item potential. Advanced players should consider character specialization—certain builds achieve dramatically better results in specific farming environments.
Strategic Optimization Tips: Teleportation skills reduce Countess run times by approximately 40%. For The Pit, area clearing efficiency improves significantly with area-of-effect abilities and movement speed enhancements. Common mistakes include neglecting resistance preparations and underestimating enemy density in confined spaces.
For players seeking broader strategic context, our Complete Guide provides foundational gaming principles. Equipment optimization parallels weapon selection strategies detailed in our Weapons Unlock methodology, while character build considerations align with Class Guide specialization approaches.
Time investment varies significantly: Countess runs typically complete in 2-3 minutes, while thorough Pit clears may require 5-7 minutes depending on character power and layout complexity.
Action Checklist
- Assess current character capabilities against location-specific requirements
- Prepare alternative damage sources for Countess fire immunity encounters
- Establish efficient routing patterns for each farming location
- Implement quick exit and restart protocols to maximize farming cycles
- Monitor drop patterns and adjust farming strategies based on acquisition rates
No reproduction without permission:GameCDjnh » Two of the Best Areas for Farming in Diablo 2 Resurrected Master efficient farming strategies in Diablo 2 Resurrected with expert Countess and Pit optimization techniques