TL;DR
- Complete all yellow quests and Benjamin’s blue quest in Rocco Town to unlock access
- Focus on blue crystal destruction in area 2 to prevent endless enemy spawns
- Use specific portal sequence: left first, second left, then fourth left
- Coordinate simultaneous hallway entry in area 6 to avoid flame traps
- Boss fight emphasizes positioning over complex mechanics – avoid floor flames
Welcome to this comprehensive Soul Worker Dungeon Guide focusing on the challenging Last Carnival raid. This guide builds upon community knowledge while adding substantial strategic depth and practical execution tips. The dungeon features six distinct combat zones culminating in a final boss encounter that tests both individual skill and team coordination.

How to Access Last Carnival
Last Carnival represents Soul Worker’s introductory casual raid dungeon, positioned in the eastern sector of Rocco Town. Access requires completing all primary storyline quests (marked yellow) before accepting the blue quest chain from NPC Benjamin. This questline serves as the mandatory gateway to unlock the dungeon portal. Many players underestimate the quest prerequisite importance – attempting to enter without proper completion will leave the portal inactive regardless of level requirements.
Dungeon Rewards Breakdown
Last Carnival follows the standard casual raid reward structure while offering several exclusive items:
– BP (Booker Points): Essential currency for endgame progression and vendor purchases
– Raid Gear Blueprints: Critical schematics for crafting powerful endgame equipment
– Elemental Shards: Enhancement materials for weapon and armor elemental attributes
– Raid Accessories: Stat-boosting items with unique set bonuses
– Golden Citadel Tickets: Required entry items for the next tier raid content
– Tritanium/Irregular Stones/Common Materials: Standard upgrade components for various crafting systems
First Area Strategy
Begin by positioning your team near the exit portal, systematically grouping enemy mobs in this location. This tactical positioning addresses the notorious small puppet miniboss behavior – this particular enemy refuses to follow players toward room center, often resulting in all standard enemies defeated while the miniboss remains at nearly full health. By concentrating combat near the portal, you ensure the miniboss remains engaged and can be efficiently eliminated alongside the remaining enemies.
Second Area: Crystal Control
This chamber requires strategic team division into three coordinated squads. Assign one team to right flank, another to left flank, and the third advances directly forward. Each squad must prioritize destroying their designated Blue Crystal immediately to prevent continuous enemy reinforcements. After crystal elimination, focus on clearing remaining mobs. Optimal strategy involves grouping enemies toward room center, provided movement time remains efficient. The Red Crystal becomes vulnerable only after complete enemy clearance.
Third Area: Portal Initiation
Upon entering the lobby featuring five distinct portals, immediately proceed through the leftmost portal. Your primary objective is eliminating the miniboss before it generates additional trash mobs. Successfully defeating this boss automatically clears all remaining enemies in the area.
Fourth Area: Timed Assault
Enter the second portal from the left. This timed challenge requires clearing three successive enemy waves before the countdown expires. Failure to eliminate all enemies triggers a massive area explosion dealing significant damage. Advanced tactic: Position Junk Knight summons in corners to maximize area coverage and ensure complete room clearance.
Pro tip: Deploy area-of-effect abilities immediately upon wave spawn to maintain timer efficiency.
Fifth Area: Environmental Awareness
Enter the fourth portal from the left. This chamber operates on fixed spawn timers – rushing won’t accelerate enemy appearance. Critical awareness: Continuously monitor floor patterns to avoid flame traps that inflict burning damage over time.
Sixth Area: Coordinated Movement
This zone demands exceptional team coordination across three interconnected hallways separated by small chambers. Avoid engaging enemies in hallways – focus purely on navigation. Skillfully dodge through flame patterns in first and second corridors to minimize damage taken. Crucially, do not proceed into the third hallway prematurely.
The entire team must gather in the chamber preceding the final hallway, then execute simultaneous entry. The flame activation triggers precisely three seconds after any player crosses the third hallway threshold. These flames require jumping maneuvers rather than standard dodging. If flames activate before full team passage, surviving becomes impossible. Establish clear communication signals – effective examples include Erwin’s buff animation or the party leader’s jump command as synchronization triggers.
Boss Encounter
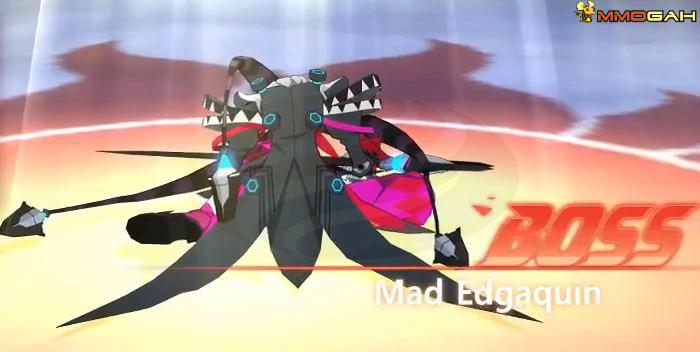
The final boss employs relatively straightforward attack patterns that players can quickly learn and evade. The primary threat emerges from progressive floor flame patterns throughout the battle. Maintain constant environmental awareness and reposition immediately when flames appear – sustained positioning in these areas guarantees rapid health depletion.
Success in Last Carnival heavily depends on coordinated team execution rather than individual player skill. Establish role assignments before entering – designate crystal destroyers, mob controllers, and support specialists. Voice communication dramatically improves synchronization success rates, particularly during the critical sixth area hallway sequence.
Common coordination failure points include: premature hallway entry causing team wipes, inefficient crystal targeting allowing endless spawns, and poor environmental awareness during boss encounters. Advanced groups complete the entire dungeon in approximately 15-20 minutes with proper execution.
For players seeking to enhance their Soul Worker gameplay further, our Class Selection Guide provides detailed character optimization strategies.
Action Checklist
- Complete all yellow quests and Benjamin’s blue quest in Rocco Town
- Group enemies near exit portal in first area to control miniboss
- Divide team into three squads for simultaneous crystal destruction
- Execute portal sequence: left first, second left, then fourth left
- Coordinate simultaneous third hallway entry with established signals
- Maintain flame awareness during boss fight with constant repositioning
No reproduction without permission:GameCDjnh » Soul Worker Dungeon Guide: Last Carnival Master Soul Worker's Last Carnival dungeon with expert strategies, loot breakdowns, and team coordination tips