Complete guide to finding the pharmacy location and documenting all required items for the Life of a Pharmacist quest
Quest Overview and Starting Location
The Life of a Pharmacist mission in ARC Raiders becomes available through Lance, one of the game’s key NPC quest givers. This documentation-focused assignment requires you to venture into the dangerous Buried City district and locate the Arbusto Farmacia establishment. Your primary objective involves investigating specific items within the pharmacy to learn about its former owner’s life and interests.
Before embarking on this mission, ensure your loadout is properly configured for urban combat scenarios. The Buried City often contains hostile ARC units that may interfere with your documentation work.
Essential reading: How to complete ARC Raiders Off The Radar quest (Field Depot location)
To begin the mission properly, deploy specifically to the Buried City landing zone rather than adjacent areas. The Arbusto Farmacia sits adjacent to Piazza Arbusto, positioned toward the southeastern quadrant of this central plaza. Navigation becomes significantly easier if you approach from the main thoroughfare rather than attempting back-alley routes.
Accessing the Pharmacy Interior
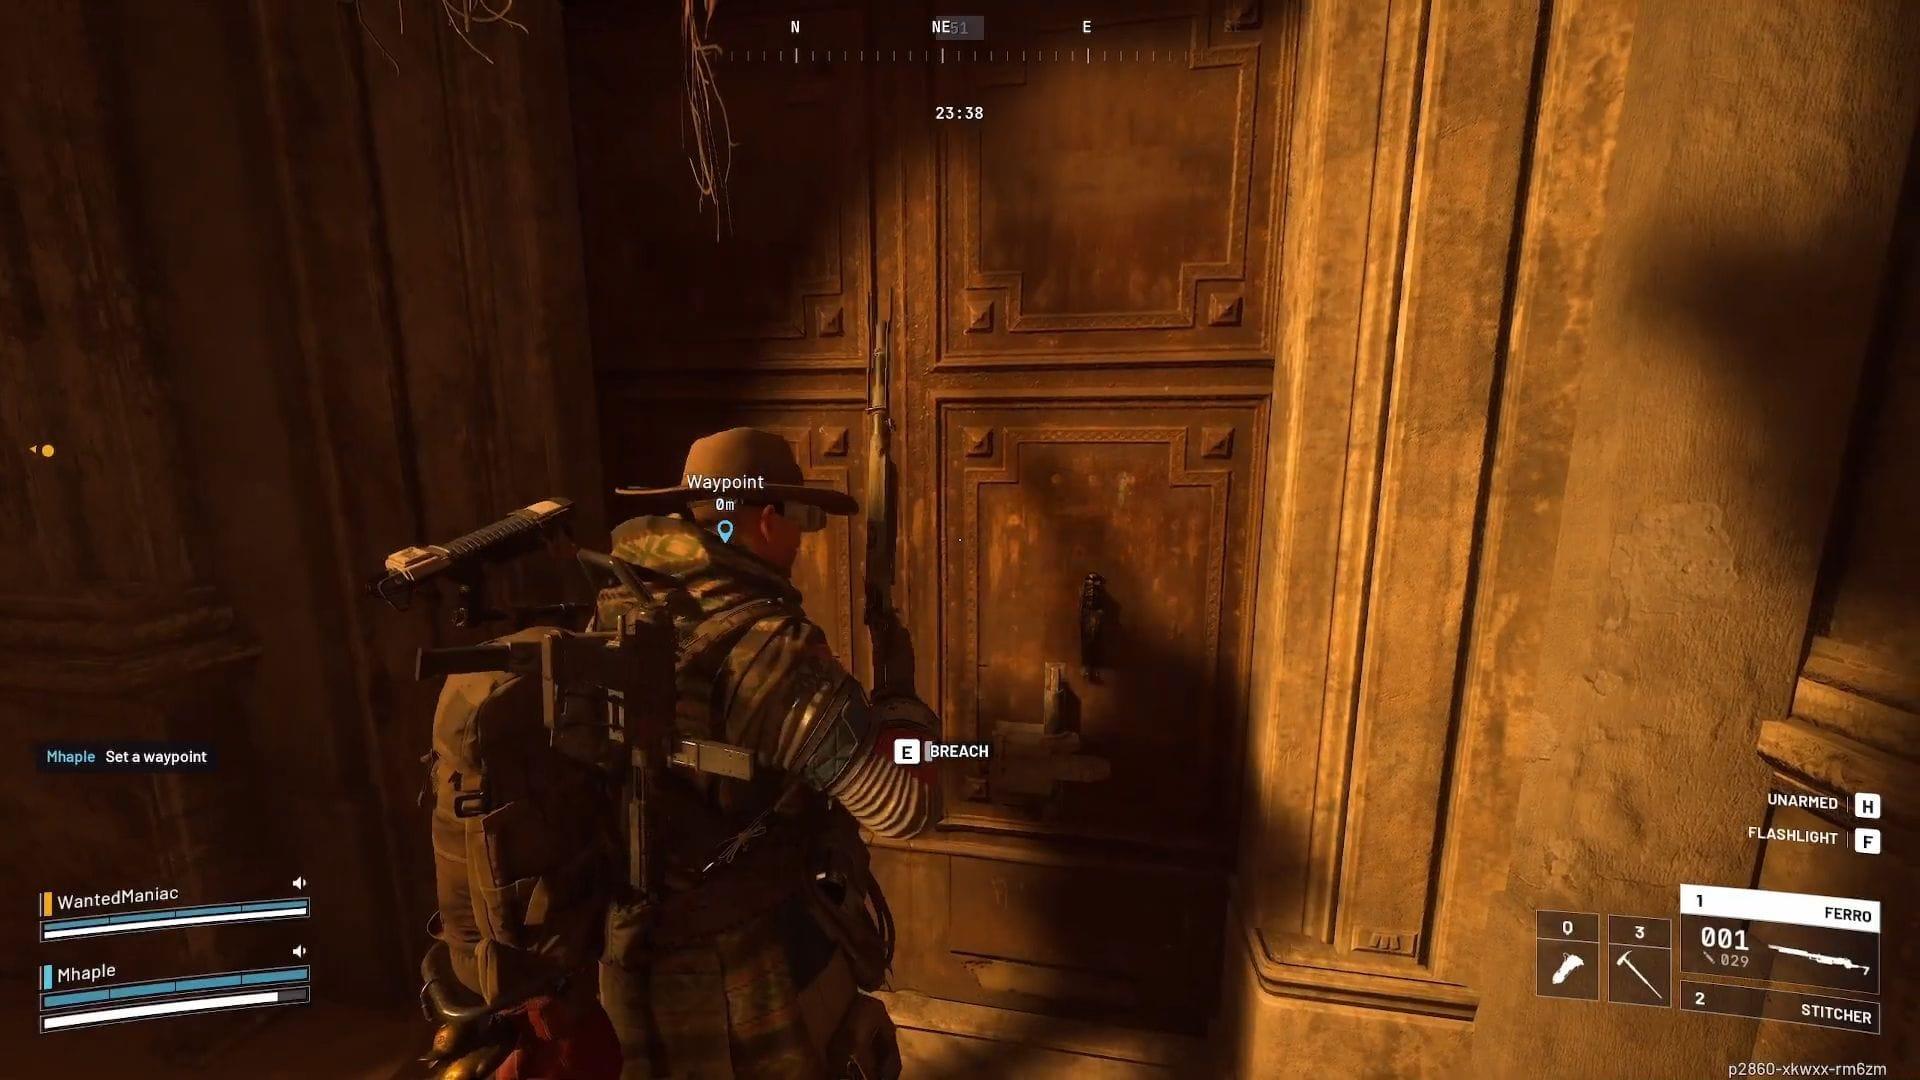
Upon reaching the pharmacy’s exterior, you’ll encounter a substantial locked wooden barrier blocking entrance. This door requires breaching using your character’s standard interaction mechanics. Position yourself directly facing the door and hold the interact key/button until the breach sequence completes.
Further guidance: How to complete Major’s Footlockers quest in ARC Raiders
Once inside the pharmacy’s ground floor, immediately turn left and then execute a right turn to locate the stairwell access point. The staircase leads directly to the first floor where all documentation targets are situated. Be cautious during this transition as narrow spaces can limit combat mobility if surprised by enemies.
Advanced players recommend clearing the ground floor thoroughly before ascending, as respawning ARC units sometimes patrol these interior spaces. This precaution prevents unwanted interruptions during the documentation process.
Documentation Objectives Walkthrough
Documenting the pharmacist’s family history
Immediately after emerging from the stairwell onto the first floor, enter the first room on your right. Here you’ll discover a framed portrait mounted on the wall depicting the pharmacist’s family members. Approach and interact with this artwork to document the family history objective.
Comprehensive reference: All quests in Arc Raiders (Objectives, rewards, and more explained)
Documenting the pharmacist’s personal hobby
Proceed to the adjacent chamber connected to the portrait room. Look for a vintage set of drawers with a potted plant positioned atop the furniture. The plant represents the pharmacist’s botanical interests – interact with it to complete this documentation requirement.
Documenting the pharmacist’s culinary taste
Within the same room containing the plant, navigate to the opposite end to locate a formal dining table setup. This furniture piece reveals insights into the pharmacist’s dining preferences and lifestyle. Document it using your standard interaction command.
Documenting the pharmacist’s musical skill
Return to the initial room containing the family portrait. Against one wall stands an upright piano that demonstrates the pharmacist’s musical abilities. Approach this instrument and initiate the interaction sequence to finalize the skill documentation objective.
The documentation order is flexible, but following this sequence creates the most efficient path through the space, minimizing backtracking and exposure time.
Advanced Tips and Common Mistakes
For optimal completion time, memorize the documentation route: family portrait → plant → dining table → piano. This sequence follows a natural circular path through the first floor layout. Beginners often waste time revisiting rooms unnecessarily by documenting in random order.
Common errors include failing to properly breach the main entrance door (ensure you hold the interaction key long enough) and neglecting to check for enemies between documentation points. The pharmacy interior occasionally spawns patrols that can interrupt your progress if not neutralized first.
Seasoned players recommend bringing equipment that enhances mobility and quick escapes, such as grapple hooks or movement abilities, since the confined spaces can become death traps if overwhelmed by ARC forces. Complete the documentation swiftly but methodically to minimize combat risks.
Mission completion triggers automatically after documenting the fourth item, immediately granting your reward without requiring extraction. This makes the Life of a Pharmacist one of the more straightforward documentation quests in ARC Raiders once you master the location and sequence.
No reproduction without permission:GameCDjnh » How to complete Life of a Pharmacist quest in ARC Raiders Complete guide to finding the pharmacy location and documenting all required items for the Life of a Pharmacist quest